This article was co-authored by Lauren Kurtz. Lauren Kurtz is a Naturalist and Horticultural Specialist. Lauren has worked for Aurora, Colorado managing the Water-Wise Garden at Aurora Municipal Center for the Water Conservation Department. She earned a BA in Environmental and Sustainability Studies from Western Michigan University in 2014.
wikiHow marks an article as reader-approved once it receives enough positive feedback. In this case, several readers have written to tell us that this article was helpful to them, earning it our reader-approved status.
This article has been viewed 258,176 times.
Chrysanthemums are a very hardy flower that don’t need a lot of tending to bloom and make your yard look beautiful! Make sure you plant your mums in an area with full sun and good air circulation. You can plant mums in your garden, but they also make a great addition to a collection of potted plants. Caring for your mums after you’ve planted them is important. If you take care of your mums, they’ll be a beautiful addition to your garden!
Steps
Planning Your Planting
-
1Choose garden mums for a hardy flower. Hardy mums can last for several years if you plant them at the correct time of year and care for them properly. They’ll put down deep roots that help them survive the winter and come back the following year and flower again. [1]
-
2Choose florist mums for a greater variety. Florist mums are less hardy than garden mums, and they are usually potted or planted in a garden bed with the intention of removing them once their blossoms are gone. They come in an amazing variety of colors and shapes, but unfortunately they won't live over the winter, no matter how well you take care of them. Florist mums include the following varieties: [2]
- Pompom mums, one of the most common varieties, which are shaped like little balls.
- Anemone mums, which have either one or two rows of petals around a center.
- Daisy mums, which have a row of petals around a center, like daisies do.
- Spider mums, which are less common, have long, droopy petals.
Advertisement -
3Pick an area in full sun. Mums will bloom pretty much anywhere, but they do best in an area in full sunlight. This means the area where you plant your mums should get 5 to 6 hours of direct sun per day.[3]
- Mums bloom based on the changes in sunlight as nights get longer and days get shorter, so try to avoid planting them near artificial light sources like street lights.
-
4Choose an area with good air circulation. Mums are actually pretty adverse to wet conditions, so choose an area to plant them that has good air circulation and is generally dry. This usually means a higher area of your yard.


Planting Mums in Soil
-
1Plant in the early spring. This should be after the threat of freezing is over but before the weather gets too warm. Your mum plant’s roots, or the seeds, if you're planting from seed, should have at least 6 weeks to establish themselves before either very cold or very hot weather. [4]
-
2Dig a hole. The size of hole will depend on whether you’re planting plants or seeds. If you’re planting a mum plant, the hole should be at least twice as big as the rootball of the plant. If you’re planting seeds, you'll need a few holes about the size of a pencil, which you can easily make with your fingers.[5]
- If you're transplanting mums from a plastic pot to the soil, the hole you dig should be the same depth as the pot they came in. So if the pot is six inches tall, plant your mums in a hole six inches deep.
- Space the holes about 18 to 24 inches (45 to 50 cm) apart to make sure the flowers have room to grow without getting tangled up. The number of holes you need will depend on how many plants or packets of seeds you buy, and how much space you have. You'll be placing 5 to 6 seeds per hole.
-
3Add compost or peat to the hole. This aerates the soil a little bit and makes it easier for the roots of your mums to breathe. You should add compost or peat to your hole whether you're transplanting plants or planting seeds. Add enough so that the bottom of each hole is covered to a depth of about 1 inch (2.5 cm).
-
4Place the mums in the ground. If you're transplanting a plant, gently remove it from its container by flipping the container over and gently tapping the bottom until the plant slides out. Place the plant carefully in the hole - make sure it's not tilted to one side or the other. If you're planting seeds, sprinkle five or six seeds into the hole. Once the plants or seeds are in the hole, fill it the rest of the way with soil and pat it down with your hand.
- If you're planting mums from seed in the spring, you can expect them to flower in the early to mid fall.


Planting a Mum Plant in a Pot
-
1Plant your mums in late spring. Whether you're planting a mum plant or growing the plants from seeds, you should begin the process in the late spring if you plan on keeping the mums outside. This is true even if you're planning on growing the mums in the house and transplanting them later, since the plants have to have enough root material to survive the winter.
- You can transplant your container-grown mums in the early fall.
-
2Place soil in a new pot. You will need to get a pot for your mum and some potting soil to fill your pot. Look for a potting soil mix that is appropriate for flowers.
- If you're planting a mum plant, the pot should be twice as big as the rootball. Add enough soil to make a layer about 1 inch (2.5 cm) deep in the bottom of the pot. If you use any more than that, the plant will sit on top of the soil and be taller than the pot. Any less and there won’t be anything for the plant’s roots to attach to.[6]
- If you're planting mum seeds, you can choose the size of your pot - the mums will grow to fill the container. Fill the container with soil to about three inches below the top of the pot.
-
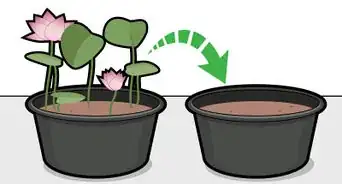
3Remove the mum from its plastic container. Don’t pull your mum out of the container by the stems. Instead, place your hand over the top of the plant, with the stems between your index finger and thumb, and flip the plant upside down. Then gently tap the bottom of the container until the plant falls out.[7]
-
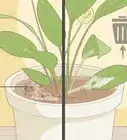
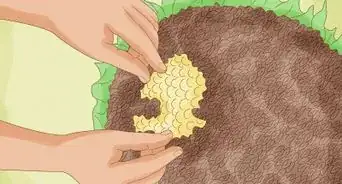
4Break up the root ball. The roots on the bottom of the plant will probably be growing in a circular direction. If you leave them this way, they'll eventually choke each other and your plant will die. Break up those roots by running your hand gently down the side of the rootball and loosening up the roots and dirt.
-
5Place the mum in the pot and fill with soil. Once you’ve filled the pot with soil to the edge, gently tap the container on the table to even out the soil. If you're planting mum seeds in a pot, place 2 to 3 seeds for every 4 inches (9 cm) of diameter.[8]
-
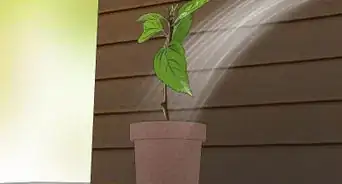
6Leave the mum in an area with plenty of sun. This can be in a very sunny window, or on your front porch if it gets a lot of sun.[9]


Caring for Your Mums
-
1Keep the soil moist. You should check the soil for its moisture level every day if the weather is still relatively warm (up to 80 degrees Fahrenheit/27 degrees Celsius during the day) and every other day when it’s cool. It should feel moist and cool to the touch, but not soaking wet. If your soil is dry, it needs water! This is true whether your mums are planted in the ground or in a pot.[10]
- If your plants or soil get really dry, make a few small holes in the soil with a pencil and then fill them with water or soak the pot in a bucket of water until the soil is saturated.
-
2Fertilize the mums. If you planted mums in the spring, they should be fertilized once a month until they bloom in the fall. You don't have to worry about fertilizing florist mums planted in the fall - they're hearty enough to survive without fertilizer.[11]
- You should use a 5-10-10 fertilizer for mums. The 5-10-10 ratio refers to the amount of nitrogen, phosphorus, and potassium in the fertilizer, and 5-10-10 ration means there should be twice as much phosphorus and potassium as nitrogen in the fertilizer. All fertilizer brands will show on their labels what the ratio is.
-
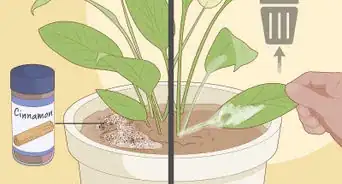
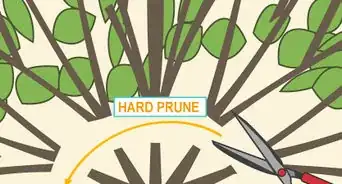
3Pinch back the plants before they bloom. This just means pinching off the top of the mum plant while it’s still green and growing. You should pinch the top ½ inch (1 cm) or so off when the plants are 6 inches (15 cm) and 12 inches (30 cm) tall. It actually encourages more blooms when the plants finally flower in the fall.[12]
- If you want to get a more precise edge when you're taking off the top of the mum, you can use garden shears to cut the plants back.
-
4Remove dead blooms. Once your mums bloom, you’ll find that some blooms fade quicker than others. Remove them by gently pinching the bloom at the base of the stem and pulling it off. This encourages the plant to grow more blooms and keeps your plant looking fresh.[13]


Expert Q&A
Did you know you can get expert answers for this article?
Unlock expert answers by supporting wikiHow
-
QuestionWhen can you plant mums in the ground?
 Maggie MoranMaggie Moran is a Professional Gardener in Pennsylvania.
Home & Garden SpecialistIt's best to plan mums in late August or early September, in the U.S., as they are a fall-blooming plant.
Support wikiHow by unlocking this expert answer.
-
QuestionDo mums like full sun or shade?Maggie MoranMaggie Moran is a Professional Gardener in Pennsylvania.
Home & Garden SpecialistMums thrive in full sun. About 3 hours of direct sunlight is the minimum amount they need per day.Support wikiHow by unlocking this expert answer.
-
QuestionAre mums annual or perennial flowers?Maggie MoranMaggie Moran is a Professional Gardener in Pennsylvania.
Home & Garden SpecialistMums are seen as a tender perennial, as it depends on what time of year they were originally planted.Support wikiHow by unlocking this expert answer.
Things You'll Need
- Chrysanthemums
- Potting Soil
- Compost
- Small garden shovel
- Water


References
- ↑ https://www.todayshomeowner.com/growing-chrysanthemums-in-your-garden/
- ↑ https://www.todayshomeowner.com/growing-chrysanthemums-in-your-garden/
- ↑ https://www.todayshomeowner.com/growing-chrysanthemums-in-your-garden/
- ↑ https://www.todayshomeowner.com/growing-chrysanthemums-in-your-garden/
- ↑ https://www.todayshomeowner.com/growing-chrysanthemums-in-your-garden/
- ↑ http://www.bhg.com/gardening/flowers/perennials/all-about-mums/
- ↑ http://www.finegardening.com/how-repot-container-plants
- ↑ http://www.bhg.com/gardening/flowers/perennials/all-about-mums/
- ↑ http://www.bhg.com/gardening/flowers/perennials/all-about-mums/
- ↑ http://www.southernliving.com/home-garden/gardens/beginners-guide-growing-mums/buying-mums
- ↑ http://www.bhg.com/gardening/flowers/perennials/all-about-mums/
- ↑ https://www.todayshomeowner.com/growing-chrysanthemums-in-your-garden/
- ↑ http://www.southernliving.com/home-garden/gardens/beginners-guide-growing-mums/buying-mums
About This Article

To plant mums in your garden, select an area that gets at least 5 hours of direct sunlight per day. Make sure the area has good air circulation to ensure that the stems dry quickly even in wet weather. In early spring, dig a hole large enough to fit the root ball of the plant, or about the size of a pencil if you’re planting seeds. Then add about 1 inch of compost to the hole before planting the mums or the seeds. Keep the soil moist to the touch, and fertilize them once per month with 5-10-10 fertilizer until they bloom in the fall! For more tips from our Horticulturist reviewer, including how to plant a mum plant in a pot, read on!