This article was co-authored by Michelle Driscoll, MPH. Michelle Driscoll is the Owner of Mulberry Maids, which is based in Fort Collins, Colorado. With five years of experience, her business specializes in cleaning homes and small offices. She holds a Masters in Public Health from the Colorado School of Public Health. Additionally, Mulberry Maids has an A+ rating from the Better Business Bureau.
This article has been viewed 25,479 times.
Whether you’re after a just-buffed matte appearance or a high gloss shine, all poured concrete countertops benefit from a thorough polishing before they’re put to use. With an electric wet concrete polisher and a series of coarse- to fine-grit diamond polishing pads, paired with a healthy dose of patience and elbow grease, you’ll be able to achieve a beautiful finish on your countertop. Not only will polishing remove bumps and rough edges, but it can expose some of the attractive aggregates within the concrete mix, resulting in a one-of-a-kind piece.[1]
Steps
Cleaning and Patching Holes
-
1Protect your workspace with drop cloths and plastic. Wet polishing concrete can be an extremely messy process. Cover your floors with drop cloths to prevent splashes and stains. Consider covering your walls with plastic as well.[2]
-
2Fill small holes in the concrete with a patching mixture. If your concrete countertop has any small holes or minor flaws, you can fill in the holes with homemade or store-bought patching mixture before beginning the polishing process.[3]Advertisement
-
3Allow the concrete to fully cure for at least 10 days before polishing. Don’t attempt to polish your countertop until the concrete and any subsequent patches are fully cured. For best results, the concrete should have been cured for no fewer than 10 days and no more than 30 days.[4]
-
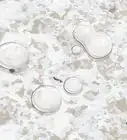
4Wash off the concrete surface with water and a squeegee. Pour water over the top and edges of the fully-cured concrete countertop. Then run a squeegee over the entire piece to remove any debris from the surface of the concrete.[5]
- Any leftover debris might dig into the concrete and leave deep scratches once you start polishing it, so make sure to remove all residue during this process.


Honing the Surface with a Coarse Grit Pad
-
1Put on an apron, safety goggles, and earplugs before working. Protect your clothing from the mess of concrete slurry with an apron or jumpsuit. Your eyes should be covered with safety goggles, and you can use earplugs or construction earmuffs to protect your ears from the harsh sounds of the grinding tool.[6]
- Be sure any loose apron ties are tucked away. Similarly, tie back long hair away from your face and make sure it won’t dangle in front of your shoulders.
-
2Connect a handheld wet concrete polisher to a water source. You’ll be using a handheld wet concrete polisher with variable speed settings and ground-fault circuit interrupter (GFCI) shut off capabilities. The polisher you’re using might have a built-in water hose, or it might have a receiving tube that you can twist a garden hose onto. Either way, hook up the hose from your water source to the tool securely.
- The tool should release water consistently as you grind the surface of the concrete. This will take care of all the concrete dust that would typically form without a stream of water preventing it. It also cools down the grinding pads which will heat up quickly from the friction.
- Variable speed settings aren’t totally necessary to achieve a smooth finish but will give you more control over your progress.[7]
-
3Attach the coarsest grit diamond grinding pad to the polisher. You’ll be using a compatible set of diamond grinding pads ranging from coarse (about 50 grit) to very fine (up to 3,000 grit). Many tools and grinding pads come with compatible hook-and-loop attachments, making it easy to switch from one pad to another. Place the coarsest pad (50 grit) on the polisher and attach it securely.[8]
- Make sure the tool and grinding pads you’ve chosen are specifically designed for use on concrete. Stone polishers and pads intended for use on materials like granite won’t hold up to this project.
-
4Hold the tool level and apply even pressure to the concrete surface. Starting with the largest horizontal surface of the countertop, position the grinding pad in contact with the concrete and start up the tool. Work your way around the surface in fanned or linear strokes at a moderate pace.
- The polishing tool shouldn’t be held on an angle, and you won’t need to push down on it very hard. If you do, you’ll cause it to dig into the surface and the concrete will be left with undesirable divots, swirl marks, and an uneven finish.[9]
-
5Buff out bumps to achieve an even surface texture with the first pass. With your 50-grit grinding pad, you’ll be able to get the entire concrete surface to the same texture. It will certainly be rough to the touch, but the important thing is that it’s even. Go over the surface as many times as you need to grind down any remaining lumps in the concrete.[10]
- You should end up with a totally flat surface.
-
6Attach a protective skirt to the tool and polish the vertical surfaces. Clip on a protective skirt around the 50 grit polishing pad so that when you hold the tool vertically, the water that’s streaming out and catching all the concrete dust doesn’t spray all over the floor and ceiling of your workspace. Once the skirt is attached, polish the edges and corners the same way you polished the countertop’s horizontal surface.[11]
- Whichever grit you’re using, complete a full pass over the horizontal surface and vertical surfaces before switching out to the next finer grit pad. This will save you time in the long run and will ensure that the texture is consistent across all sides of the countertop.


Using Finer Grits to Create a Sheen
-
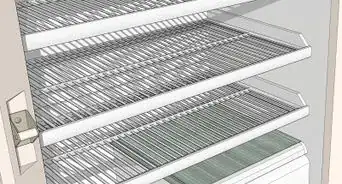
1Switch to the next level grit and go over the entire surface again. If you started with a 50-grit pad, step down to a 100-grit pad, which is designed to buff out the texture created by the 50-grit pad. Follow the same process of applying even pressure and working at a moderate speed until the horizontal and vertical surfaces possess a consistent texture.
-
2Rinse and squeegee the countertop occasionally between passes. As you polish the concrete, some debris and slurry may be leftover. Rinse off every surface and press off any bits of debris. Use these intermittent pauses as an opportunity to examine your handiwork and see how close you’re getting to the desired finish.[12]
-
3Use handheld diamond grinding blocks to polish hard-to-reach areas. As with the electric concrete polisher, you’ll start with the coarsest block (around 120 grit) and work your way up to the finest grit (around 1,500 grit). Make sure you get any difficult corners and smooth out the edges running around the perimeter of the countertop.[13]
- You should use handheld blocks in the same sequence of grit levels as those you used with the electric polishing tool. If you skip any grit levels you won’t achieve the same finish.[14]
-
4Progress from the coarse-grit pads to the medium-grit pads. If you’ve already used a 50-grit and 100-grit pad, you’ll use a 200-grit pad for the next pass, followed by a 400-grit pad. Whatever you do, don’t skip any grit levels! You’ll need to slowly progress from coarse to medium to fine since polishing pads are designed to smooth out the surface created by the previous grit.
- For example, a fine 3,000 grit pad won’t give you a nice looking finish if you most recently used a 200 grit pad. Stick with the progression and you’ll see beautiful results![15]
-
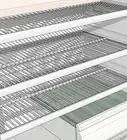
5Use medium-fine grits to create a smooth surface. When you’re done with the 400-grit pad, switch to an 800-grit pad. Repeat the process of polishing all surfaces of the countertop. You’ll start to see a smooth finish develop as you work your way through these medium-fine grit pads.[16]
-
6Use the finest grits to achieve a shiny finish. After the 800-grit pad, you can stop with a 1,500-grit pad which will provide a smooth-to-the-touch surface and a subtle sheen. For an extra shiny finish, complete the final pass with a 3,000 grit pad.[17]


Treating and Sealing the Concrete
-
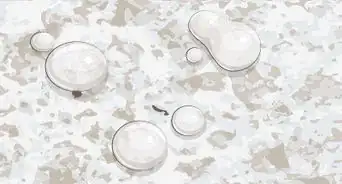
1Give the countertop a final rinse with water. When you’ve achieved the desired finish, rinse and squeegee off the countertop one last time. Make sure you haven’t missed any spots and that all surfaces have a smooth and even finish. Allow the concrete to air dry completely.
-
2Treat the concrete with any paint or acid stains if desired. You should apply any paint or acid stain treatments at this stage – after you’ve polished the concrete and given it a final rinse and dry, but before you seal it.
-
3Apply 1 coat of concrete sealer to the surface with a rag. Purchase a penetrative concrete sealer that’s designed for countertops rather than floors. It should be waterproof, low-odor, and food-safe. Saturate a clean rag with the product and wipe on 1 complete layer of sealer to the concrete. Make sure to coat all nooks, crannies, and corners of the countertop.[18]
- You can choose from the variety of gloss levels available, from high gloss to a matte finish.[19]
-
4Let the sealer fully cure before enjoying your new countertop. Allow the surface to dry completely. Depending on the sealing product you’ve used, it may take a few days or a few weeks to cure. Then you’ll be able to use and maintaining your new concrete countertop!
- Although sealing won’t prevent all scratches, spots, stains, and other flaws from occurring with regular use, it is an important step in preventing the growth of bacteria within your concrete.[20]


Things You’ll Need
- Handheld electric wet concrete polisher with a protective skirt
- Coarse to fine diamond grinding pads
- Water source
- Squeegee
- Safety goggles
- Earplugs
- Diamond polishing blocks
- Concrete sealer
- Rag


References
- ↑ https://www.everything-about-concrete.com/finishing-concrete-countertops.html
- ↑ https://www.everything-about-concrete.com/finishing-concrete-countertops.html
- ↑ https://www.concretenetwork.com/products-concrete-countertops/how-to-polish.html
- ↑ https://www.concretenetwork.com/products-concrete-countertops/how-to-polish.html
- ↑ https://www.concretenetwork.com/products-concrete-countertops/how-to-polish.html
- ↑ https://www.everything-about-concrete.com/finishing-concrete-countertops.html
- ↑ https://www.concretedecor.net/decorativeconcretearticles/vol-13-no-5-july-2013/the-three-stages-of-grinding-and-polishing-countertops/
- ↑ https://www.concretenetwork.com/products-concrete-countertops/how-to-polish.html
- ↑ https://www.concretenetwork.com/products-concrete-countertops/how-to-polish.html
- ↑ https://youtu.be/Prj5-dZMztk?t=274
- ↑ https://www.concretenetwork.com/products-concrete-countertops/how-to-polish.html
- ↑ https://www.concretenetwork.com/products-concrete-countertops/how-to-polish.html
- ↑ https://www.concretenetwork.com/products-concrete-countertops/how-to-polish.html
- ↑ https://www.concretenetwork.com/products-concrete-countertops/how-to-polish.html
- ↑ https://www.concretedecor.net/decorativeconcretearticles/vol-13-no-5-july-2013/the-three-stages-of-grinding-and-polishing-countertops/
- ↑ https://www.concretedecor.net/decorativeconcretearticles/vol-13-no-5-july-2013/the-three-stages-of-grinding-and-polishing-countertops/
- ↑ https://www.concretenetwork.com/products-concrete-countertops/how-to-polish.html
- ↑ https://www.concretenetwork.com/products-sealer/
- ↑ https://www.concretenetwork.com/products-sealer/
- ↑ https://www.countryliving.com/remodeling-renovation/a43247/pros-and-cons-concrete-countertops/
- ↑ https://www.concretenetwork.com/products-concrete-countertops/how-to-polish.html
- ↑ https://www.concretenetwork.com/products-concrete-countertops/how-to-polish.html
About This Article