This article was co-authored by Monique Capanelli. Monique Capanelli is a Plant Specialist and the Owner and Designer for Articulture Designs, an innovative design firm and boutique in Austin, Texas. With over 15 years of experience, Monique specializes in interior botanical design, living walls, event decor, and sustainable landscape design. She attended the University of Texas at Austin. Monique is a Certified Permaculture Designer. She provides plant and botanical design experiences, from small gifts to entire transformations, to shoppers as well as commercial clients including Whole Foods Market and The Four Seasons.
This article has been viewed 44,395 times.
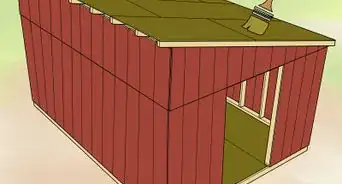
If you are planning on getting a new shed, you will first have to take some time to prepare your garden. This preparation involves picking a spot for your shed, clearing your garden, and creating a hard standing.
Steps
Choosing a Site for Your Shed
-
1Consider the ground you are hoping to place your shed on. Try to find a spot where the ground can be easily leveled. This means you should try to avoid spots that have a slope or are very rocky, as these characteristics will make it harder for you to level the ground.
- Try to find a spot that is already relatively level to make the process as easy as possible for yourself.
-
2Find a spot that will allow you to access all sides of your shed. You will need to be able to access every side of your shed so that you can make repairs and maintain it throughout the year. You should also consider the roof of your shed; tree branches can rub away roof felt. When picking your spot, try to avoid:[1]
- Putting your shed too close to walls or fences. You should be able to walk all the way around your shed.
- Putting your shed too close to trees or shrubs that will need pruning. As mentioned above, tree branches can damage the roof of your shed.
- Putting your shed on a boggy patch of ground. The ground should be fairly dry underneath your shed to keep it from sinking into the earth.
Advertisement -
3Keep water and electricity in mind when selecting your shed location. If you need water or electricity running to your shed, you will need to run water or power lines to the area.[2]
-
4Take a moment to think about how the shed will affect your yard. The entrance to your shed will most likely be a high-traffic area, which may cause a bald spot to form on your lawn. You should also consider whether or not your shed will affect your neighbors at all; will your shed block their view, or disrupt them (if you will be using power tools)?
- When placing your shed, you may also want to put it somewhere that is quiet, or has a pretty view that you can look at when taking a break.


Clearing Your Garden
-
1Clear the space where you plan to put your shed. Cut down or cut back any trees or shrubs that may be in the way. Keep in mind that it will be harder to care for and trim any shrubs or branches in the back or on the sides of your shed.
- If you plan to keep some trees or shrubs in these areas, consider keeping a path clear that runs all the way around your shed.
-
2Remove the stump of any trees you cut down. While cutting down trees to allow you to build your shed is a large job, removing the stump is equally as important. If some roots or a part of the stump are left behind, there is a chance that the tree will regrow, which could cause damage to your shed.[3]
- You can use a stump killer purchased at a garden supply store, or you can spread Epsom salts to kill the roots and plant before digging it out of the ground.
-
3Eliminate any weeds in the area. You may be surprised how strong weeds are; some can punch up through the floor of your shed even if it’s built of concrete. Because of this, it is important to get rid of these weeds before you build your shed. To get rid of weeds, you can:
- Use chemical weed controllers.
- Dig the weeds out by hand.
- Lay down horticultural fabric that will effectively keep weeds from growing by blocking their light source.
-
4Level the ground where you plan to build your shed. Your shed will need a level surface to stand on. An uneven surface will cause problems later, such as causing the shed to warp. If the ground is uneven, start by leveling this out. If you do not know how to level ground, click here for more information.[4]
- If you are making a flat surface on a slope, take steps to prevent ground slide later on. You may need to shore the earth back to prevent this from happening.
- If you can’t level the ground so that it is absolutely flat, don’t get too stressed. You can compensate for an uneven surface by excavating a deeper base for the shed and then putting in concrete and leveling it to create a flat surface.


Creating a Hard Standing
Using Concrete
-
1Check the temperature. Make sure temperatures are above freezing before laying your concrete shed base. You should also try to avoid very hot and dry temperatures, as these temperatures may cause the concrete to set too quickly.
- If it rains after laying the concrete mix, cover the area with a tarpaulin.
-
2Build a hard standing that is slightly larger than your shed. It is important that you construct a hard standing that is slightly larger than your shed’s footprint. Try to make it about three or four inches wider than the shed base along each side.[5]
- Mark this area out using pegs and string.
-
3Dig a base for your concrete. Dig out the area you have marked off so that the large, shallow hole you create is about six inches deep. Before laying your concrete, place weed protection fabric in the bottom of this area. Once you have laid the fabric into the hole:
- Fill the hole halfway up with rubble or gravel. Level this layer with sand, or rake over the gravel to give it an even surface. This layer will help with drainage and to keep the area level.
-
4Build an edge all around the footprint. Use timber or steel shuttering to make an edge all around the hole you have dug.[6]
- The edge should be roughly three inches deep and level with the surface of the ground.
-
5Fill the remaining space with concrete. Once you have created the edge, fill the remaining three-inch depth with concrete. Pour the concrete so that the concrete is level with the surrounding ground.
- Smooth out the surface using a block of wood to get a smooth finish. Leave the concrete to set.


Using Pavers or Wood Bearers
-
1Use paving slabs to make your hard standing. Paving slabs are square pieces of stone that you can use as a hard standing. To do this, begin by marking out the area of your shed base using pegs and string.[7]
- If you do not want to use paving slabs, you can also use slabs of pressure-treated timber.
-
2Excavate the ground to create a hole that is three inches deep. Once you have dug this shallow hole, lay weed protection fabric in the bottom to keep any weeds from growing up under your shed.[8]
-
3Measure the depth of your paving slabs. Your paving slabs should be slightly higher than ground level when they are placed in your hole. Fill about half of the hole with concrete.
- Use a rake to level off the concrete. Once the concrete has set, cover the area with paving slabs.


Expert Q&A
-
QuestionHow can you change your shed to make it more aesthetically pleasing?
 Monique CapanelliMonique Capanelli is a Plant Specialist and the Owner and Designer for Articulture Designs, an innovative design firm and boutique in Austin, Texas. With over 15 years of experience, Monique specializes in interior botanical design, living walls, event decor, and sustainable landscape design. She attended the University of Texas at Austin. Monique is a Certified Permaculture Designer. She provides plant and botanical design experiences, from small gifts to entire transformations, to shoppers as well as commercial clients including Whole Foods Market and The Four Seasons.
Plant SpecialistYou could either switch the door or paint the door and add some kind of flair that way. You could also change the lighting, whether it be hanging a chandelier or doing something different to add a specialness to it. If you're building something new, I would say incorporate found objects. I love incorporating vintage stained glass windows that I find in architectural salvage yards. I think that really elevates it. -
QuestionMy new garden shed is now up and ready to fill. Should I give the bare floor any treatment or cover it with anything suitable?
 Community AnswerYou might want some natural mats to stand on. I wouldn't use rubber, which releases chemicals, especially in heated environments. Recycled cotton clothes or weaved hemp make good mats.


References
- ↑ http://www.agritech.tnau.ac.in/expert_system/cattlebuffalo/Housing%20Management%20of%20Cattle%20and%20Buffalo.html
- ↑ http://www.agritech.tnau.ac.in/expert_system/cattlebuffalo/Housing%20Management%20of%20Cattle%20and%20Buffalo.html
- ↑ https://www.youtube.com/watch?v=8ZmCVJ9j7Y4
- ↑ https://homesteady.com/how-12177480-install-shed-hill.html
- ↑ https://homesteady.com/how-12177480-install-shed-hill.html
- ↑ https://www.youtube.com/watch?v=5OOk2VxTw9I
- ↑ https://www.youtube.com/watch?v=8ZmCVJ9j7Y4
- ↑ https://www.youtube.com/watch?v=xP2Kya941Ic
About This Article