wikiHow is a “wiki,” similar to Wikipedia, which means that many of our articles are co-written by multiple authors. To create this article, 10 people, some anonymous, worked to edit and improve it over time.
The wikiHow Culinary Team also followed the article's instructions and verified that they work.
This article has been viewed 41,725 times.
Learn more...
Preserved lemons are an important ingredient in many Moroccan and Middle Eastern recipes. The lemons are preserved in a simple mixture of salt and their own juices. Meyer lemons, which are sweet-tart and thin-skinned, are preferable to conventional lemons when it comes to preservation.
Ingredients
- 3 to 4 Meyer lemons (or conventional lemons, if you can't find them)
- Kosher salt
- Sterilized canning jar
Steps
Prepping the Lemons
-
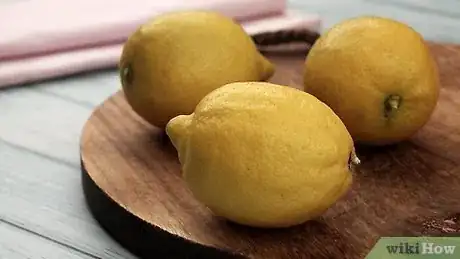
1Choose ripe Meyer lemons. Meyer lemons are darker in color and sweeter than conventional lemons. Their peak season begins in November and ends in March, making winter a great time to make preserved lemons. Meyer lemons are traditionally used in place of conventional lemons in this recipe because their thinner skin makes them easier to preserve properly.[1]
- Look for lemons with firm, bright flesh. Don't buy lemons that are green and underripe, and avoid lemons with brown spots indicating they're past their prime.
- If you can't find Meyer lemons, you can preserve conventional lemons instead. It's still best to use lemons when they're in season, during the winter months, since the lemons will taste fresher.
-
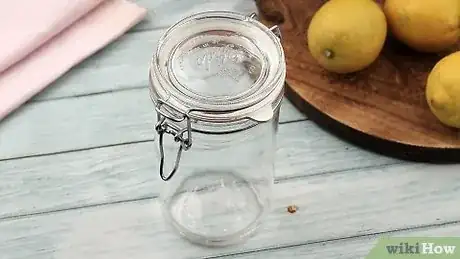
2Sterilize your canning jar. You can use a mason jar or another canning jar of any size. A quart-size jar fits enough lemons to last for a year or more, provided you don't need them for every recipe you make. It's important to make sure the jar is sterile before you put the lemons inside; otherwise, you might end up with rotten preserves. Here's how to sterilize a jar:[2]
- Boil a large pot of water
- Lower the jar into the water and boil it for five minutes
- Boil the lid separately
- Lay the jar and lid out to dry on a clean towel
Advertisement -
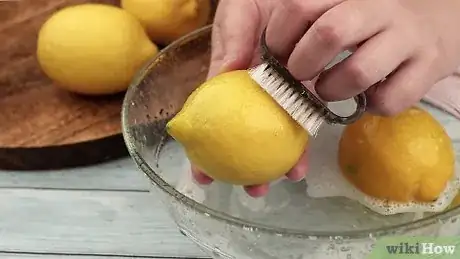
3Scrub the lemons' skins. Since you're preserving the entire lemon, peel and all, it's important to scrub the skin to make sure all traces of pesticides and other residue are washed away. Run cold water over the lemons and use a vegetable brush to scrub the skins well. Dry the lemons once you're finished.
-
4Slice off the stems. Use a sharp paring knife to slice the brown stems or stem tips from the ends of the lemons. The stems are inedible, so you want to remove them before you preserve the lemons.
-
5Slice the lemons lengthwise, leaving the bases attached. Stand a lemon on one end and hold it steady with one hand. With the other hand, use a paring knife to slice the lemon in half lengthwise. Slice through the lemon, but leave the base of the lemon intact; you want the pieces to stay together.[3]
-
6Make a perpendicular lengthwise slice. Turn the lemon ninety degrees and slice again, so that you make an "x" shape across the top of the lemon and into the flesh. Again, don't slice all the way through the lemon; leave the base intact. Repeat with the remaining lemons.
Preserving the Lemons
-
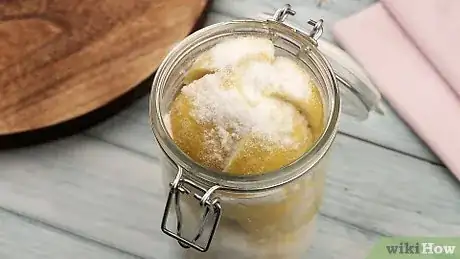
1Place two tablespoons of salt in the bottom of the jar. This should be enough to completely cover the bottom. Kosher salt is the best kind to use, since it has a clean, sea-salty taste that will complement the lemons.
-
2Sprinkle salt inside a quartered lemon. Gently open the lemon and sprinkle it between the slices, still leaving the base intact. Use up to a tablespoon of salt to completely coat the inside of the lemon.
-
3Place the lemon into the jar cut-side down. Push it against the salt at the bottom of the jar. This will release the lemon juice and help the preservation process get started.
-
4Add two more tablespoons of salt to the jar. This should be enough to almost completely cover the top of the lemon. Simply sprinkle it over the lemon you just placed in the jar.
-
5Layer another lemon on top of the first. Put it into the jar cut-side down, and push it against the salty lemon below. Keep pushing until the juices are released.
-
6Keep layering salt and lemons until you get close to the top. Add another layer of salt, another lemon, and so on until you have only an inch of space left at the top of the jar. If you're using a quart-sized jar, there's probably enough space for three or four lemons, depending on their size.
- Top it off with more salt. This will ensure the top of the last lemon gets completely preserved.
- It's important to leave extra space, called "headspace," at the top of the jar. This keeps pressure from building up in the jar.
-
7Add extra juice if necessary. Squeezing the lemons into the jar should produce enough juice to rise about halfway up the jar. If the jar is low on lemon juice, cut into another lemon and squeeze the juice into the jar. You want it to rise at least halfway to the top of the jar.
- You can also top off the liquid with water that has been boiled and cooled.
- If you want sweet preserved lemons, add maple syrup to top it off.
-
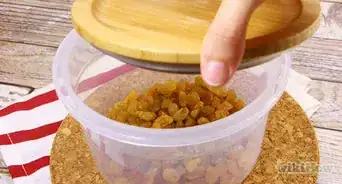
8Lid the jar and store the lemons in the refrigerator. Lemons preserved with salt and their own juice will last up to a year when stored in the refrigerator. Just remember to keep the lid tightly fastened.
Using Preserved Lemons
-
1Cut off a lemon quarter and rinse it well. If you want to add something tart to your meal, a simple preserved lemon quarter will do just the trick. Remove the lemon quarter from the jar and rinse it under cold running water to remove excess salt.
- If you wish, use a sharp knife to slice the lemon quarter into very thin slices.
- A little goes a long way, and one lemon quarter will provide enough lemon to divide among three or four serving plates.
-
2Puree an entire preserved lemon with the salt. Pureed preserved lemon is excellent when mixed into sauces. Remove a lemon and place it in your food processor. Puree the lemon until you have a fine, grainy paste. Store the paste in a small jar, and spoon a little into the sauce or dressing of your choice.
- Pureed preserved lemon is excellent in marinades.
- Or use it to add some punch to your favorite salad dressing.
-
3Use it to add flavor to chicken and fish dishes. Preserved lemons are typically paired with spicy meat and fish dishes. The extra tart flavor from the lemons makes a regular dish taste extraordinary. Try using preserved lemons in the following ways:
- Place two preserved lemon slices on top of a fish filet before grilling or baking.
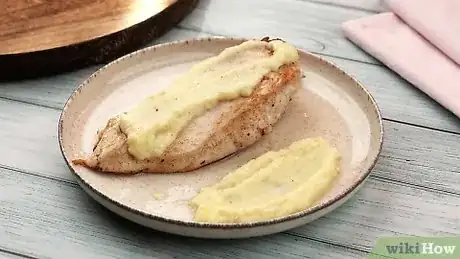
- Make a rub for grilled chicken using preserved 1 tablespoon lemon puree mixed with 1 tablespoon olive oil. Add pepper to taste.
- Serve any grilled meat dish with a few thin slices of preserved lemon on the side.
Community Q&A
-
QuestionDo they taste like regular lemon slices?
 Community AnswerNo, they don't but preserve lemons have a powerful flavor as they are steeped lemon juice with salt.
 -
QuestionI was given homegrown lemons. I think they may be Meyers. How can I tell?
 Community AnswerMeyer lemons are considerably smaller than "regular" lemons. They also have much less of an acidic taste than regular lemons.
References
About This Article
To preserve lemons, start by selecting ripe Meyer lemons, which are easier to preserve due to their thinner skin and will give you the best results. Then, sterilize a canning jar by boiling it in a pot of water on the stove for 5 minutes. Next, prepare the lemons by rinsing them in cold water, slicing off the stem, and making 2 cuts in the shape of an "X" where the stem was. Finally, fill a jar with layers of salt and lemons before sealing the jar and storing in the refrigerator for up to one year. For more tips, including how to use your preserved lemons, read on!
