This article was co-authored by wikiHow staff writer, Ali Garbacz. Our trained team of editors and researchers validate articles for accuracy and comprehensiveness.
wikiHow’s Content Management Team carefully monitors the work from our editorial staff to ensure that each article meets our high quality standards.
This article has been viewed 319,967 times.
Learn more...
If you need lots of photos for a project or just want to save paper when printing, you might find yourself needing to print lots of pictures on a single sheet of paper. We’re here with a step-by-step guide to help both Windows and macOS users get this task done.
Things You Should Know
- For both Windows and macOS, select the photos you want to print, navigate to the Print menu, and choose the Contact Sheet option to put multiple images on one page.
- For Windows users, use the Wallet option or change the paper size to adjust the number of photos on one page.
- Make sure your printer is loaded with the right sized paper and connected to your computer before starting.
Steps
Windows
-
1Open the folder that contains the photos you wish to print. It’s best to keep all of the photos you want to print together in a separate folder to make selecting them easier.
-
2Select the photos you want to print. To select multiple photos, hold the Ctrl key as you click each file. You can also hold down the left button on the mouse and drag your mouse over the photos.Advertisement
-
3Right-click on the selected photos. This opens up a contextual menu.
-
4
-
5Click the Contact Sheet option. This button is on the right side of the window, and you may have to scroll down to find it. Using this option, you can print up to 35 photos on a single page. If you don't like how it looks in the preview, try one of these other options:
- Wallet allows you to fit up to nine images on a single piece of paper.
- If you're just printing two images, you can choose to print them to a single page at 4 x 6 inches or 5 x 7 inches.
- If you're printing four images, you can choose the 3.5 x 5 inch option.
-
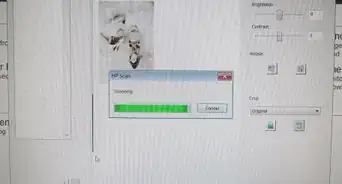
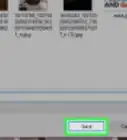
6Click Print. After checking to make sure all of your images are there, click the Print button to print them out on a single sheet.
- Make sure your printer is turned on, filled with the correct paper size, and properly connected to your computer before printing.
- If your printer isn’t already selected, choose your printer’s name in the "Printer" drop-down menu first.


macOS
-
1Open the folder containing the photos you wish to print. To make finding and selecting your photos easier, save all of the photos you want to print together in one folder.
-
2Select the photos you want to print. To select multiple photos, hold the ⌘ Command key while clicking each photo. You can also hold down the left button on the mouse and drag your mouse over the photos.
-
3Click the File menu. This option is in the upper left corner of the window.
-
4Click Print. This option appears in the drop-down menu after you click File. This opens up a print preview screen that shows you the images you selected.
-
5Click the Contact Sheet option. This is on the right side of the print menu at the bottom of the available options.
-
6Click Print to print your images out. Make sure all of the images you want printed are in the preview, then hit Print when you’re ready.[2]
- Make sure your printer is turned on, filled with the appropriate paper size, and properly connected to your computer before you start printing.
- You may have to select your printer's name from the "Printer" drop-down menu first.


Community Q&A
-
QuestionI have tried to do this with Windows 11, as I have always successfully done with earlier versions of Windows, but no "print" option appears in the drop-dowm menu.
 wikiHow Staff EditorThis answer was written by one of our trained team of researchers who validated it for accuracy and comprehensiveness.
Staff AnswerwikiHow Staff EditorStaff AnswerYou might have to click "Show more options" first in the drop-down menu, and then a "Print" option will appear. -
QuestionI'd like to be able to determine what order they appear on the page. How can I do that?wikiHow Staff EditorThis answer was written by one of our trained team of researchers who validated it for accuracy and comprehensiveness.
Staff AnswerwikiHow Staff EditorStaff AnswerIf you are using Windows 11, you can use the pre-installed photo editing app Paint 3D to crop, adjust, and position your photos to your liking before printing. -
QuestionI followed the directions for a pc, but even when all the photos are highlighted, the preview only shows one photowikiHow Staff EditorThis answer was written by one of our trained team of researchers who validated it for accuracy and comprehensiveness.
Staff AnswerwikiHow Staff EditorStaff AnswerMake sure you've selected the "Contact sheet" option or any other multi-image layout. The default will be for only 1 image to be printed per piece of paper, so just navigate to the options on the side menu and select what layout of the images you would like.

-Step-53.webp)

References
About This Article
1. Open the folder containing your photos.
2. Select your photos by holding the Ctrl key while clicking on them.
3. Right-click on the selected photos.
4. Click Print.
5. Click Contact Sheet.
6. Click Print.


-Step-53.webp)


wikiHow’s Content Management Team carefully monitors the work from our editorial staff to ensure that each article meets our high quality standards. This article has been viewed 319,967 times.