This article was co-authored by Nicole Bolin. Nicole Bolin is a Crafting Specialist and the CEO of Stencil, a DIY Craft Studio in Phoenix, Arizona. Nicole specializes in interior design and various craft and DIY projects. Nicole holds a Certificate in Interior Design from the New York Institute of Art and Design. She opened Stencil in 2017 to teach others to create DIY projects that fit their home and lifestyle.
wikiHow marks an article as reader-approved once it receives enough positive feedback. In this case, 90% of readers who voted found the article helpful, earning it our reader-approved status.
This article has been viewed 263,935 times.
Photo albums help you to preserve your past memories and keep photos together in one place. DIY photo albums can be great keepsakes for loved ones. Creating a DIY photo album is a lot easier than you might think. With a few materials, some creativity, and a little time, you can create the perfect DIY photo album.
Steps
Creating an Accordion-Style DIY Photo Album
-
1Stock up on paper. Go to your local craft store to purchase paper for your covers and the subsequent album pages. [1]
- Create your covers with a decorative heavy paper. The cover sheets should be made of heavier paper like cardstock and should have distinguishing details like patterned paper.
- Create the album pages with solid sheets of paper that are one color. Sheets should have measurements of 12x12.
-
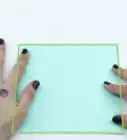
2Cut the 12x12 solid pieces of paper. Divide the 12x12 sheets evenly in half to create two sections of 6x12 pieces. On each 6x12 piece, use a ruler to measure 3 sections that are 4 inches in length. Fold the 6x12 piece against each of the three 4-inch lines and press it firmly to make the folds smooth.
- Measure and cut the heavy cover pages into two 4x6 cut pieces.
Advertisement -
3Tape the album together. Take both of the 6x12 inch sections of paper at their short ends and secure with tape. Fold the paper up like an accordion to discern where the album’s front and back covers will be.[2]
-
4Glue the decorative sheets to the album. The heavy decorative paper from earlier will act as the front and back covers of the album. Place glue at the corners and sides of the page and place them firmly at the front and back of the album pages.
-
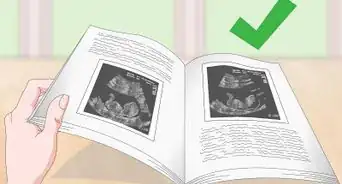
5Add your photos. Arrange photos on the remaining open pages of the album, placing them on available sheet: front and back. Do not glue photos onto the pages. Instead use photo mount squares on each of the photo’s corners to ensure that they are secure on their respective pages.
-
6Cut a piece of ribbon for your bow. Make sure that the ribbon is long enough to wrap around the entire length of the album when tying it. Use super adhesive glue to secure the ribbon on the back cover of the album. Tie the ribbon’s ends into a simple bow.[3]
- Use your creativity to add designs. Use a glitter marker or a gold permanent marker and fill the cover with different drawings or words that have to do with who you’re creating the album for. Add stickers to the front and back if you desire to or even additional photos.
- As an added personal touch, glue a metal label holder to the front cover to write a name or date.


Creating a Paper Bag DIY Photo Album
-
1Purchase brown lunch bags. Brown paper bags can be bought at either your local grocery store or at a craft store. For the pages, be sure to have at least 3-4 bags to use.
-
2Stack the 3-4 brown paper bags together. Place them so that the side facing up alternates: one side opened, the next side closed.[4]
-
3Fold the stacked bags in half. Form the folded bags into a book. Use a hole puncher to punch two holes into the folded paper book: one at the top left corner and one at the bottom left corner.
- Thread ribbon into each of the holes and bring the ends together in the front of the album. Tie a bow out of the ribbon.
-
4Fill the paper bag pages with photos. Tape or glue the 4x6 photos into place. One photo should fit squarely on each page, front and back. A great way to arrange them is chronologically, but you can also get creative and place photos together that are similar in color.
-
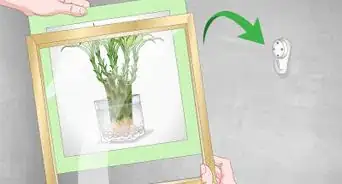
5Decorate the front and back covers of the album. Use leftover wrapping paper or decorative scrapbook paper to add design to the covers. Place dots of glue on the corners of the paper and place firmly and smoothly against the covers.
- Write on the front of the book with a colorful marker to use cursive penmanship as a way to name it.
- Place another photo on the front cover to give a hint of what the album will be about and the kinds of photos it holds.

Creating a Mini DIY Photo Album
-
1Gather your materials. Have at least 10 printed wallet size photos, 10 blank 3x5 index cards, a ribbon or binding material, a felt tip pen marker, and a hole puncher.[5]
-
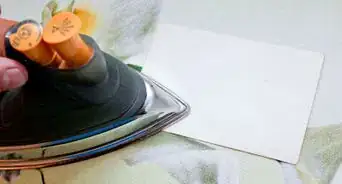
2Apply rubber cement glue on the back of the photos. Turn the blank index card so that it is on its longest side in landscape position.
- The wallet sized photos will be placed portrait style on the cards.
- Stick the photo to the right sides of your blank index cards.
-
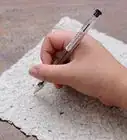
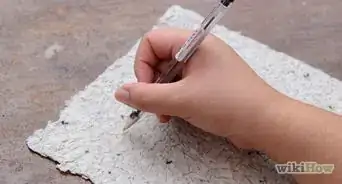
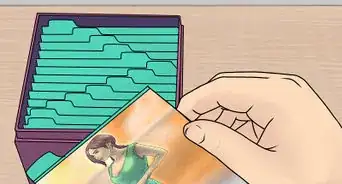
3Write details depicting the photo on the left side of the card. Use this space to write about the people in the photo, the date of the event, or just a title for the photo.
-
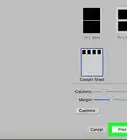
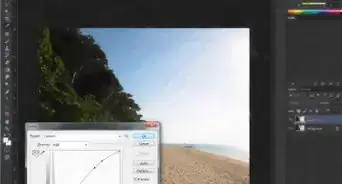
4Place a blank index card in the immediate front and back to act as covers for the album. Decorate the front with markers or keep the look sleek and clean by placing a simple monogram on it by using stencils for lettering.
-
5Punch holes at the top and bottom of your booklet. Place the hole at about ½ an inch from the very bottom and very top of the book. Through those holes, thread a ribbon and tie it into a bow.

Expert Q&A
Did you know you can get expert answers for this article?
Unlock expert answers by supporting wikiHow
-
QuestionHow do I make a photo album book at home?
 Nicole BolinNicole Bolin is a Crafting Specialist and the CEO of Stencil, a DIY Craft Studio in Phoenix, Arizona. Nicole specializes in interior design and various craft and DIY projects. Nicole holds a Certificate in Interior Design from the New York Institute of Art and Design. She opened Stencil in 2017 to teach others to create DIY projects that fit their home and lifestyle.
Crafts & DIY SpecialistThe scrapbooking sections of arts and crafts stores have tons of decorations you can use to make your own photo album book. For instance, if you don't like the plastic inserts in typical photo albums, try buying little corner pieces for your photos. You can glue these into a scrapbook, then your photos will hang there by their corners in a cute way.
Support wikiHow by unlocking this expert answer.
-
QuestionAre there any preferred types of photos for the album?
 Community AnswerNo, it's completely your choice.
 -
QuestionIs this helpful for making an album of artistic pictures?
 Community AnswerYou can put any photos or pictures in your DIY album. If that is your desired place to put the artistic pictures in, then make an album of artistic pictures!
Things You’ll Need
- Photos (10)
- Ribbon
- Patterned scrapbook, decorative paper
- Solid colored paper
- Scissors
- Photo mounting squares
- Tape
- Ruler
- Hole puncher
- Paper bags (3-4)
- Photo safe glue/rubber cement glue
- Metal label holder
- Stencils
- Additional odds and ends to add personality to the album

-Step-53.webp)

References
- ↑ http://makinglemonadeblog.com/homemade-photo-album-mothers-day-gift/
- ↑ http://makinglemonadeblog.com/homemade-photo-album-mothers-day-gift/
- ↑ http://makinglemonadeblog.com/homemade-photo-album-mothers-day-gift/
- ↑ http://www.allyou.com/budget-home/crafts/how-to-make-photo-album
- ↑ http://www.weddingchicks.com/2011/01/27/diy-valentines-love-book/
- ↑ Nicole Bolin. Crafts & DIY Specialist. Expert Interview. 29 October 2020.
- ↑ Nicole Bolin. Crafts & DIY Specialist. Expert Interview. 29 October 2020.
- ↑ Nicole Bolin. Crafts & DIY Specialist. Expert Interview. 29 October 2020.
About This Article

To create your own photo album out of brown paper lunch bags, stack 3-4 bags together so that the open side alternates from bottom to top. Then, fold the bags in half and use a punch to turn them into a book by making two holes, one in the top left corner and one in the bottom left. To finish your album, fill the paper bag pages with photos and decorate the front page using wrapping paper or glitter. For tips on how to make an accordion photo album or a miniature photo album, keep reading!