wikiHow is a “wiki,” similar to Wikipedia, which means that many of our articles are co-written by multiple authors. To create this article, 105 people, some anonymous, worked to edit and improve it over time.
The wikiHow Video Team also followed the article's instructions and verified that they work.
This article has been viewed 1,947,357 times.
Learn more...
Each snowflake is unique and so will be the ones you make! Whether it's December 24th or July 24th, these snowflakes are beautiful and quite easy to make; all you'll need is some paper and a pair of scissors. Because of their simplicity and aesthetic appeal, paper snowflakes are a fantastic craft idea for kids and adults alike.
Steps
Round Snowflake
-
1Fold a piece of paper in half. For a standard snowflake, a normal printer paper(8.5 x 11) is just fine. To get fancy, decorate your paper beforehand in colored pencil, crayon, or marker. Or use colored paper!
-
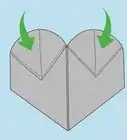
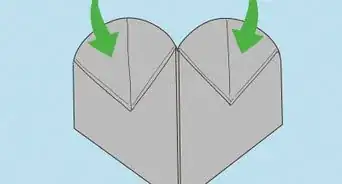
2Find the center of the paper on the fold. Then grab the bottom corner and bring it to the center, forming a triangle. Then, fold it again, turning over the folded corner. The paper should end up being folded into thirds, slightly resembling a cone shape.
- If you found that confusing, fold one side over about 1/3 of the way and then fold the other side over to cover the first side. Any better?
- When you're handling your soon-to-be snowflake, always keep the point down. This is the center of your snowflake.
Advertisement -
3Fold in half. You have a mini-cone in front of you, right? Just like this?
-
4Cut off the top in a very slight arch. You are cutting through all the layers just where the top layer stops. It should be pretty clear to see. You're now ready to create your snowflake!
-
5Start cutting. You may want to begin with a very simple pattern and then move on to more complicated patterns. Or dive in. The smaller the cuts (and the more in number), the more detailed your snowflake will be.
-
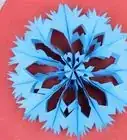
6Unfold the snowflake. Unfolding takes some patience (make sure it doesn't tear!), but you'll have your first six-sided snowflake in seconds. Tada! Onto the next!

Angular Snowflake
-
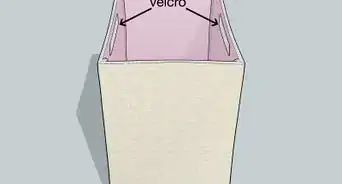
1Get a sheet of 8.5 x 11, or A4 paper. Create a perfect square by taking the bottom corner and folding it over to the top, at a diagonal. A 3" (7.5 cm) or so piece will be sticking out. Cut off the excess so you're working with just the square.
- At all steps in this method make sure your creases are firm and straight. If they're not clean and symmetrical, you may end up with a wonky snowflake.
-
2Fold the paper in half, in a triangle shape. This is the same fold you made in the first step and is only mentioned in case you unfolded it to cut. Once it's folded once, fold it again, forming an even smaller triangle.
- At this point, you may fold it again to create a different, much smaller, base for your snowflake. Experiment! However, for kids, folding it again renders it much more difficult to work with.
-
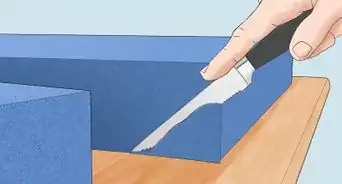
3Start making cuts. This is where the snowflake gets really good. If you get creative with it, you'll end up with a pattern that's intricate, delicate, and detailed. Or you could end up with a couple of slits in a piece of paper. Cut in curves, angles, and swirls to get the most out of the paper.
- You may find it useful to hold on to the center of the snowflake -- the very tip. Though you can cut it off and the snowflake will hold together! The more paper you cut off, the flimsier it will be -- not necessarily a bad thing.
-
4Carefully unfold your snowflake. If you've made a lot of cuts, the snowflake may rip, so be careful. And if your cuts were very small, sometimes the layers of paper stick together (think election day 2000).
- If you're not happy with your pattern, fold it back up and take a few more whacks at the paper. Problem solved.

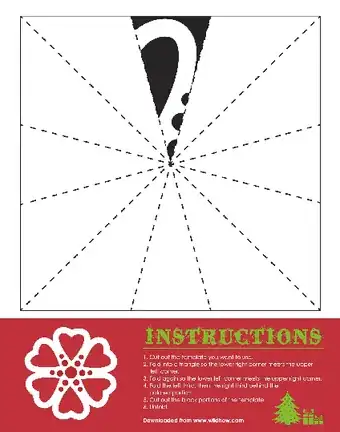
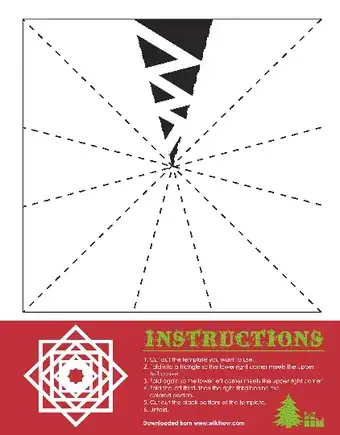
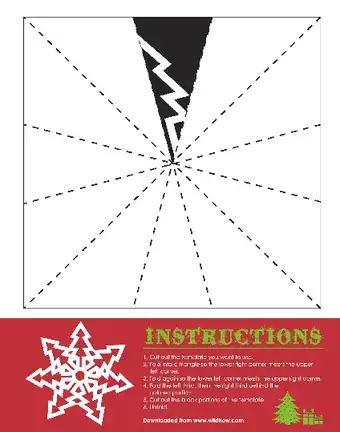
Printable Templates
Community Q&A
-
QuestionShould I use origami paper or regular paper?
 Community AnswerYou can use both kinds of paper. Printer paper also works well.
 -
QuestionWhich snowflake do I need to do?
 Beauty and the BeastCommunity AnswerYou don't need to do any. Just choose the design you like best. If you can't decide, ask a friend or family member for advice.
 -
QuestionDo I cut off different pieces?Christmas NerdCommunity AnswerYes. You can cut them into circles, hearts, or stars. You can even create your own design.
Warnings
- Adult supervision of young children is essential during the cutting stages, as they may cut themselves.⧼thumbs_response⧽
Things You'll Need
- Paper
- Scissors
- Markers/crayons (optional)

About This Article
To make a paper snowflake, cut a piece of paper into a square shape. Fold the paper in half diagonally to form a triangle, then fold it in half twice more. Using scissors, make cuts into the sides of the paper, such as triangles, rectangles, or round shapes. Then, carefully unfold the paper to reveal your paper snowflake!