This article was co-authored by wikiHow Staff. Our trained team of editors and researchers validate articles for accuracy and comprehensiveness. wikiHow's Content Management Team carefully monitors the work from our editorial staff to ensure that each article is backed by trusted research and meets our high quality standards.
This article has been viewed 36,557 times.
Learn more...
Photos hold a great deal of sentimental value and allow us to relive our favorite memories. Over time, photographs can dry out and begin to curl in on themselves. If you have a photo that is curled up, though, all hope is not lost. By adding moisture back into the photo with a DIY humidification chamber, you can make it more flexible and smooth it out again. If only a corner or edge of the photo is curled, you may even be able to flatten it using heavy objects, a thick book, or an iron.
Steps
Preparing a Humidification Chamber
-
1Choose a container for the chamber. To create a humidification chamber that will help soften the photo, you need a sealed container. A plastic storage bin works well because it has a lid that allows you to seal it. [1]
- The storage bin must be deep enough to fit a wire plate rack and still leave some room between the top of the rack and the lid.
-
2Set up a work station with the container. Place a clean towel down on the floor or another flat surface that is out of the way. Add the storage container on top, making sure that it's secure and will not be disturbed.[2]
- If you are placing the container on the floor, you do not necessarily need a towel if the flooring has a rug or carpet over it.
Advertisement -
3Fill the bottom of the bin with 2-inches (5-cm) of water. Make sure the water is room temperature; if it is too hot, it will cause condensation on the inside of the lid that might drip down onto the photo.[3]
-
4Set a wire plate rack in the bin. With the water in the storage bin, place a wire plate drying rack in it so it fits and you can still close the lid. The rack only needs to be large enough to fit your photo, but it is best to choose a rubber-coated style to protect the photo.[4]
- You don't necessarily have to use a plate drying rack. Any wire rack that holds the photo above the water while still allowing the humidity to reach it.


Relaxing the Photo
-
1Place the photo on the rack. It should be face up, but there’s no need to try to unroll it. Leave it as it’s naturally curled. Keep in mind that the photo should not be touching the water at all.[5]
- It’s best to start with a test photo if you’re new to the process. That way, you won’t damage a photo that means a lot to you if something goes wrong.
- You can use this process to uncurl any paper document.
- You can uncurl more than one photo at a time. Just make sure there's a couple of inches (5-cm) between the items on the rack.
-
2Cover the bin and allow the photo to sit for a couple of hours. Once the photo is in place, secure the lid on the container so that it’s airtight. Let the photo sit in the humidification chamber for two to three hours so it has time to soften.[6]
-
3Examine the container for condensation after a couple of hours. Open the storage container and check the interior for moisture. There shouldn't be any beads of water, but if you find them, wipe them away immediately. Make sure that the photo isn't wet -- dry it off with a clean towel right away too.[7]
-
4Check the photo to see if it’s flexible. When you're done looking for condensation, feel the photograph to see if it's become softer and more pliable. If it’s still not flexible enough to uncurl, put it back on the rack.[8]
-
5Leave the photo in the bin for a few more hours if necessary. After you’ve checked on the photo, replace the lid on the container. Allow the photo to sit in the chamber for three to four more hours so it has more time to soften.[9]
- You may need to repeat this process more than once. Continue leaving the photo in the chamber for a few hours at a time until it becomes flexible enough to uncurl.


Smoothing the Photo
-
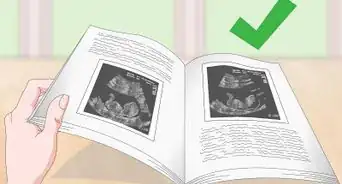
1Place the photo on blotting paper and smooth it out. When the photo is flexible enough to unroll, take it out of the chamber and place it on a piece of archival blotting paper. Use your hands to gently unroll the photo.[10]
- You can usually find archival blotting paper at art supply stores.
- The piece of blotting paper should be large enough to rest the photo. However, there should also be some overhang that you can fold over the photo to cover it later.
-
2Set a piece of wax paper over the photo and fold the blotting paper on top. After you’ve unrolled the photo, place a piece of wax paper on top of it. Next, fold the overhanging blotting paper over the wax paper to cover it.[11]
- You can substitute parchment paper for the wax paper if you prefer.
-
3Add some heavy items on top of the photo. When the photo is covered with the wax and archival papers, weigh it down with some heavy objects. Large books, bricks, and wood pieces can all work well.[12]
-
4Allow the photo to dry for a few days. Once the photo is weighed down, let it sit for two to three days. It may take that long for the photo to dry completely. You can remove the wax paper after a day or two to allow the blotting paper to remove more moisture. If the photos still wants to curl up, leave it weighed down for another day or so to fully flatten it.[13]


Fixing Slightly Curled Photos
-
1Set the photo underneath a heavy item. If it’s only a single corner or edge of the photo that’s curled, you may be able to smooth it by simply weighing it down. Place the photo on a clean surface and cover it with a piece of paper. Add a heavy item such as a brick on top, and let it sit for a few days.[14]
-
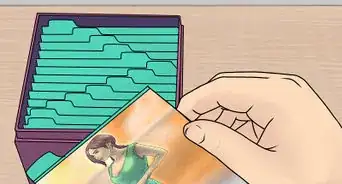
2Place the photo between the pages of a heavy book. Open the book to the middle, and set the photo between the pages. Let the photo sit in the book for a day or two so it has to time to smooth out.[15]
- To make the process faster, you can place a heavy item such as a brick on top of the book.
-
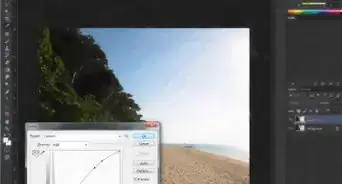
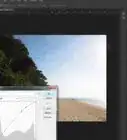
3Run an iron over the photo’s edges for a few seconds. If weight doesn’t seem to be helping to uncurl the photo, place the photo picture-side down on an ironing board with a thin towel over it. Use a cool, dry setting on your iron, and lightly press it over the edge of the photo for 2 to 3 seconds to flatten it.[16]


Things You Will Need
- Large storage container with lid
- Towel
- Rubber-coated plate drying rack
- Archival blotting paper
- Wax paper
- Heavy weights, such as a brick, block of wood, or thick book
- Iron

-Step-53.webp)

References
- ↑ http://thefamilycurator.com/photo-tutorial-how-to-relax-and-rehumidify-old-rolled-photog/
- ↑ http://thefamilycurator.com/photo-tutorial-how-to-relax-and-rehumidify-old-rolled-photog/
- ↑ http://thefamilycurator.com/photo-tutorial-how-to-relax-and-rehumidify-old-rolled-photog/
- ↑ http://thefamilycurator.com/photo-tutorial-how-to-relax-and-rehumidify-old-rolled-photog/
- ↑ http://www.ala.org/alcts/preservationweek/advice/flatteningphotos
- ↑ http://thefamilycurator.com/photo-tutorial-how-to-relax-and-rehumidify-old-rolled-photog/
- ↑ http://thefamilycurator.com/photo-tutorial-how-to-relax-and-rehumidify-old-rolled-photog/
- ↑ http://thefamilycurator.com/photo-tutorial-how-to-relax-and-rehumidify-old-rolled-photog/
- ↑ http://thefamilycurator.com/photo-tutorial-how-to-relax-and-rehumidify-old-rolled-photog/
- ↑ http://thefamilycurator.com/photo-tutorial-how-to-relax-and-rehumidify-old-rolled-photog/
- ↑ http://thefamilycurator.com/photo-tutorial-how-to-relax-and-rehumidify-old-rolled-photog/
- ↑ http://thefamilycurator.com/photo-tutorial-how-to-relax-and-rehumidify-old-rolled-photog/
- ↑ http://thefamilycurator.com/photo-tutorial-how-to-relax-and-rehumidify-old-rolled-photog/
- ↑ http://www.goodhousekeeping.com/home/cleaning/tips/a2480/uncurling-photo-oct01/
- ↑ http://www.goodhousekeeping.com/home/cleaning/tips/a2480/uncurling-photo-oct01/
- ↑ http://www.goodhousekeeping.com/home/cleaning/tips/a2480/uncurling-photo-oct01/
About This Article


-Step-53.webp)


