This article was co-authored by wikiHow staff writer, Hannah Madden. Hannah Madden is a writer, editor, and artist currently living in Portland, Oregon. In 2018, she graduated from Portland State University with a B.S. in Environmental Studies. Hannah enjoys writing articles about conservation, sustainability, and eco-friendly products. When she isn’t writing, you can find Hannah working on hand embroidery projects and listening to music.
The wikiHow Video Team also followed the article's instructions and verified that they work.
This article has been viewed 46,118 times.
Learn more...
Classic flip books are made out of your own drawings to get cute, short animations. If you aren’t the best artist or you want to make yourself into a flip book, you can try making one with photos instead! Use this as a fun craft project to entertain your kids for the afternoon or send them out as invitations and party favors. Making a photo flip book is easy with a little creativity and a few hours of your time.
Steps
Taking and Printing the Photos
-
1Set your camera to “continuous shots.” Most digital cameras have a continuous shooting option that will take photos in rapid succession. If you have one, set up your camera on a tripod or a flat surface in front of the object that you’d like to photograph.[1]
- You can also use a disposable camera with a timer.
Tip: If you don’t have a digital camera, you can use “burst” mode on your smartphone or take a bunch of still shots on your webcam camera.
-
2Take as many pictures as you’d like with little movement in between. Depending on what you are photographing, you can take as many or as few photos as you’d like to. Aim for at least 15 to 20 shots, and try to limit the movements between each shot so that your pictures flow continuously.[2]
- For example, you can take pictures of yourself doing a silly dance or a wave. Or, you can take pictures of an action figure moving into different poses.
Advertisement -
3Upload the photos to your computer. Depending on what you used to take your photos and what kind of computer you have, you may have to plug in your camera’s SD card or email the photos to yourself from your phone. Try to get all of your photos onto a computer that you can print from.[3]
- Most libraries have computers that are free to the public.
-
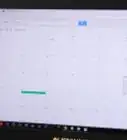
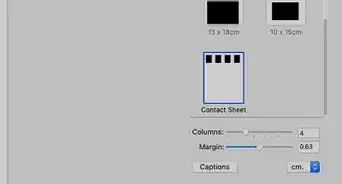
4Resize your photos to be 2 × 2 or 3 × 3 in (5.1 × 5.1 or 7.6 × 7.6 cm). You can open up a blank document and put all of your photos onto a single page to make sure they are the same size. Shrink your pictures down so they will all fit in a flip book that’s small enough to hold in 1 of your hands.[4]
- If you have movie editing software, you can upload your photos to it and make them into a film strip so that they are all the same size.
-
5Print out your pictures on white paper. You can use plain printer paper or cardstock for a more sturdy base. Print them out from your computer in color or black and white.[5]
- Make sure your printer is set to high resolution so your photos are clear.
- Most libraries have printers that cost less than $1 to use.


Assembling the Flip Book Pages
-
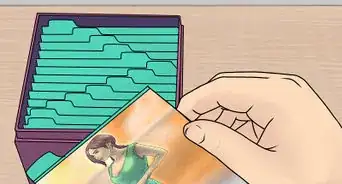
1Cut out each photo with scissors. Make sure you cut each photo in a straight line without any jagged edges. Try to keep your pictures all the same size so that they look seamless.[6]
- If you have a paper cutter, use that instead to make sure your pictures are straight and even.
Tip: Try to keep your photos in consecutive order as you cut them so you don’t mix them up.
-
2Cut out 15 to 20 long pieces of white paper. Use plain white paper to cut out strips that are about twice the size of your photos, around 4 × 4 or 6 × 6 in (10 × 10 or 15 × 15 cm). Make sure they are straight and all the same size so that your flip book will line up well.[7]
- You can use colored paper if you’d like a bright background for your photos.
-
3Glue each of your photos to a strip of white paper. Use a glue stick to attach the pictures so that they dry quickly. Make sure they are lined up with the far right side of your strips of paper so that you’ll be able to see them as you flip through your booklet.[8]
- Glue sticks are better to use than liquid glue because they won’t mess up the ink on your photos.
-
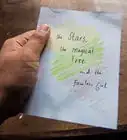
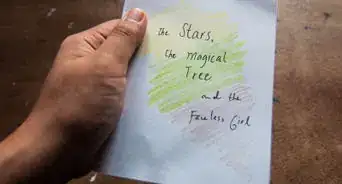
4Make a cover out of cardstock if you’d like to. Cut out a strip of white or colored cardstock that matches the length of the white paper strips. Use a marker to write the title of your flip book and who it’s for, if you’d like to.[9]
- For example, if you are sending wedding invitations with a flip book, you could write “You’re Invited!”
-
5Stack the pages in order and staple them together along 1 edge. Make sure the edges of your papers line up by tapping them on a table or countertop. Staple the end of your flip book that’s blank together to keep the pages in order as you show off your booklet.[10]
- You can also use a binder clip for a less permanent hold.
-
6Flip the pages of your photo flip book quickly to see the short animation. Hold your flip book by the stapled end and use your other hand to quickly flip through the photos. Show off your animated booklet to your friends to wow them with your animation skills![11]
- You can use photo flip books to send messages to your partner, invite people to your wedding, or entertain your kids.

Community Q&A
-
QuestionWhat kind of paper do I need to make a flip book?
 Community AnswerYou can use any kind of paper, even post-it's will do the job, just make sure whatever you use doesn't allow for the ink to bleed through the page.
 -
QuestionHow we can make the actual flip book -- not images on it?
 T. ChinsenTop AnswererAny small note pad with the cardboard backing removed will form the basic flip book without images. For a sturdy version, cut off the cardboard cover of any bound mini notebook.
Things You’ll Need
- Camera, smartphone, or webcam
- Computer
- Printer
- Paper
- Scissors
- Glue stick
- Stapler or binder clip
-Step-53.webp)

References
- ↑ https://www.youtube.com/watch?v=-_My_EzQa7E&feature=youtu.be&t=16
- ↑ https://www.nyfa.edu/student-resources/flipbook-animation-techniques-and-examples/
- ↑ https://www.youtube.com/watch?v=-_My_EzQa7E&feature=youtu.be&t=62
- ↑ https://www.nyfa.edu/student-resources/flipbook-animation-techniques-and-examples/
- ↑ https://www.nyfa.edu/student-resources/flipbook-animation-techniques-and-examples/
- ↑ https://www.youtube.com/watch?v=TOg_PRGd24I&feature=youtu.be&t=80
- ↑ https://www.youtube.com/watch?v=-_My_EzQa7E&feature=youtu.be&t=129
- ↑ https://www.youtube.com/watch?v=-_My_EzQa7E&feature=youtu.be&t=142
- ↑ https://www.nyfa.edu/student-resources/flipbook-animation-techniques-and-examples/
About This Article