This article was co-authored by Chris Hasegawa, PhD. Dr. Chris Hasegawa was a Science Professor and the Dean at California State University Monterey Bay. Dr. Hasegawa specializes in teaching complex scientific concepts to students. He holds a BS in Biochemistry, a Master’s in Education, and his teaching credential from The University of California, Davis. He earned his PhD in Curriculum and Instruction from The University of Oregon. Before becoming a professor, Dr. Hasegawa conducted biochemical research in Neuropharmacology at the National Institute of Health. He also taught physical and life sciences and served as a teacher and administrator at public schools in California, Oregon, and Arizona.
wikiHow marks an article as reader-approved once it receives enough positive feedback. In this case, 88% of readers who voted found the article helpful, earning it our reader-approved status.
This article has been viewed 191,362 times.
Light is an essential part of your day. It allows you to see objects, shapes, and colors. In fact, the pupils in your eyes filter in light to help you see everything around you. As part of a school assignment, you may be asked to prove that light travels in a straight line. You can do this using basic household items in three easy experiments.
Steps
Making a Light Pinhole
-
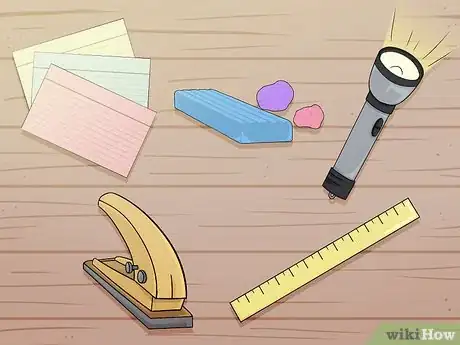
1Gather your materials. This experiment will allow you to create a light pinhole, which will show you how light travels in a straight line by filtering it through a hole. To create a light pinhole, you will need the following supplies:[1]
- Three index cards.
- A piece of modeling clay or sticky tack. You can also use double sided tape.
- A flashlight or a laser pointer.[2]
- A hole puncher.
- A ruler.
-
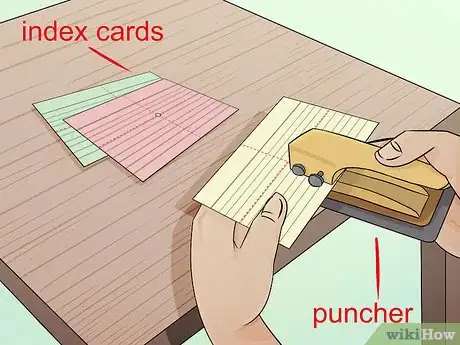
2Punch a hole in the center of the index cards. To do this without any excessive measuring, use the ruler to draw two diagonal lines on an index card that connect the opposite corners of the card. Repeat this for the other two cards.
- Take the hole puncher and punch a hole at the center of the card where the two lines intersect. Do this for the other two cards.
Advertisement -
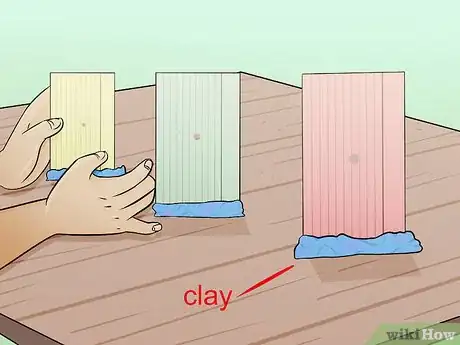
3Use the modeling clay to stand up the cards. The cards need to stand vertically, at equal distance from each other, and in a straight line for this experiment to work.
- Form a stand for the cards using the clay so the cards are straight and upright. Use the ruler to ensure the cards are two to five inches from each other.
- You can also use double sided tape to attach the cards to a surface in a vertical position. Do not cover or obstruct the hole in the center of the cards with modeling clay or tape.
-
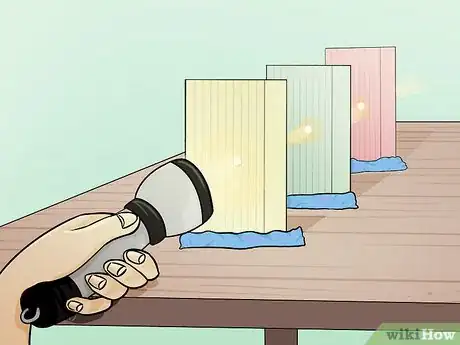
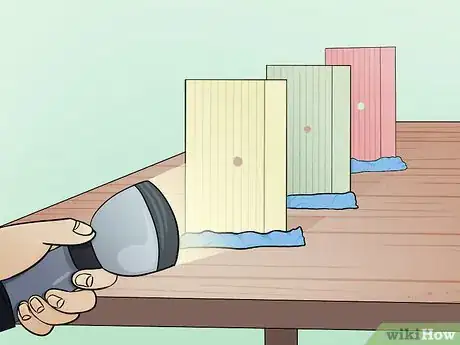
4Position the flashlight or the laser pointer at one end of the row of cards. Hold the flashlight in your hand so it hits the center of the hole in the first card. Turn on the flashlight or the laser pointer.
- Note that the light can be seen through all the holes. You should be able to see the light go through all the holes and land on a wall or surface beyond the last index card.
-
5Move the flashlight or laser pointer so it does not hit the center of the first card. You will note that the light does not travel beyond the card. This illustrates that light will travel in a straight line when it hits a non reflective material like the index card.
Using a Mirror and a Flashlight
-
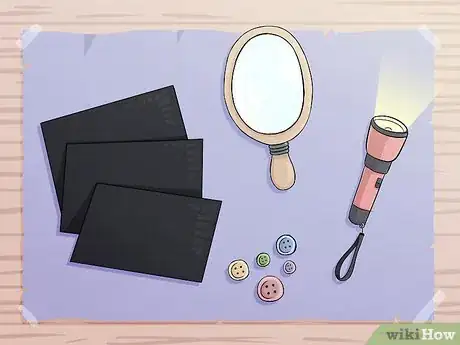
1Gather your materials. This experiment will use the reflection of light on objects to show how light moves in a straight line. You need to conduct this experiment with someone else, as one person will hold the flashlight and one person will hold the mirror. You will need the following supplies:[3]
-
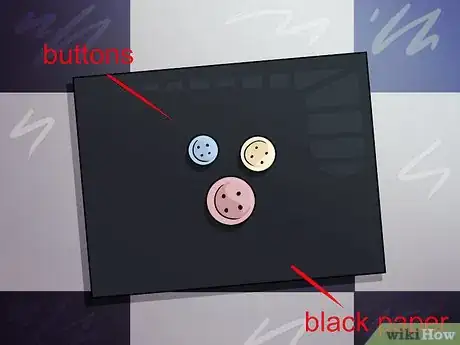
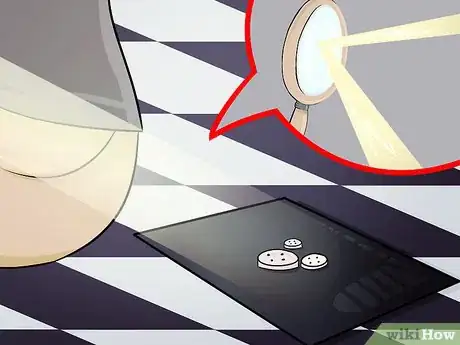
2Place the objects on the black paper. Lay the black paper down on the ground in a lowly lit room or, if possible, a dark room. Then, place two to three small objects in the center of the paper.
-
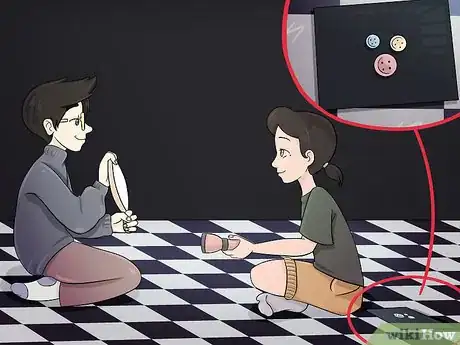
3Have one person hold the flashlight and one person hold the mirror. The person with the flashlight will sit in front of the objects with her back to the objects.The other person will hold the small mirror so it is facing the objects.
-
4Turn on the flashlight. The person will then turn on the flashlight so it is shining away from the objects.[6]
- The other person will use the small mirror to reflect the flashlight so it hits the objects. Move close to the light, at an angle, to catch the light so it hits the objects.
- You may need to position more than one mirror to create a light path that shines on the objects. Play around with reflecting the light on the mirrors until the light hits the objects. You can also move the objects around the room to create a more complicated light path, using the flashlight as the light source.
- This experiment shows that light travels in a straight line in the air. But it also bounces off of a reflective surface, like a mirror. The angle of the light as it bounces off the mirror will be the same as the angle of the light as it hits the mirror. The mirror reflects the light and changes its path from a straight line to an angled straight line.
Using Water and Oil
-
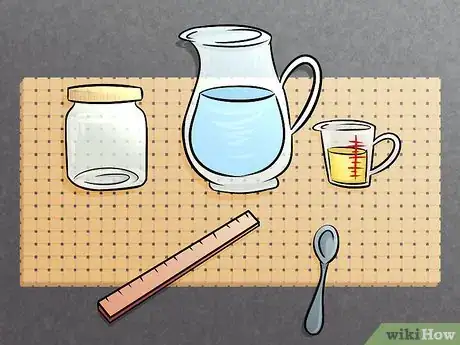
1Gather your materials. This experiment will illustrate that light travels in a straight line in the air but it will bend when it hits a certain surface, like water and oil. To conduct this experiment, you will need:[7]
- A large glass jar.
- Access to water.
- One cup of oil.
- A ruler.
- A spoon.
-
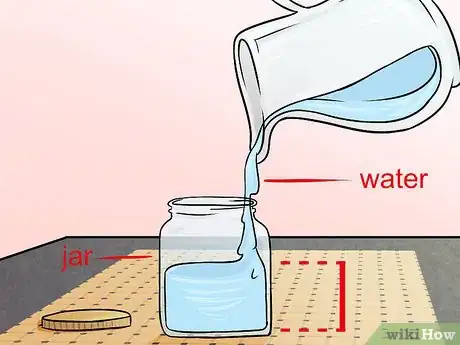
2Pour water into the jar. Fill the jar halfway with water.
- Make sure the jar is large enough to fit the ruler.
-
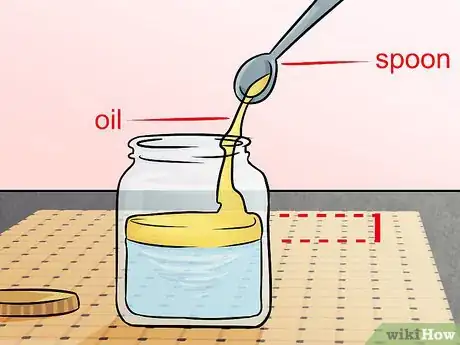
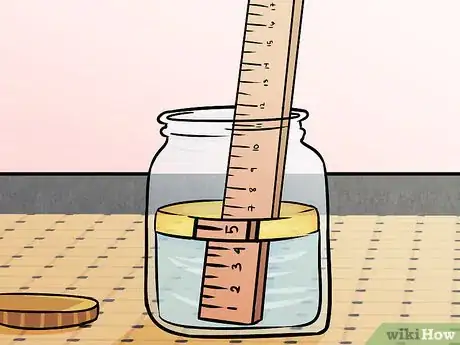
3Use a spoon to run the oil over the surface of the water. Spoon oil into the jar so it forms a solid layer of oil on the surface of the water.
-
4Place the ruler in the water. Position it so it is vertical in the water and you can see the numbers on the side of the ruler.[8]
- Note that the numbers appear stretched or magnified as the light rays bend in the oil and the water. Move the ruler from side to side to note the different appearances of the ruler numbers in the oil and in the water.
- This will show that light travels at different speeds in different mediums, such as air, oil, and water. It will travel in a straight line in the air, but it will bend when it changes speed due to contact with a certain medium, like oil or water.
Expert Q&A
-
QuestionHow do you teach students about light?
 Chris Hasegawa, PhDDr. Chris Hasegawa was a Science Professor and the Dean at California State University Monterey Bay. Dr. Hasegawa specializes in teaching complex scientific concepts to students. He holds a BS in Biochemistry, a Master’s in Education, and his teaching credential from The University of California, Davis. He earned his PhD in Curriculum and Instruction from The University of Oregon. Before becoming a professor, Dr. Hasegawa conducted biochemical research in Neuropharmacology at the National Institute of Health. He also taught physical and life sciences and served as a teacher and administrator at public schools in California, Oregon, and Arizona.
Retired Science Professor & Dean Teach them by sending light through different pairs of glasses! Then, observe what happens as the light goes through. This might inspire your students to ask more questions about light and vision.
 -
QuestionWhat does the experiment prove about how light travels?
 Community AnswerIt proves that it travels in a straight line as the title of the article says.
 -
QuestionHow do I demonstrate the recombining of colors of the spectrum into white light?
 Community AnswerPass a light through a prism to disperse the colors, then pass the dispersed light through an upside down prism to recombine the colors.
Things You'll Need
Making a Light Pinhole
- Three index cards.
- A piece of modeling clay or sticky tack. You can also use tape.
- A flashlight or a laser pointer.
- A hole puncher.
- A ruler.
Using a Mirror and a Flashlight
- Two to three sheets of black paper.
- A flashlight.
- A small mirror.
- Small objects like buttons, bottle caps, or dimes.
Using Water and Oil
- A large glass jar.
- Access to water.
- One cup of oil.
- A ruler.
- A spoon.
References
- ↑ http://www.ducksters.com/science/experiment_light_travel.php
- ↑ Chris Hasegawa, PhD. Retired Science Professor & Dean. Expert Interview. 29 July 2021.
- ↑ https://www.science-sparks.com/science-fair-projects-light-maze/
- ↑ Chris Hasegawa, PhD. Retired Science Professor & Dean. Expert Interview. 29 July 2021.
- ↑ Chris Hasegawa, PhD. Retired Science Professor & Dean. Expert Interview. 29 July 2021.
- ↑ https://www.science-sparks.com/science-fair-projects-light-maze/
- ↑ https://www.scientificamerican.com/article/now-you-see-it-testing-out-light-refraction/
- ↑ https://www.scientificamerican.com/article/now-you-see-it-testing-out-light-refraction/
