This article was co-authored by wikiHow Staff. Our trained team of editors and researchers validate articles for accuracy and comprehensiveness. wikiHow's Content Management Team carefully monitors the work from our editorial staff to ensure that each article is backed by trusted research and meets our high quality standards.
There are 11 references cited in this article, which can be found at the bottom of the page.
This article has been viewed 54,648 times.
Learn more...
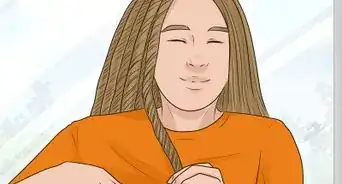
Using cowrie shells to adorn your dreads (or locs) is a super popular choice, and it’s also fairly simple to do at home. You’ll need cowrie shells, a bobby pin, and small hair elastics. With a little bit of patience, you’ll be able to add shells to both the ends and middle sections of your dreads in no time!
Steps
Putting Shells on the Bottom of Your Locs
-
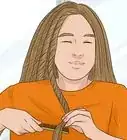
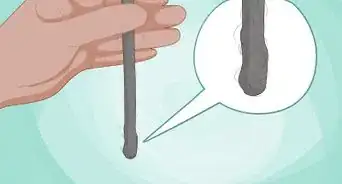
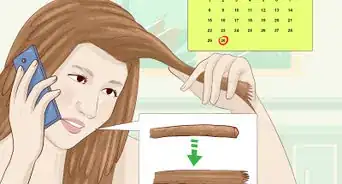
1Pierce the bottom of a thinner dread with a bobby pin. Pick a dread that has a softer, rather than a harder, end. Often times, if wax or other products are used on dreads, it can create stiff sections, so try your best to find an end that has a little bit of give when you squeeze it. Take one side of the bobby pin and push it through the dread, about 1⁄4 inch (0.64 cm) from the end.[1]
- Avoid using bigger dreads for this method, as the end of the dread needs to be thin enough to fit through the hole in the cowrie shell.
Tip: This method also works really well for sisterlocks, which are dreads that are about half the size or less of traditional locs.[2]
-
2Thread the bobby pin through the hole in the center of the cowrie shell. Once the bobby pin is attached to your dread, take both ends and push them straight through that center hole in the shell. It doesn’t matter which side of the shell is facing out.[3]
- Some cowrie shells don’t have holes through their centers. Buy ones that are “sliced” so that you can easily add them to your dreads.
Advertisement -
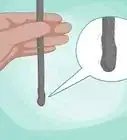
3Work the shell up the bobby pin and over the end of your dread. Once the shell reaches the end of your dread, gently pull the tip of the hair through the shell about 1⁄4 inch (0.64 cm). Avoid yanking your hair and instead gently wiggle it back and forth until the end comes through the shell.[4]
- If you yank too hard or are too aggressive, you risk splitting or fraying the end of your dread.
-
4Remove the bobby pin from your dread. Leaving the shell in place on the end of your dread, simply push the bobby pin out of your loc. Set it down on the counter or somewhere it won’t get lost.[5]
- Be careful to not accidentally snag the shell on anything at this stage—it could easily come off your dread and make you have to repeat the process all over again.
-
5Fold the end of your dread up over the edge of the shell. Take the end of the dread that is poking through the cowrie shell and bring it up so it meets the rest of your dread. If you find you need a little more length, go ahead and gently tug your dread through the shell a little bit further.[6]
- You may be tempted to just leave the shell dangling on the edge of your dread, but don’t skip the last step. Otherwise, you might find yourself losing shells as you go about your day.
-
6Secure the shell by wrapping a small elastic around your dread. Take a small hair elastic and wrap it around the section of hair just above the cowrie shell. Depending on how thick your dread is, wrap the elastic around 3 to 4 (or more) times. Take the shells out when you tire of the look or when it comes time to wash your dreads.[7]
- Try to use an elastic that matches your hair color if you don’t want the elastic to be noticeable.
- For a fun twist, try using colored elastics in an array of colors, or you could even match them to your outfit for the day.
Tip: If you want to put more than 1 shell on a dread, use the mid-dread method to add any additional ones.


Placing Mid-Dread Shells
-
1Thread a small hair elastic through the hole in the center of the shell. Take a single hair elastic and push one end through the center of the cowrie shell so that half of the elastic is coming out the front and half of it is coming out the back. This can be a little tricky since the elastic is so small, so take your time and be patient![8]
- If you are having a hard time getting the elastic through, try threading a bobby pin through the elastic and pushing that through the shell. Just remember to remove the bobby pin once the elastic is in place.
-
2Create a knot by looping one end of the elastic over the other one. Essentially, you’ll want to pass one side of the elastic underneath and through the other side and then pull it tightly so that it creates a circle. Do your best to keep a finger through the circle so that you don’t lose hold of the elastic.[9]
- When this is done, the cowrie shell should resemble a hair tie with a bead or bobble attached to it.
-
3Pick a position for the cowrie shell on one of your dreads. The great thing about this method is that it allows you to place the shell wherever you would like, from the top to the middle to the bottom. You can really have fun placing them all over your hair in different positions for a cool look.[10]
- You can also add multiple shells to the same dread using this method.
Did You Know: The cowrie shell used to be used as currency in West Africa. The shells lost their monetary value around the turn of the 20th century; however, many West Africans held onto the cowrie as their form of currency well into the 1940s.
-
4Secure the shell by wrapping the elastic around your dread a few times. Once you’ve picked the place for your shell, simply thread your dread through the elastic. Depending on how thick your dread is, you may need to wrap the elastic around it 2 to 3 times (or more, if you have really thin dreads). You can leave your shells in place for a day or until you tire of the look or need to wash your hair.[11]
- When you’re ready to remove the shell, you can simply undo the elastic, or you could carefully cut the elastic with a pair of scissors to release the shell.


Things You’ll Need
Putting Shells on the Bottom of Your Lots
- Cowrie shells
- Bobby pin
- Hair elastic
Placing Mid-Dread Shells
- Cowrie shells
- Hair elastic


References
- ↑ https://youtu.be/CcJtfO6Rgvk?t=160
- ↑ https://youtu.be/eB9FmF51qqc?t=27
- ↑ https://youtu.be/7SvP27vthO0?t=59
- ↑ https://youtu.be/7SvP27vthO0?t=66
- ↑ https://youtu.be/CcJtfO6Rgvk?t=207
- ↑ https://youtu.be/CcJtfO6Rgvk?t=214
- ↑ https://youtu.be/7SvP27vthO0?t=76
- ↑ https://youtu.be/CcJtfO6Rgvk?t=263
- ↑ https://youtu.be/CcJtfO6Rgvk?t=372
About This Article