This article was co-authored by Michael Metz. Michael Metz is a Golf Instructor and the Director of Instruction at Simi Hills Golf Course. With more than 15 years of experience, Michael is adept at coaching all facets of Golf. Mike uses technology, such as Flightscope, V1 Swing Suite, Blast Motion, and BodiTrak pressure mapping, to provide advanced golf training with quick results.
There are 11 references cited in this article, which can be found at the bottom of the page.
wikiHow marks an article as reader-approved once it receives enough positive feedback. In this case, 93% of readers who voted found the article helpful, earning it our reader-approved status.
This article has been viewed 75,383 times.
Sinking a putt is the last step to finishing off a hole in golf. Also called the “short game,” the basics of putting are different from other swings you will take with your clubs, but are easy to learn. Learning to read the green and adding some tricks to your practice routine can help make your efforts more consistent and reliable. While simple to do, putting is difficult to master, and learning to sink your putts consistently can be the difference between a good round and a great round.
Steps
Swinging Your Club
-
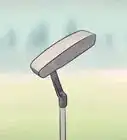
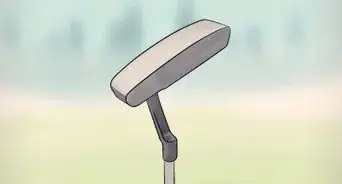
1Get a golf ball, a putter, and somewhere to putt. The best spot would be a real putting green, however an indoor putting mat or even making a makeshift practice mat with a cup would work as well.
-
2Read the green (or whatever surface you are working on). To do this, first, take a look at the green while you are approaching the area to get a sense of what the green may be doing.
- When approaching the ball, squat down. This will help see if the ball is going to be traveling uphill or downhill, and also if it has any left or right breaks in its path the hole. [1]
Advertisement -
3Line the golf ball up. Think of this as choosing your target. Choose a target that is close to your ball to aim at that is also in line with the path you would like the ball to follow. Use the line on the ball to perfectly aim the ball to the target.
- Choosing a spot to aim at closer can help keep the ball more on the line compared to aiming somewhere farther. [2]
-
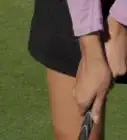
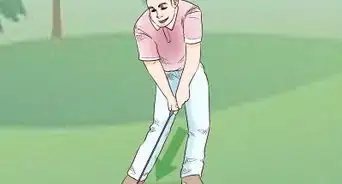
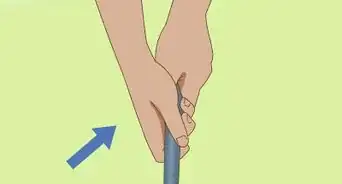
4Grip the putter. Use your fingers to grab hold of the putter handle, with your strong hand lower on the club. That is, if you play right-handed, your left hand should be at the top of the club. Having your fingers grip the handle will give you greater feel for the club and your actions, which creates better control.[3] The grips is different if you are left-handed or right-handed.
- Right-handed: Take your right hand and place it at the bottom of the grip, and have your thumb pointing down towards the bottom of the putter. Wrap your left hand above the right, and allow a bit of overlapping. [4]
- Left-handed: Take your left hand and place it at the bottom of the grip, and have your thumb pointing down towards the bottom of the putter. Wrap your right hand above the left, and allow a bit of overlapping.
- Make sure your thumbs are aligned.
- Keep your grip neutral. Avoid strong or weak grips.
-
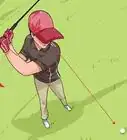
5Get in your stance. This is the way you approach (or “address”) the ball and stand over it. Stand up straight with your arms extended forward, holding your putter. Draw your elbows into your rib cage, then bend over until your putter head rests right behind the ball.[5]
- Make sure you bend your knees slightly. Stiff legs will give you less freedom of movement.
- Another way to help your posture while practicing is to find the ideal distance to stand from the ball. Professional golfers stand with their toes, on average, 2.5 putter head lengths from the ball. Try anywhere from 2 to 2.75 lengths when practicing to find the most comfortable distance for you.
-
6Line shoulders up. It is vital to make sure that time is taken into lining up the body, because if your body is not properly lined up but you have a perfect line, the ball will most likely not go into the hole. Ensure that your shoulders are square to the target that are aiming at.
- A helpful strategy to help with squaring the shoulders is to put either an alignment stick or a golf club across your shoulders. This technique will give immediate feedback on where exactly your shoulders are aiming. [6]
-
7Line feet up. Once the shoulders are lined up, it will help with lining up the feet as well. You want to make sure your feet are aligned with your shoulders, and they are aiming both towards the same target.
- A helpful strategy to help with squaring the feet is similar to the strategy for squaring the shoulders. Lay either an alignment stick or a golf club on the ground in front of your toes so that it tells you where exactly your feet are aiming. [7]
-
8Keep your head over the ball. Your posture and stance width can change depending on the green slope, your aim, or various other factors. The important part of your positioning should be that you head is directly over the ball. Lifting your head after putting the ball can ruin a perfectly lined up ball and squared body. Lifting your head will risk lifting your head too soon, which may unalign your feet, shoulders, or the face of the putter.
- If you aren’t sure about your posture, imagine dropping a ball from between your eyes straight down. It should land directly on top of the ball you want to putt. Of course, don’t actually do this during a round.[8]
-
9Align the putter. Now that both the feet and shoulders are aligned, aligning the putter should not be difficult. To align the putter, line up the line on the putter with the line on the ball to make sure that it is perfectly in line with your target.
- Using the line on the ball and the putter helps with making sure the face of the putter is square and in line with the ball and your body. [9]
-
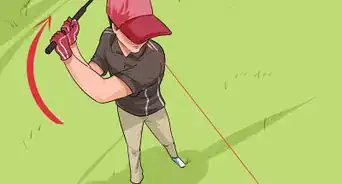
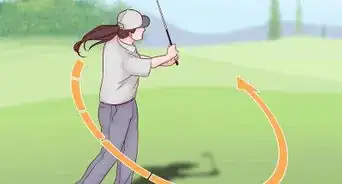
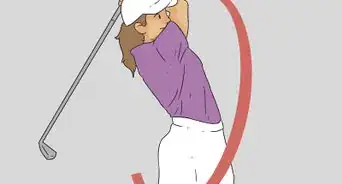
10Swing your club. Your swing should be smooth and unhurried. Focus less on striking the ball, and instead push it toward the hole to get a good role. Putting isn’t about power in the same way that shot from other parts of the course are.[10] [11]
- Keep your shoulders level and wrists firm. When you swing, make sure that all the motion is in your arms. Keeping your shoulders and wrists from moving will give you greater control and accuracy.[12]
- The speed and distance of your backswing and follow-through should be equal. Pulling your follow through short or long will cause you to lose control of the putt.[13]
- A wider stance will give you a longer backswing. The farther away you are from the hole, the wider your swing should be.
-
11Putt the ball. Before actually hitting the ball, you want to make sure that you are standing over the ball. Standing over the ball makes sure that the face of the putter stays square through the entire stroke. It also helps with making sure that you are rocking your shoulders instead of flicking your wrist. When putting, you have the most control when you use your shoulders instead of the wrists. [14]
- Once you are standing over the ball, you are ready to putt the ball.The speed that you move the putter and also distance in both the backswing and follow through should be the same.


Reading the Green
-
1Stand behind the ball. Reading the green means trying to figure out what your ball will do as it travels along the green toward the hole. Start your read by crouching 3 feet behind the ball. Look at the surface of the green, seeing where it dips and rises.[15]
-
2Look up the green. If you are facing a putt that is going to go downhill, it can be helpful to read the green by looking “up” towards your ball. Looking down the green can make the hole appear farther away than it is, which will lead to you striking the ball too hard. Stand behind the hole and look towards your ball to get a sense of the downslope.
- Keep in mind the lowest spot on the green is where the water would pool.
-
3Focus on the area closest to the hole. While you want your reading to examine as much of the putting line as possible, you want to pay special attention to the last part of the putt. When you first strike the ball, the break of the green matters less because your ball is moving fastest. As it slows down, the slope will have a greater influence.[16]
- One way to get a closer look at this part of the green is to stand between your ball and the hole so you can get closer to the area you want to examine.
-
4Find a horizon. When you look over the green, try to find a flat line in the background to judge the green’s slope. This can be anything you see on the course, including eaves and windows on the clubhouse, benches, or bodies of water. This horizontal line will give you a reference point when tracking the break of the green, especially left to right.
- If you can’t find a natural horizon in the distance, use the brim of your cap or visor. Even more effective can be curling your hands around your face, fingers above your eyebrows, which will help block out your peripheral vision.
-
5Focus on the edge of the cup. When you start visualizing the break on the green, imagine how you see the ball rolling into the hole. Consider the hole as a clock face, with “12” being the back of the cup and “6” at the front. As you start to address the ball, turn your body so that your putt will aim in that direction.
- The way edge that the ball will roll into is dependent on a variety of factors, particularly the lay of the green. Use the sloping of the green to inform your prediction of how the ball should fall into cup.


Improving Your Putting
-
1Avoid staring at the ball. When putting, your instinct will be to look at the ball to make sure you don’t miss when swinging. Instead of locking onto the ball, focus on a spot an inch or two in front of the ball on the line you intend to putt. This will help you to think about the direction you are trying to go in, which should give you a better focus on the putt itself, rather than just striking the ball.[17]
-
2Use a training aid to keep your putts straight. You want your putting motion to be as straight as possible. When practicing, give yourself a guide to help train yourself the correct motion. Lay a stick down perpendicular to your club and behind the head. Practice your swinging motion along this straight line to get the right feel.[18]
- This is a good tip to help with the basic motion of putting, but this should really only be a helpful reminder.
-
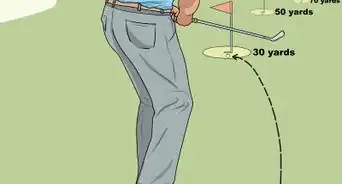
3Practice from a variety of distances. Because of the size of greens, you will probably be putting from many distances, including ranges of 30 to 40 feet away. When you get time on the practice green, make sure you try to sink putts from different ranges. This will help you get more familiar with how much power you need for putts of different lengths.
-
4Be aggressive when putting. When you are on the course, you should try to sink every putt you have, no matter how far it is. Trying to lay one close to or short of the hole is just setting yourself up to do it again, and a putt left short is a stroke lost. Aggressiveness can help you be more confident, especially if those longer putts start going in.
- If you go too far, you can always watch the roll afterward to get a quick look at the slope of the green beyond the hole. If you come up short, you’ll have to check that last bit of the green again without the benefit of watching the ball travel along it.


Expert Q&A
-
QuestionHow do you know how long a putter should be?
 Michael MetzMichael Metz is a Golf Instructor and the Director of Instruction at Simi Hills Golf Course. With more than 15 years of experience, Michael is adept at coaching all facets of Golf. Mike uses technology, such as Flightscope, V1 Swing Suite, Blast Motion, and BodiTrak pressure mapping, to provide advanced golf training with quick results.
Golf InstructorYou should be fitted. Your waist height, inseam and how low your hands are will all be taken into account. -
QuestionHow can I tell how much power I should put into a putt?
 Community AnswerIt depends on the distance you are from the hole; the further away you are, the harder you have to hit the ball.
 -
QuestionI'm a golfer and my dad is really good. He says I should putt softly because I don't want to get it past the hole. Is this true?Community AnswerNo, short putts have no chance of falling. Always aim 6 inches past the hole.

References
- ↑ https://www.golfspan.com/how-to-read-green
- ↑ https://projectgolfau.com/how-to-line-up-putts-in-golf/
- ↑ http://www.golfdigest.com/story/putting-dave-stockton
- ↑ https://projectgolfau.com/golf-putting-grip-styles-techniques/
- ↑ http://www.golf.com/instruction/how-putt-tour-pro
- ↑ https://projectgolfau.com/how-to-line-up-putts-in-golf/
- ↑ https://projectgolfau.com/how-to-line-up-putts-in-golf/
- ↑ http://www.golfdigest.com/story/dave-stockton-putt-like-the-pros
- ↑ https://projectgolfau.com/how-to-line-up-putts-in-golf/
- ↑ http://www.golf.com/instruction/how-putt-tour-pro
- ↑ http://www.golfdigest.com/story/putting-dave-stockton
- ↑ http://www.golfdigest.com/story/dave-stockton-putt-like-the-pros
- ↑ https://www.insidescience.org/content/how-science-helps-golfers-drain-those-tricky-putts/2916
- ↑ https://golftoday.co.uk/posture-is-the-key-to-putting/
- ↑ http://golftips.golfsmith.com/read-putting-greens-20257.html
- ↑ http://www.golf.com/instruction/5-secrets-holing-more-putts
- ↑ http://www.golfdigest.com/story/putting-dave-stockton
- ↑ http://www.golftipsmag.com/instruction/quick-tips/5-ways-to-putt/
About This Article

To putt a golf ball, start by crouching down behind the ball and taking note of any dips and rises on the green. Use the layout of the green to decide which direction and speed to hit the ball. For example, if the green is sloping downward to the right, you'd want to use less force and hit the ball to the left so it travels toward the hole. Once you've assessed the green, place the head of your putter right behind the ball. Grip the putter so your strong hand is on the bottom, and stand up straight with your knees bent slightly. You should also move your head so it's directly over the ball. When you're ready to swing, pull back slightly on the club. Then, use a smooth, steady motion to push the ball toward the hole.