This article was co-authored by Ed Beery. Ed Beery is an Automotive Specialist and the Owner of InTechgrity Automotive Excellence based in Denver, Colorado. With more than eight years of experience, he specializes in providing maintenance and repair services for both individuals and companies. Ed and the InTechgrity Automotive Excellence Team are approved by the American Automobile Association (AAA) for repairs and are Automotive Service Excellence (ASE) certified.
This article has been viewed 367,246 times.
Rebuilding an alternator is a fairly simple procedure, which anyone with basic automotive knowledge can accomplish. Although the construction of some brands will vary slightly, the basic anatomy of an alternator consists of the same components.[1] Follow these steps as you learn how to rebuild an alternator.
Steps
-
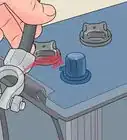
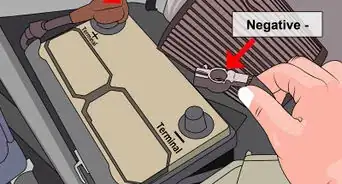
1Disconnect the battery leads.[2]
-
2Remove the air cleaner for easier to access the alternator.Advertisement
-
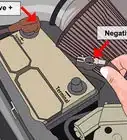
3Mark the placement of the electrical leads before removing them.
-
4Disconnect the electrical leads.[3]
-
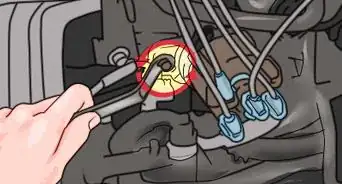
5Remove the vehicle's serpentine belt.[4]
-
6Remove the mounting bolts and familiarize yourself with their placement.
-
7Pull the alternator out.
-
8Remove the plastic cover from the back of the unit by unscrewing it.
-
9Inspect the bearing. If it does not seem snug, or makes noise when it spins, it will have to be replaced.
-
10Replace the bearing, if necessary, before moving on.
-
11Undo the screw which holds the resistors in place.
-
12Pay careful attention to the placement of each wire before disconnecting any.
-
13Replace the rectifier by prying out the soldered leads and then undo the mounting screws.
-
14Pull the rectifier out.
-
15Install the new rectifier by replacing the mounting screws. Solder the lead wires to reconnect them.
-
16Reinstall the screw which separates the rectifier from the brush assembly.
-
17Replace the brushes by first undoing the screws which hold each brush assembly in place. Remove the brushes from their channels.
-
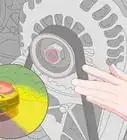
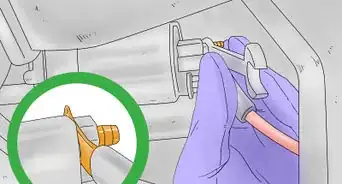
18Clean the area of the armature shaft that the brushes contact.
-
19Assure that the spring for each new brush is directly at the back, pushing into the brush slot. Install the replacement brushes.
-
20Remove the voltage regulator by first removing the screw from the bottom brush assembly. Remove the screw that holds the lead into the grounding screw.
-
21Install the replacement voltage regulator by replacing the screws mentioned in the previous step.
-
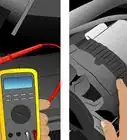
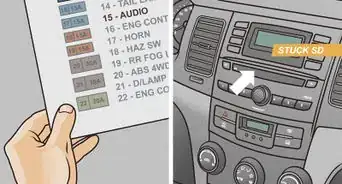
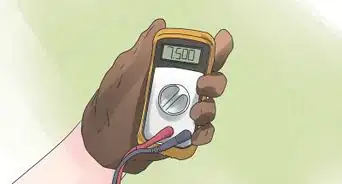
22Use an ohmmeter or a multimeter to assure that the diodes are receiving the proper current.[5]
-
23Replace the plastic cover as well as both of the resistors.
-
24Put the alternator back in the vehicle.
-
25Reconnect the electrical leads assuring that you're installing them properly.
-
26Replace the serpentine belt.[6]
- When the belt is properly seated in the various pulleys, slowly adjust the tension of the belt release the ratchet, allowing the tensioner to once again place tension on the bel
-
27Reinstall the air cleaner and verify that the belt tension and mounting bolts are right.
-
28Inspect the heat shield at the back of the alternator to verify that it is properly installed.
-
29Reinstall the battery leads.


Community Q&A
-
QuestionWhere do I buy the alternator kit for a 1997 BMW?
 Community AnswerIf you know how to rebuild it, look for the rebuild kit in your local auto parts store or go on car-parts.com. You can buy a used one with warranty for less than what you would pay for a new one or a remanufactured one.
 -
QuestionHow do I fix the alternator of a 2004 Honda CRV?
 Community AnswerYou're better off replacing your alternator instead of fixing it.
 -
QuestionWhat if it is not charging the battery?Community AnswerRemove one of the battery terminals, if the car turns off, most likely it's the alternator. If you can drive it, go to the mechanic or auto parts store, they will most likely check it for free. The meter should read 14 amps while it's running, don't let them sell you an alternator and find out later it was the battery.


References
- ↑ https://medium.com/@rajamanehegdeseo/what-is-alternator-and-its-construction-a328f80f9e65
- ↑ https://www.instructables.com/Cheap-and-Easy-Car-Alternator-Repair/
- ↑ https://www.familyhandyman.com/automotive/how-to-replace-an-alternator/
- ↑ https://www.familyhandyman.com/automotive/changing-a-car-serpentine-belt/
- ↑ https://www.instructables.com/Cheap-and-Easy-Car-Alternator-Repair/
- ↑ https://shop.advanceautoparts.com/r/advice/car-maintenance/how-to-replace-alternator
- http://www.econofix.com/alt.html#arb
About This Article