This article was co-authored by Ed Beery. Ed Beery is an Automotive Specialist and the Owner of InTechgrity Automotive Excellence based in Denver, Colorado. With more than eight years of experience, he specializes in providing maintenance and repair services for both individuals and companies. Ed and the InTechgrity Automotive Excellence Team are approved by the American Automobile Association (AAA) for repairs and are Automotive Service Excellence (ASE) certified.
There are 7 references cited in this article, which can be found at the bottom of the page.
wikiHow marks an article as reader-approved once it receives enough positive feedback. In this case, 100% of readers who voted found the article helpful, earning it our reader-approved status.
This article has been viewed 466,257 times.
The vehicle’s alternator supplies power to recharge the battery and operate its electronics. If your vehicle begins showing signs of reduced power like dimming headlights or interior lighting, you can have your alternator tested for free at most auto parts stores. If it can’t produce enough current to keep your battery charged and car running, it will need to be rebuilt or replaced.
Steps
Disconnecting the Alternator
-
1Park the car on an even, level surface. Any time you plan to work on your vehicle, safety is paramount. Because you may need to jack the vehicle up, make sure it’s parked on a surface that’s suitable for the work. It should be evenly paved and flat.[1]
- Even if you don’t have the jack the car up, it’s easier to work on an even surface.
- Ensure the vehicle is park, or has the parking brake engaged (if equipped with a standard transmission).
-
2Disconnect the battery. Find the right socket to loosen the bolt that keeps the cable on the negative terminal tight. It’s the terminal of the battery with a visible (-) sign. Once it’s loose, slide the cable off the terminal to disconnect the battery. Never work in the engine bay of a vehicle without first disconnecting the battery for safety.[2]
- Working on the alternator without disconnecting the battery could result in getting shocked or damaging the vehicle.
- You can leave the positive cable attached.
Advertisement -
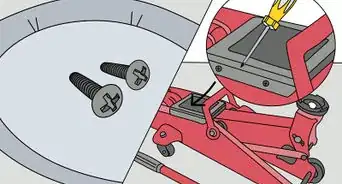
3Jack the vehicle up if necessary. Follow the serpentine or accessory belts to locate the alternator in your engine bay. Depending on the vehicle, it may be on the top closest to you, or it may be on one of the sides and difficult to access. If you can’t easily access it from the engine bay, you’ll need to jack up the vehicle.[3]
- Be sure the parking brake is on and the wheels are blocked before you jack it up.
- Insert jack stands beneath the vehicle for safety once it’s jacked up.
-
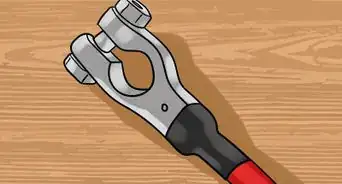
4Remove the main power cable from the alternator. The main power cable will be the thick cable attached to the alternator that runs from the battery. Depending on how much space you have in your specific vehicle, you may be able to use a ratchet, but in some, you may only be able to fit an open-ended wrench. Unscrew the bolt holding it in place and pull it from where it’s connected.[4]
- The bolts will likely require standard sized sockets or wrenches in American made vehicles, and metric in most foreign applications.
- The only other cable running to the alternator connects to a harness, so it will be easy to identify.
- Set the bolt aside someplace safe until you install the new alternator.
-
5Release the safety clip connecting the wiring harness. The only other wiring heading into the alternator is the control harness. Use your finger or a flat head screwdriver to release the clip holding the harness together, then slide it apart.[5]
- Be careful if you use a screwdriver to get to hard to reach clips so you don’t break the plastic.
- Tuck the loose wire aside so it doesn’t snag on the alternator when you remove it.


Removing the Old Alternator
-
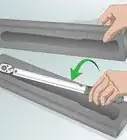
1Relieve tension on the belt with the auto-tensioner (if equipped). Some vehicles use the alternator itself to apply tension to the serpentine or accessory belt, but others use an auto tensioner pulley. Insert the square drive from a breaker bar into the hole in the auto-tensioner pulley and apply pressure in a clockwise direction to relieve tension on the belt.[6]
- You can tell if your vehicle uses an auto-tensioner by looking at the alternator mounting bracket: if the bolts can slide from side to side in the bracket, it does not have an auto-tensioner.
- You will need to slide the belt off the alternator pulley before you release the auto-tensioner.
- Prior to making any changes, take photos of the belt set up so tha you know exactly how the belt should be routed around the various pulleys.
- In some cars, you might need a friend to relieve the tension while you remove the belt.
-
2Loosen the bolts on the alternator if there is no auto-tensioner. In cars without an auto-tensioner pulley, you can relieve the tension on the belt simply by loosening the two bolts that secure the alternator to the engine. These will often require a 14mm or 1⁄2 inch (1.3 cm) socket, though you may need to try others.[7]
- As you loosen the bolts, the alternator will slide in the bracket under the tension of the belt.
- Only loosen the bolts, but do not remove them!
- You may not need to remove the serpentine or accessory belt if it’s not damaged.
-
3Inspect the serpentine belt for damage. Look for signs of glossing or glazing (shinier portions) on the edges and underside of the belt. Inspect both the top and underside for signs of cracking as well.
- If you find any of those issues, you’ll need to replace it.
-
4Remove the alternator from the engine bay. With the belt pulled off of the alternator pulley and the wires disconnected, the alternator should come out freely.[8]
- You may need to wiggle the alternator around some things in order to remove it.
- Keep track of how you worm the alternator out of the engine bay to help squeeze the new one in.
-
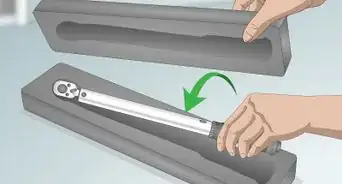
5Compare the new alternator to the old one. Before installing the new alternator, set it down on a table next to the old one you just removed. Make sure the mounting holes and wire connectors are in the same place and that the two parts are the same size.[9]
- Even if you provided specific information when purchasing the alternator, this step is important to make sure they provided you with the correct part.
- If they don’t match, return the new alternator to the auto parts store to get the correct replacement.


Installing the New Alternator
-
1Slide the new alternator into place. You might have to wiggle the alternator around to squeeze it back into place in a crowded engine bay. Be sure to hold loose wires or the serpentine belt out of the way as you get it into place.[10]
- Be careful not to trap any wiring behind the alternator as you slide it into place.
- Watch out for the serpentine belt as you slide the alternator into place to be sure you don’t damage it.
-
2Insert the mounting bolts. Slide the mounting bolts through the alternator and into the mounting bracket. Tighten them by hand until they’re snug. In cars with an auto-tensioner pulley, you can completely tighten the bolts at this point, otherwise keep the bolts loose.[11]
- You’ll need to tighten the belt using the alternator later if you don’t have an auto-tensioner.
- Make sure the bolts are snug enough to hold the alternator in place, but loose enough to slide side to side in the bracket.
-
3Run the belt over the new alternator pulley. Either install the new belt or run the old belt back through all of the appropriate pulleys. If you aren’t sure how to properly route the belt, use the photos you have previously taken. You can also look for a diagram on the body of the car inside the engine bay to guide you. The belt will need to go around any accessories it is supposed to power in your specific vehicle.[12]
- Keep the tensioner loose with pressure on the ratchet. When the belt is properly seated in the various pulleys, slowly release the ratchet, allowing the tensioner to once again place tension on the belt.
- If there is no diagram stuck in the engine bay, you may also be able to find the diagram in your vehicle owner’s manual.
- You might also be able to find the diagram on the manufacturer’s website.
-
4Apply tension to the alternator with a pry bar if necessary. If your vehicle does not have an auto-tensioner pulley, apply pressure to the alternator using a large screwdriver or pry bar until the belt is tight. Place the pry bar between the alternator and the engine, and push the alternator out, away from the engine.[13]
- Be careful not pinch or cut any wires with the screwdriver or pry bar.
- You or a friend will need to continue applying pressure until the bolts are tightened.
-
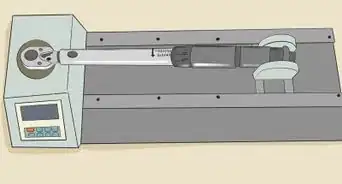
5Tighten the bolts and the belt. With tension on the belt applied via the alternator and pry bar, use the appropriate socket and a ratchet to tighten the two mounting bolts up the rest of the way. This will allow the alternator to keep the tension on the belt.[14]
- Make sure that the serpentine belt has less than an inch of play back and forth once installed.
- If the belt is a little loose, loosen the bolts and apply pressure again using the pry bar while you tighten them up.
- If you have taken photos of the belt, use them to make sure once again that the belt is positioned correctly.
-
6Connect the power cable and monitor harness. Reconnect the wire harness and insert the bolt that secures the main power cable to the alternator in the same order you removed them. They should install exactly as they were in the old alternator.[15]
- Make sure the primary power cable is tightened firmly onto the new alternator.
- Be sure you hear an audible “click” from the wiring harness to ensure it’s seated snugly.
-
7Reconnect the battery. With the new alternator in place, all you have left to do is reconnect the negative lead to the battery. Make sure you tighten it firmly so it can’t shake loose while driving.[16]
- If the battery is dead, you may need to jump start it.
- If the vehicle is jacked up, remove the jack stands and lower it.


Community Q&A
-
QuestionWhat is a serpentine belt tool?
 Community AnswerIt's usually a long ratchet or "breaker bar" used to loosen the bolt on the belt tensioner so that the serpentine belt becomes loose.
 -
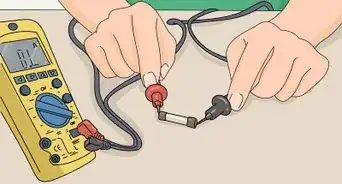
QuestionHow can I be sure that the alternator is the problem with my car?
 Community AnswerIf you aren't sure how to diagnose this problem yourself, you can take your car to the shop and have them check your alternator (even if you do the repairs yourself).
 -
QuestionHow do I change the alternator in a 1989 Cadillac El Dorado?Community AnswerChanging the alternator on most cars is generally the same. Find the alternator (has to be connected to the serpentine belt), and then look up steps to replace it. The main difference in cars is where the alternator is and how it's mounted.
Warnings
- When putting the old bolts back onto the new alternator, do not tighten them down until all have been added.⧼thumbs_response⧽
- Always allow the engine to cool down before you begin working near it to prevent burning yourself.⧼thumbs_response⧽
- Disconnect the negative battery cable before you work on any electrical parts in your vehicle to prevent shorting out the electrical system and damaging the electronics.⧼thumbs_response⧽


References
- ↑ https://www.dummies.com/home-garden/car-repair/how-to-safely-jack-up-your-vehicle/
- ↑ https://www.automd.com/13/how-to-replace-an-alternator/
- ↑ https://www.2carpros.com/articles/how-to-replace-an-alternator
- ↑ https://www.aa1car.com/library/how_to_replace_alternator.htm
- ↑ https://www.2carpros.com/articles/how-to-replace-an-alternator
- ↑ https://www.familyhandyman.com/automotive/how-to-replace-an-alternator/view-all/
- ↑ https://www.automd.com/13/how-to-replace-an-alternator/
- ↑ https://www.familyhandyman.com/automotive/how-to-replace-an-alternator/view-all/
- ↑ https://www.aa1car.com/library/how_to_replace_alternator.htm
- ↑ https://www.familyhandyman.com/automotive/how-to-replace-an-alternator/view-all
- ↑ https://www.automd.com/13/how-to-replace-an-alternator/
- ↑ https://www.2carpros.com/articles/how-to-replace-an-alternator
- ↑ https://www.aa1car.com/library/how_to_replace_alternator.htm
- ↑ https://www.automd.com/13/how-to-replace-an-alternator/
- ↑ https://www.automd.com/13/how-to-replace-an-alternator/
- ↑ https://www.2carpros.com/articles/how-to-replace-an-alternator
About This Article

To change an alternator, park the vehicle on an even, level surface, and disconnect the cable from the negative battery terminal. Locate the alternator, and jack up the vehicle if you can’t easily access it. Use a wrench or a ratchet to remove the main power cable that runs from the battery to the alternator and release the safety clip connecting the wiring harness. Remove the auto-tensioner or loosen the bolts on the alternator, then remove the old alternator and install the new one using the opposite process. Keep reading for more details on installing a new alternator!