This article was co-authored by Art Fricke. Art Fricke is a home renovation and repair specialist and the owner of Art Tile & Renovation based in Austin, Texas. With over 10 years of experience, he specializes in bathroom and kitchen renovations. Art focuses on a single contractor approach to customized renovation work, and performs projects such as installing custom tile showers, fixing tiled shower leaks, replacing cracked tiles, and installing floor and wall tile.
This article has been viewed 448,710 times.
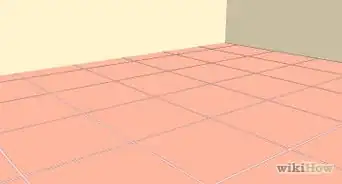
Removing tile from your floor can be done with a few tools and dedicated time. By positioning a chisel under a tile, you'll be able to loosen each one and remove the floor. Taking your time with this project will ensure you finish with a beautiful, tile-free floor. Don't forget to wear leather gloves, a dust mask, protective eyewear, and clothing that covers your arms and legs to prevent injuries.
Things You Should Know
- Start in places with chipped tiles or loose grout for easy removal.
- Pry up tiles with a chisel positioned at a 30° angle under the tile and a hand mallet.
- Use a floor scraper to smooth out any remaining rough patches after you’ve removed the tile.
Steps
Preventing Injuries and Damages
-
1Remove items that are on the tile floor. In order to remove the floor tile, move any appliances or other items that are covering the floor. You can place them on a stable counter in the room or in another room entirely.[1]
- These items might include trash cans, kitchen islands, drying racks, or toilet accessories.
-
2Cover surfaces that you don’t want to get dirty. This includes the bottom of walls, cabinets, and any other surface that’s close to the floor. Dust and pieces of tile will likely fly up while you’re working, so it’s best to cover necessary areas with plastic so that you have less cleanup once your project is finished.[2]
- Use painter’s tape to attach the plastic to surfaces.
- It’s a good idea to cover the tops of surfaces as well if you will likely be laying your materials or tools on the counter.
Advertisement -
3Put on proper safety attire to protect yourself from flying debris. Removing floor tile can cause injuries if you’re not properly protected, so put on leather work gloves, a long-sleeve shirt, and pants to protect your hands, arms, and legs from getting cut. You should also wear protective eyewear and a dust mask.[3]
- Knee pads are super useful for protecting your knees while you’re kneeling on the tiles.
- Wear closed-toe shoes to protect your feet while you’re working.


Knocking Out the Tiles
-
1Locate a broken tile or section of loose grout. Look for pieces of tile that have chipped or are cracked around the edges. Another good place to start is at any spot where the grout has started coming loose. This is the spot that will be easiest to start removing the tile.[4]
- If there isn't a chipped tile or loose grout, try to start loosening a tile at one of the ends of the floor. You can also tap the tile with your chisel, starting in the center and working your way outward, until it breaks.[5]
- If you want to remove the tile without breaking it, drill a hole through the center of the tile with an abrasive diamond drill bit, being sure to use the lowest speed setting on your drill. Also, dip the drill bit in a little water throughout the process to keep it wet so it doesn't overheat.[6]
-
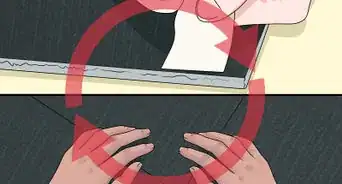
2Hold a chisel underneath the loose tile at a slight angle. Try to situate the chisel under the tile at an angle of about 30 degrees so that you can easily lift it from the ground.[7]
- Use a masonry chisel that’s about 1 in (2.5 cm) wide for best results.
-
3Hit the chisel with a mallet to lift the tile from the floor. As you hit the chisel, the tile should begin to separate from the ground. Continue hitting the chisel until the piece of tile you’re working on completely breaks.[8]
- The tile might not come off in one solid piece, so don’t worry if it splits and breaks into smaller pieces as you’re chipping away.
- A small sledge hammer also works instead of a mallet.
-
4Continue removing the tiles using a chisel and mallet. Move on to the next piece of tile, situating the chisel under the tile and hitting it with the mallet. Repeat this process to lift the tile from the entire floor.[9]
- Once you remove the first few pieces of tile, it’ll be much easier to maneuver the chisel underneath the next pieces.
- This process will likely take a while, so be patient and go slowly so that you don’t injure yourself.
-
5Strike the top of the tile with the chisel if it’s not breaking easily. Place the end of the chisel right on top of the tile and hit the opposite end with the mallet. This should break the tile, making it easier for you to remove it at a new angle.[10]
- Move the broken pieces of tile out of the way so that you can reach the attached pieces more easily.


Scraping off the Adhesive
-
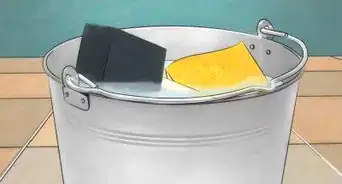
1Sweep up the broken pieces of tile on the ground. Once you’ve detached the tiles from the floor, you’ll likely be left with smaller broken pieces scattered around. Use a broom and dustpan to collect these broken pieces and throw them away.[11]
- Keep your safety attire on for this step so that you don’t cut your hands or injure yourself.
- If necessary, you can vacuum up the dust and smaller pieces.
-
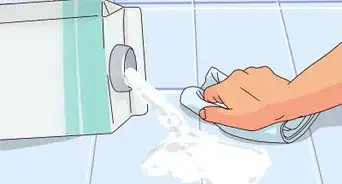
2Hit the chisel with the mallet to scrape off the adhesive. You'll likely have leftover grout or glue that needs to be removed. This should come off the same way the tiles were removed by positioning a chisel or hand maul against the grout and scraping it off with the help of the mallet.[12]
- Depending on the size of your floor, you may want to use a bigger chisel to reach a wider surface area at once.
-
3Leave a super thin layer of the adhesive, if necessary. If you can’t remove all of the grout or glue, that’s okay. Use the chisel or hand maul to remove as much of it as possible, leaving just a thin layer (no more than 0.125 in (0.32 cm)) on the floor that can be filled in and covered up easily.[13]
-
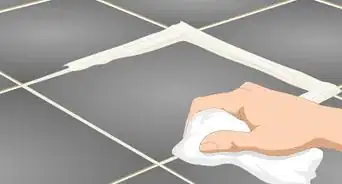
4Smooth the floor using a floor scraper. Floor scrapers have a wider edge than a hand maul or chisel, as well as a longer handle, making it easier to scrape the floor. Use a floor scraper to smooth out any rough patches resulting from the tile or grout removal, pushing the edge of the scraper against the floor in precise, forward motions.[14]
- You can find a floor scraper at a home improvement store or online.
-
5Remove any remaining dust using a vacuum. Use a Shop Vac or similar vacuum to pick up any extra pieces of tile, grout, or dust from the floor and surrounding surfaces. Go slowly when vacuuming to ensure you get everything.[15]
-
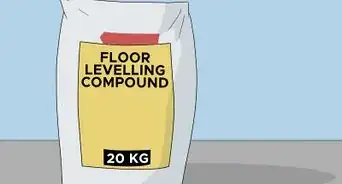
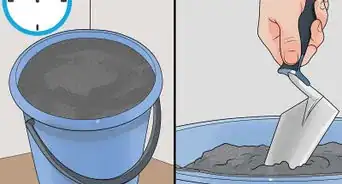
6Apply thin-set mortar to the floor to make it level. Thin-set mortar will help fill in the holes and uneven surfaces of the floor so that the removal of the tile and grout no longer looks bad. Apply a 0.125 in (0.32 cm) layer of thin-set mortar with a flat or square-notched trowel depending on whether you’ll be re-tiling the floor.[16]
- Follow the directions to mix the mortar properly before applying it.
- A square-notched trowel is helpful in making grooves in the mortar so that you can easily place new tile.


Expert Q&A
Did you know you can get expert answers for this article?
Unlock expert answers by supporting wikiHow
-
QuestionWhat's the best tool for removing ceramic tile?
 Art FrickeArt Fricke is a home renovation and repair specialist and the owner of Art Tile & Renovation based in Austin, Texas. With over 10 years of experience, he specializes in bathroom and kitchen renovations. Art focuses on a single contractor approach to customized renovation work, and performs projects such as installing custom tile showers, fixing tiled shower leaks, replacing cracked tiles, and installing floor and wall tile.
Home Renovation & Repair SpecialistCeramic tile is very hard, but it tends to shatter because it's brittle. To avoid that, drill a hole through the center of the tile with an abrasive diamond drill bit. Use the slow setting on your drill, and frequently dip the drill bit in a little bit of water to keep it from getting too hot.
Support wikiHow by unlocking this expert answer.
Warnings
- Make sure the flooring doesn't contain asbestos before attempting to remove floor tile yourself.⧼thumbs_response⧽
- Removing floor tile creates an immense amount of dust. Seal off the room as much as possible and cover carpet, furniture and other belongings before beginning demolition.⧼thumbs_response⧽
Things You'll Need
- Protective clothing
- Plastic to cover surfaces
- Painter's tape
- Leather gloves
- Eye protection
- Kneepads
- Mallet or small sledgehammer
- Chisel or other handheld scraper
- Broom
- Dustpan
- Floor scraper
- Thin-set mortar
- Flat or square-notched trowel
- Shop vacuum
References
- ↑ https://www.thisoldhouse.com/how-to/removing-ceramic-tiles
- ↑ https://www.allthingsthrifty.com/how-to-remove-tile-flooring-yourself-with-tips-and-tricks/
- ↑ https://www.thisoldhouse.com/how-to/removing-ceramic-tiles
- ↑ https://www.familyhandyman.com/tiling/remove-ceramic-tile-from-a-concrete-floor/view-all/
- ↑ Art Fricke. Home Renovation & Repair Specialist. Expert Interview. 1 July 2020.
- ↑ Art Fricke. Home Renovation & Repair Specialist. Expert Interview. 1 July 2020.
- ↑ https://www.allthingsthrifty.com/how-to-remove-tile-flooring-yourself-with-tips-and-tricks/
- ↑ https://www.allthingsthrifty.com/how-to-remove-tile-flooring-yourself-with-tips-and-tricks/
- ↑ https://www.familyhandyman.com/tiling/remove-ceramic-tile-from-a-concrete-floor/view-all/
- ↑ https://www.familyhandyman.com/tiling/remove-ceramic-tile-from-a-concrete-floor/view-all/
- ↑ https://www.allthingsthrifty.com/how-to-remove-tile-flooring-yourself-with-tips-and-tricks/
- ↑ https://www.familyhandyman.com/tiling/remove-ceramic-tile-from-a-concrete-floor/view-all/
- ↑ https://www.familyhandyman.com/tiling/remove-ceramic-tile-from-a-concrete-floor/view-all/
- ↑ https://www.allthingsthrifty.com/how-to-remove-tile-flooring-yourself-with-tips-and-tricks/
- ↑ https://www.familyhandyman.com/tiling/remove-ceramic-tile-from-a-concrete-floor/view-all/
- ↑ https://www.familyhandyman.com/tiling/remove-ceramic-tile-from-a-concrete-floor/view-all/
About This Article

To remove floor tile, start by finding a spot on the floor where the grout is coming loose or the tile is chipped away. If there are no cracks or loose grout, you can hit a tile with the chisel so that it breaks. Then, hold the chisel under the loose tile at a 30 degree angle and hit it with a mallet to separate the tile from the ground. As pieces of tile break off, clear them away and move on to the tile next to it. Finally, use the chisel and mallet to scrape off any adhesive still sticking to the floor. For tips on how to prepare the subfloor before installing new flooring, read on!