This article was co-authored by James Schuelke. James Schuelke, along with his twin brother David, is the co-owner of the Twin Home Experts, a licensed plumbing, leak detection, and mold inspection company based in Los Angeles, California. James has over 32 years of home service and business plumbing experience and has expanded the Twin Home Experts to Phoenix, Arizona and the Pacific Northwest.
This article has been viewed 159,573 times.
The first step to repairing or replacing a shower drain is often removing it from the shower. If you've never removed a shower drain before, don't fret. You don't have to call a plumber or handyman to get the job done. With the right tools and cleaners, drain removal is simple enough for any household handyman!
Steps
Lubricating Your Shower Drain
-
1Purchase a drain lubricant to loosen the shower drain. An older drain may not readily come out even after it has been unscrewed. Buy a drain or spray lubricant, like WD-40, silicone lubricant, or PTFE. If your drain is rusty, WD-40 is ideal.[1]
- Do not pour grease or fat down your drain in an attempt to loosen it.
-
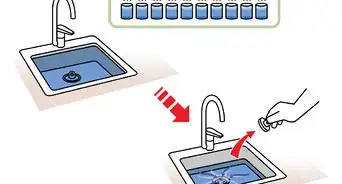
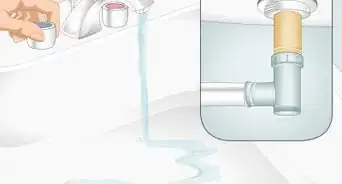
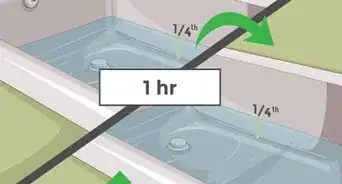
2Check your drain for clogs before you loosen it. If your drain is significantly clogged, you may want to unclog it as much as you can before removing the drain to prevent it from snagging.[2] Turn on your shower or bathtub head to inspect its draining abilities and, if it appears clogged, try one of the following unclogging methods:[3]
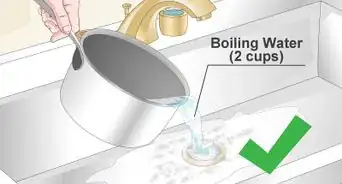
- Send a handful of baking soda and hot water down the drain.
- Pour 1 cup (8 oz) of vinegar and hot water down the drain.
- Use a drain snake to clean out any blockages.
Advertisement -
3Dry your shower drain before applying the lubricant. To secure the lubricant on the shower drain, it must be completely dry. Towel-dry the shower drain to catch any drips or puddles before you start.
-
4Coat the shower drain in the lubricant. Apply a generous amount of the shower lubricant on and around the shower drain. Pour some lubricant down the drain as well to reach as much of the drain as possible. Let it sit for 5-10 minutes before further loosening the drain.


Unscrewing and Loosening the Drain
-
1Check the shower drain for screws. Some shower drains are attached with screws while others are tightened in without them. If any screws are present, use a screwdriver to loosen each screw.[4]
- Be careful not to drop any screws down the drain. Set them aside somewhere safe and outside of the shower in case you will be putting the shower drain back in later.
-
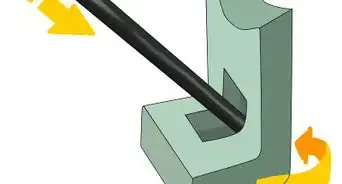
2Insert 2 nose pliers into the drain openings. Hold a pair of nose pliers in each hand—you will need two separate sets to remove the drain. Locate 2 drain openings on opposite sides of the drain, and place the pointed ends of 2 nose pliers in the openings.
- Handle the pliers carefully so that you don't accidentally dent your shower drain.
-
3Grab the plier handles firmly with both hands. Most drains are screwed into the drain hole and must be twisted out. Carefully twist both handles to the left as you begin loosening the drain.
- If the drain won't budge, apply more lubricant.
-
4Continue twisting the drain until it is entirely loosened. When you reach the end of the screwed portion of the shower drain, it can be lifted out of the drain hole. Lifting the drain requires a strong grip and focus, so twist the drain slightly to the right (which should re-tighten it) until you are ready to lift it out.[5]


Lifting the Shower Drain Out
-
1Grasp both of your pliers firmly and lift the shower drain out of the hole. Lift the drain slowly to avoid denting or otherwise damaging the drain. If you feel any snags or resistance, your drain may be overly-clogged or rusty. Apply more lubricant or unclog your drain before further removing your drain.
-
2Keep your grip consistent as you lift the drain out. Avoid holding the pliers too tightly or too loosely. Too tightly and you may break the cover. You may lose your grip and have to start over if you hold it too loosely.
- If you know that you plan on discarding the shower drain, you may handle it more roughly.
-
3Inspect the drain after removal. If your shower is clogged and you had planned on replacing the drain, check it for dirt, rust, or clogged items. In some cases, you may be able to repair the drain. Try unclogging, cleaning, or removing rust from the drain before you discard it.
-
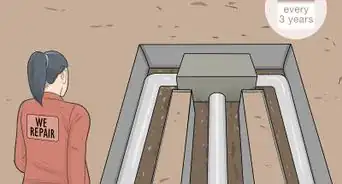
4Replace the drain if you cannot repair it. In some cases, the rust or other damage may be too severe to fix. Contact a plumber or home repair professional to determine what size or brand you will need to replace your old drain and install it in your shower.[6]


Expert Q&A
-
QuestionHow do you unclog a shower drain?
 James SchuelkeJames Schuelke, along with his twin brother David, is the co-owner of the Twin Home Experts, a licensed plumbing, leak detection, and mold inspection company based in Los Angeles, California. James has over 32 years of home service and business plumbing experience and has expanded the Twin Home Experts to Phoenix, Arizona and the Pacific Northwest.
Professional PlumberThe best way to unclog a shower drain is to use a wet/dry vacuum. Take the drain cover off the shower and put the vacuum hose right up against the drain. Turn the vacuum on and that will extract all of the organic matter, including hair and soap scum.
Things You'll Need
- Lubricant
- Towel
- 2 nose pliers
- Screwdriver


References
- ↑ http://www.finehomebuilding.com/2016/05/17/whats-difference-spray-lubricants
- ↑ James Schuelke. Professional Plumber. Expert Interview. 1 October 2019.
- ↑ http://www.wisebread.com/10-really-easy-ways-to-unclog-drains
- ↑ https://dengarden.com/cleaning/How-to-clear-a-clogged-shower-drain-8-methods-to-try
- ↑ https://www.youtube.com/watch?v=JOwr3ASh730&feature=youtu.be&t=44
- ↑ James Schuelke. Professional Plumber. Expert Interview. 1 October 2019.
About This Article

Before you try to remove a shower drain, wipe it dry with a towel, then spray it with a lubricant like WD-40 or a silicone drain lubricant. Let it sit for 5-10 minutes, then examine the drain for any screws you need to remove and take them out if you find any. Insert 2 nose pliers into the drain openings and grip the plier handles firmly, then twist them both to the left to begin loosening the drain. Continue twisting the drain until it is completely loosened, then lift the drain out of its place. For tips on how to replace or repair the drain, read on!