This article was co-authored by Art Fricke. Art Fricke is a home renovation and repair specialist and the owner of Art Tile & Renovation based in Austin, Texas. With over 10 years of experience, he specializes in bathroom and kitchen renovations. Art focuses on a single contractor approach to customized renovation work, and performs projects such as installing custom tile showers, fixing tiled shower leaks, replacing cracked tiles, and installing floor and wall tile.
This article has been viewed 92,332 times.
Caulk around a shower drain keeps the drain working properly. It stops water from leaking beyond the drain and keeps your shower free of mold and mildew. This project is easy to complete and you only need a few supplies such as screwdrivers, caulk, an application gun, and a utility knife. Remove the strainer, drain body, and old caulk and then apply the new caulk.
Steps
Unscrewing the Drain and Removing the Caulk
-
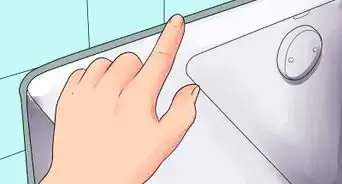
1Remove the strainer from the shower drain. The strainer is the cover over the shower drain and it usually has a grid-like pattern. Use a Phillips screwdriver to unscrew each screw that you can see going through the top of the strainer. To remove the screws with the screwdriver, simply insert the screwdriver and twist each one anticlockwise. Then lift the strainer away from the drain.[1]
- If you can’t see any screws in the strainer, then this makes your job even easier! Simply pry the strainer away from the drain using your fingers. Alternatively, wedge a flat-head screwdriver just under the strainer and use it to lift the strainer up.
-
2Twist the shower drain body anticlockwise to remove it. Get a hammer and a flat-head screwdriver. Hold the flat-head screwdriver against a crosspiece inside the shower drain body. The use the hammer to gently hit the screwdriver, forcing the shower drain body to turn anticlockwise.[2]
- Continue this motion until the shower drain body is loose enough for you to unscrew with your fingers. Then remove the drain body fully.
- The shower drain body is the removable fixture that sits underneath the strainer. It's often white and it rests between the strainer and the drain pipe.
Advertisement -
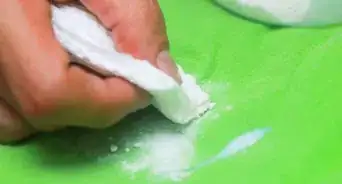
3Scrub the shower strainer and the drain body clean. Replacing the shower drain caulk is a great opportunity to give the strainer and the drain body a good clean. Get an old toothbrush and scrub both the strainer and the drain body with warm, soapy water. Continue scrubbing until you remove as much soap scum and buildup as possible. Then dry the shower strainer and the drain body fully with a cleaning cloth.[3]
- Set the strainer and the drain body aside for now.
-
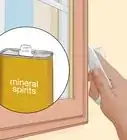
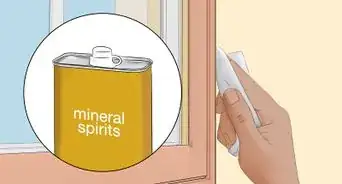
4Use a screwdriver to scrape away the old caulk around the shower drain. With the strainer and the drain body out of the way, it’s now easy to remove the old caulk. Get a screwdriver and scrape away as much of the old caulk as possible. Be careful to not accidentally scratch the shower floor with the screwdriver.[4]
- A utility knife can also be useful for removing the old caulk.[5]
- The old caulk needs to be removed so that the new caulk can set well.


Applying the Caulk
-
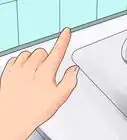
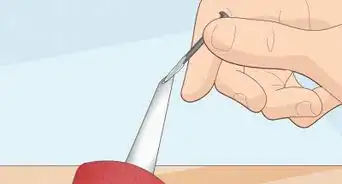
1Use a utility knife to cut the tip off the caulk nozzle. Take a look at the width of the gap that you will be caulking around the drain. Then use a utility knife to carefully slice the tip off the nozzle and aim to match the width of the opening on the nozzle with the width of the gap. There is usually a small notch on the nozzle which indicates the angle to cut it at.[6]
- If you’re uncertain, it’s best to cut the nozzle at a 20° angle.
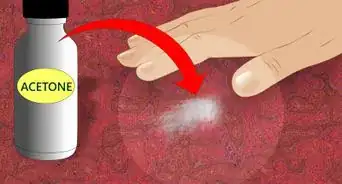
- Make sure that you use specialty kitchen and bathroom caulk, as this is designed to prevent mold and mildew.[7]
-
2Insert the tube of caulk into the application gun. Get the tube of caulk and insert the nozzle through the opening in the application gun. Then push firmly down on the end of the tube of caulk to force it into the gap in the application gun. Make sure that the tube of caulk is sitting flat in the application gun, as otherwise, it’s difficult to apply the caulk smoothly.[8]
-
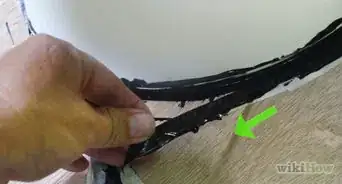
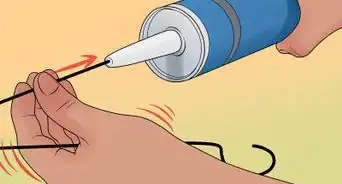
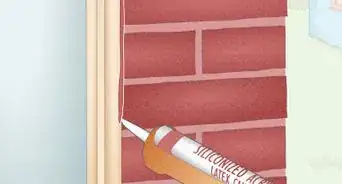
3Spread an even bead of caulk around the opening of the shower drain. It’s now time to apply the new caulk! Hold the application gun at a 90° angle to the gap between the opening of the shower drain and the shower flooring. Press down smoothly on the trigger of the application gun to begin forcing the caulk out of the tube. Aim the bead of caulk just ahead of the nozzle and push the gun forward as you apply the caulk.[9]
- Try to apply an even bead of caulk around the whole opening, as this gives a smoother and more effective finish.
- Aim to complete the whole bead in 1 pass.


Refitting the Drain and Curing the Caulk
-
1Screw the drain body back on. Get the clean shower drain body and place it into the drain. Use your hands to twist the drain body clockwise and tighten it as much as you can. When you can’t screw the drain body any more, use a hammer and a screwdriver again to further twist the drain body into place.[10]
-
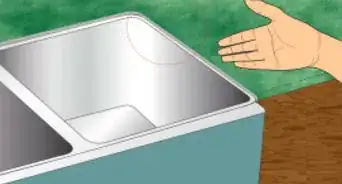
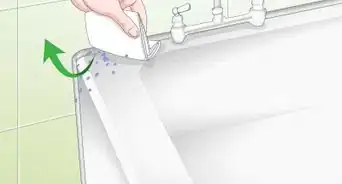
2Wipe the caulk away off the edges with a paper towel. Fitting the drain body causes the caulk to spread slightly, so it’s important to remove this excess caulk before it dries. Get 2-3 sheets of regular kitchen paper towels and use these to remove any excess caulk. It’s best to wipe around the whole opening of the shower drain with the paper towels to ensure that you don’t miss any caulk that has oozed out.[11]
- You can also use an old rag to wipe away the excess caulk.
-
3Screw the shower strainer back on to the drain body. Push the strainer back onto the drain body and make sure that it sits flat. You may need to hit it lightly with a hammer to ensure that it’s in place. When the strainer is in the right place, use a screwdriver to put the screws back in.[12]
- Make sure that you tighten the screws well.
-
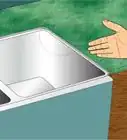
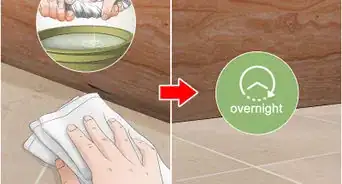
4Let the new caulk cure for approximately 24 hours. It’s important for the new caulk to cure and set properly before you use the shower again, as otherwise, this might damage the caulk. Read the label of the caulk carefully to check how long your specific product takes to dry.[13]
- If you use a quick-curing caulk, it should be water-ready in about 30 minutes or so.[14]


Things You’ll Need
- Philips screwdriver
- Flat-head screwdriver
- Hammer
- Toothbrush
- Dish soap
- Cleaning cloth
- Utility knife
- Caulk
- Caulk application gun
- Paper towels


References
- ↑ https://living.thebump.com/seal-shower-drain-8354.html
- ↑ https://living.thebump.com/seal-shower-drain-8354.html
- ↑ https://moldpedia.com/bathroom-shower-mold
- ↑ https://living.thebump.com/seal-shower-drain-8354.html
- ↑ https://www.familyhandyman.com/bathroom/remodeling/how-to-re-caulk-a-shower-or-bathtub/
- ↑ https://www.familyhandyman.com/bathroom/remodeling/how-to-re-caulk-a-shower-or-bathtub/
- ↑ https://www.familyhandyman.com/bathroom/remodeling/how-to-re-caulk-a-shower-or-bathtub/
- ↑ https://www.familyhandyman.com/bathroom/remodeling/how-to-re-caulk-a-shower-or-bathtub/
- ↑ https://living.thebump.com/seal-shower-drain-8354.html
- ↑ https://living.thebump.com/seal-shower-drain-8354.html
- ↑ https://living.thebump.com/seal-shower-drain-8354.html
- ↑ https://living.thebump.com/seal-shower-drain-8354.html
- ↑ https://www.familyhandyman.com/bathroom/remodeling/how-to-re-caulk-a-shower-or-bathtub/
- ↑ Art Fricke. Home Renovation & Repair Specialist. Expert Interview. 14 August 2020.
About This Article