This article was co-authored by Barry Zakar. Barry Zakar is a professional handyman and the founder of Little Red Truck Home Services based in the San Francisco Bay Area. With over ten years of experience, Barry specializes in a variety of carpentry projects. He is skilled at constructing decks, railings, fences, gates, and various pieces of furniture. Barry also holds his MBA from John F. Kennedy University.
This article has been viewed 14,060 times.
There are several good reasons to caulk and to seal holes around the outside of your house: to seal air leaks; to protect the house from water damage; and to keep out insects. Very many places to caulk are given below, but for many of these, you don’t need to apply caulking unless you see a gap, so it may not take too long.
Steps
Finding Places to Caulk Outside the House
-
1Caulk where walls meet at an angle. As two adjoining walls expand and contract with changes in temperature and humidity, a gap between them will expand and contract if not sealed. A thick bead of caulk or sealant should expand and contract enough to keep the gap sealed.[1]
- Caulk where a brick chimney meets a wall with wood siding. Rain entering here will rot the siding.
- Do not fill the gaps at interior corners of the house if the walls have metal siding. The sealant would prevent the siding from expanding in hot weather, possibly causing it to buckle.
-
2Caulk around doorways and windows, and under door thresholds .
- Caulk where casing (brick molding) meets the wall.
- Caulk beneath window sills.
- Use clear caulk or sealant under a threshold if it rests on concrete so the smears don't show.
- Do not caulk where the casing meets the wall if the wall has metal siding because gaps here allow the siding to expand without buckling.
Advertisement -
3Caulk around wall lamps and electrical outlets that are mounted into walls.
- If an electrical outlet is in a wall, remove its cover plate and caulk between the electrical box and the wall. If the cover plate screw is rusty, do not try to remove it because it could break. Caulk around the cover plate instead, with clear sealant or caulk.
-
4Caulk around anything that goes through a wall.
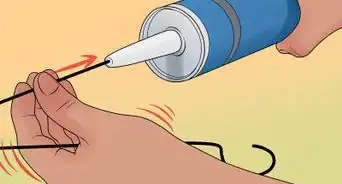
- Caulk around pipes, cables, air conditioning tubes, phone lines and low-voltage wires where they enter walls. Caulk gaps up to about ¼” (6 mm) wide. Use expanding foam sealant in place of caulk or sealant to fill gaps wider than this.
- Caulk around bathroom exhaust vents and kitchen exhaust fans. Use clear caulk or sealant if the walls are brick or block because smears cannot be cleanly removed.
-
5Fill cracks in brick, stone, block, and concrete walls.
- In most climates, even the smallest cracks in masonry walls should be caulked because water could enter, freeze and expand, and cause damage.
- Caulk thin cracks with masonry sealant. Mortar cannot be forced into very thin cracks and it does not expand if the crack becomes wider.
- Repair large cracks in masonry walls with mortar. Hire an expert to do this. If you do this and you have no experience, either the appearance would be poor, or you must use dangerous chemicals to remove the smears.
-
6Seal holes in wall between crawl space and basement. There may be holes in this wall for cables or gas pipes.
- Some holes and cracks in this wall may only be visible from the crawl space side.
- Caulk this wall even if the basement is unheated because much cold air will be drawn in though holes and cracks during the heating season, due to the “chimney effect”.
-
7Seal the gaps around a dryer hood that is mounted to a plastic window pane.
- First, check if the dryer hood is loose. If it is loose, glue it to the pane and tape it until the glue dries.
- If the dryer hood is well-mounted and air leaks in from around the vent, caulk around the vent with clear silicone caulk.


Applying Caulk or Sealant Outside the House
-
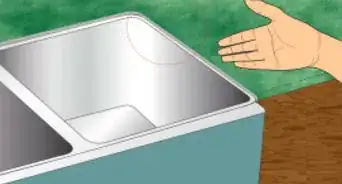
1Apply the caulk or sealant when the surfaces are very dry. [2]
- Don’t caulk if it rained the night before.
- Don’t caulk before 10:00 AM. The surfaces may be slightly damp from morning dew.
-
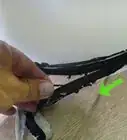
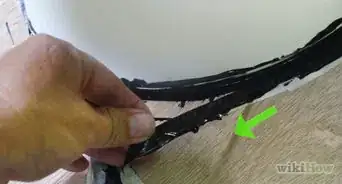
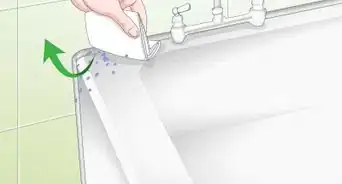
2Remove the old caulking.
- Scrape out the old caulking with a sharp wood chisel or a stiff putty knife. It may be necessary to hit the chisel with a hammer. If you fill the cracks in the old caulking instead of replacing it, the caulk or sealant you put in will be much too thin to expand and contract with changes in the weather.
-
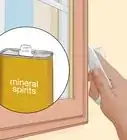
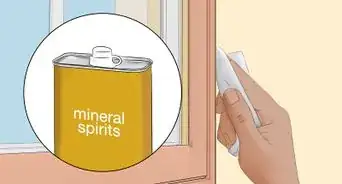
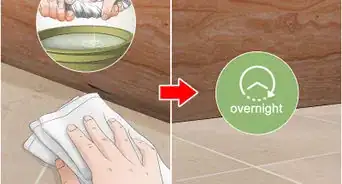
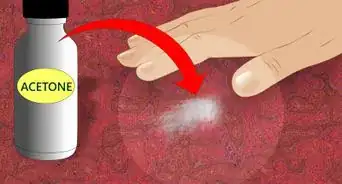
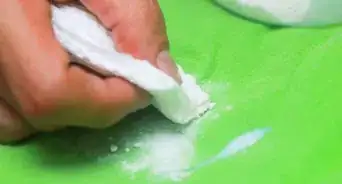
3Clean the area before caulking if it is very dirty. Exterior caulk and sealant is formulated to stick to slightly dirty surfaces, but if the area is too dirty it won’t stick.
- Rubbing alcohol is good to use because it dries fast.
- Masonry surfaces can be cleaned with a thin wire brush.
- Take out debris from cracks using a paint brush.
-
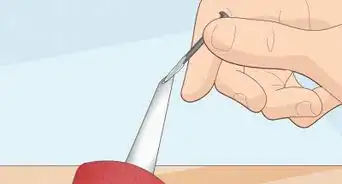
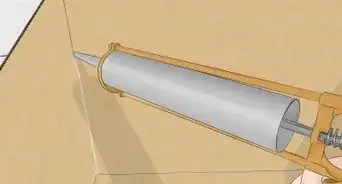
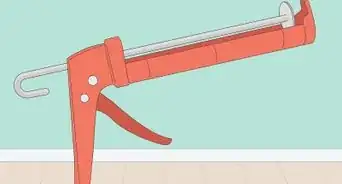
4Push the caulking gun forward to force the caulk or sealant into the gap.
- Cut off the tip of the tube of caulk or sealant with a utility knife.[3]
- Make every bead as wide as possible so it can expand more as the two surfaces move relative to each other.
- Take your time as you squeeze the caulk. Try to maintain an even, equal pressure as move along and place the caulk.[4]
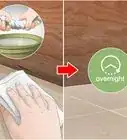
- Press the bead down with your finger so it adheres well to the surfaces.[5]
- You can also wet your finger before sliding it down the caulk bead.[6]
-
5Fill cracks that are too deep with foam backer rods before caulking.
- The maximum depth for a caulk or sealant is given on the tube.
- Foam backer rods may be labeled, “Poly Foam Caulk Savers”. They are sold in the weatherization section of stores.
-
6Nail loose siding to the wall before caulking.
- Use spiraled siding nails.
- If the siding is wood, asbestos or fiber cement, drill holes in the siding to prevent it from cracking.
- If it can’t be nailed in firmly, the material behind it is weak, normally from rot. Nail in two nails at different angles. If this fails use polyurethane construction adhesive.


Choosing the Best Caulk or Sealant for Each Location
-
1Use sealant instead of caulk where you can. Basically, sealants are better for outside the house and caulks are better for inside the house. Sealants are generally more elastic, but can be sloppy, and are not as attractive. They are also better formulated for temperature extremes. [7] [8]
- There is some confusion because the term “caulk” is applied to both sealant and caulk.
-
2Use silicone or silicone rubber sealant for damp or hot areas.
- Excellent durability - some brands last 50 years
- Permanently flexible
- Formulated for damp and hot areas on a house
- Available in several colors
- At least one brand is formulated for very cold weather
- Relatively expensive
-
3Use polyurethane sealant for strong adhesion to wood, glass, metal, masonry, stone or PVC.
- Excellent adhesion
- Excellent durability
- Permanently flexible
- May deteriorate with long-term exposure to direct sunlight
- Very elastic
- Available in many colors
- Relatively expensive
-
4Use masonry sealant for brick, stone, concrete and stucco walls.
- Formulated specifically for masonry materials
- May only be available in gray
- Paintable
-
5Use siliconized acrylic latex caulk to match a color. This is acrylic latex with silicone.
- Can be applied neatly
- Lasts 10 to 20 years in most climates
- Paintable
- Sticks to almost all materials
- Sold in a large variety of colors
- Less elastic than sealants
- Most brands must be applied at above 40º F (4º C).
- Less expensive than other exterior caulks and sealants
- Not permanently flexible


Expert Q&A
Did you know you can get expert answers for this article?
Unlock expert answers by supporting wikiHow
-
QuestionCan I use caulk inside of my house to fill the gap between the ceiling and the wall?
 Kevin TurnerKevin Turner is a handyman and the owner of Red Gator Maintenance, a handyman business based in Fresno, California. Working on handyman-related projects since the age of 12, Kevin specializes in a wide variety of home improvement projects such as (but not limited to) lighting/electrical, plumbing, deck staining, drywall repairs, cabinet installation, air conditioning, trash removal, and window, roof, and appliance repairs.
Commercial HandymanI really don't recommend it. The seam between the ceiling and the wall should be properly filled in by the tape and mudding. You shouldn't need to caulk that gap. You theoretically could do it, but there's no real reason you'd need to unless some bugs have eaten through the gypsum board or something like that.
Support wikiHow by unlocking this expert answer.
Things You’ll Need
- White exterior caulk or sealant
- Clear exterior caulk or sealant
- Caulking gun
- Hammer
- Sharp wood chisel
- Utility knife (to cut tip from tube of caulking)
- Expanding foam sealant
- ½” (13 mm) dia. foam backer rods (Poly Foam Caulk Savers)
- Masonry sealant or mortar
- Spiraled siding nails
- Drill


References
- ↑ https://www.elegantpainting.com/caulking/
- ↑ https://www.ronhazelton.com/tips/how_to_caulk_cracks_and_gaps_outside/
- ↑ Barry Zakar. Handyman. Expert Interview. 16 July 2020.
- ↑ Barry Zakar. Handyman. Expert Interview. 16 July 2020.
- ↑ Barry Zakar. Handyman. Expert Interview. 16 July 2020.
- ↑ Barry Zakar. Handyman. Expert Interview. 16 July 2020.
- ↑ https://www.motherearthnews.com/diy/types-of-caulk/
- ↑ http://www.oldhouseweb.com/how-to-advice/old-house-wall-sealants-caulk.shtml
About This Article