This article was co-authored by Art Fricke and by wikiHow staff writer, Hunter Rising. Art Fricke is a home renovation and repair specialist and the owner of Art Tile & Renovation based in Austin, Texas. With over 10 years of experience, he specializes in bathroom and kitchen renovations. Art focuses on a single contractor approach to customized renovation work, and performs projects such as installing custom tile showers, fixing tiled shower leaks, replacing cracked tiles, and installing floor and wall tile.
wikiHow marks an article as reader-approved once it receives enough positive feedback. In this case, 100% of readers who voted found the article helpful, earning it our reader-approved status.
This article has been viewed 214,101 times.
Caulk can help keep water from seeping beneath the rim of your kitchen sink. Since it dries out and cracks over time, it needs to be replaced periodically to help keep the area it seals clean and dry.
Steps
-
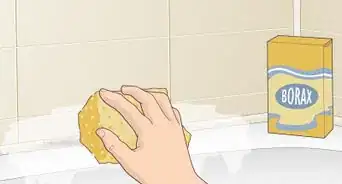
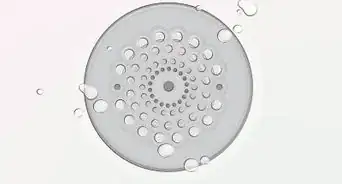
1Make sure the rim of the sink is clean and dry. Scrub the rim of your sink and counter with soap and water to get rid of any dirt or grime on the surface.
-
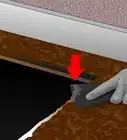
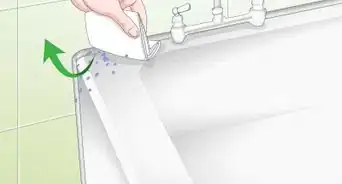
2Remove any old caulk from the rim with a utility knife. Position your utility knife between the countertop and the sink and slowly slice through the caulk. Keep the blade flat so you don’t scratch your counters or sink base.[1]
- If the caulk doesn’t come up easily, apply a caulk remover around the rim of your sink.
Advertisement -
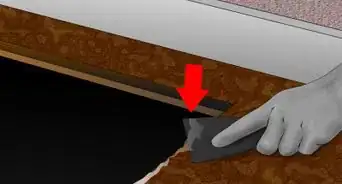
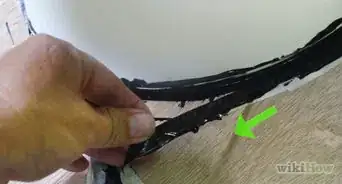
3Cut through the old caulk and pull it free from the rim. If you can’t easily pull the caulk free after cutting it, grip it with a pair of needlenose pliers and gently tug it free.[2]
-
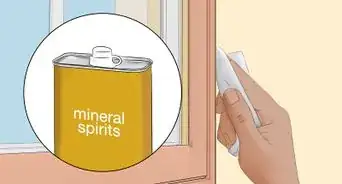
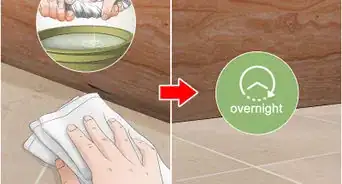
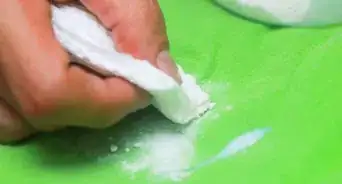
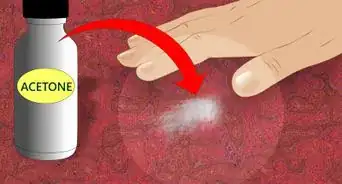
4Clean up the area with a paper towel soaked in rubbing alcohol to remove any old caulk residue and to ensure a clean surface ready to accept new caulk.[3]
-
5Let the sink's rim and counter edge dry completely. New caulk won’t stick to wet surfaces, so wipe it with a towel and let it air-dry before you start your application.
-
6Apply painter's tape to the counter next to the rim, leaving a thin gap for the caulk to be applied. Follow the shape of the corners of your sink with multiple pieces of tape to round off the edges. This will make clean up easier and ensure a straight, even caulk job.[4] [5]
- You can also use masking tape for this.[6]
-
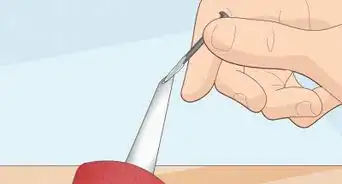
7Cut off the tip of the caulk tube with a utility knife. Trim the end of the tube to a 45-degree angle so it fits tightly against the rim of your sink.
-
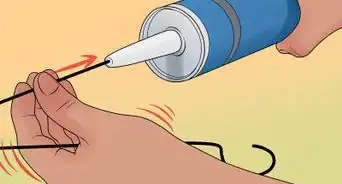
8Make the cut only as large as the opening around the sink to avoid having too much caulk come out at once. Since most caulk guns have a seal inside, insert the long metal pin attached to your caulk gun into the tube to puncture it.
-
9Insert the tip of the caulk tube into a caulk gun and push the plunger of the gun up into the back.[7]
-
10Prime the tube by squeezing the trigger a few times until the caulk rises to the tip of the gun. Wipe the excess caulk off of the tip with some paper towel so you get a clean start on your sink.
-
11Place the tip of the gun against the edge of the sink's rim where it meets the countertop.[8]
-
12Slowly squeeze the trigger to release a thin line of caulk around the edge of the rim. Only apply slight pressure so you don’t apply too much caulk in one spot.[9]
-
13Keep moving the gun as you squeeze the trigger, holding the tip of the gun tight up against the rim for a tight application. Move at a slow, consistent speed so the line of caulk has the same thickness along the entire edge of your sink.
-
14Apply the caulk all the way around the rim of the sink from one end to the next. If you need to stop your line at any time, overlap the start of the new line with where you finished the last one.
-
15Pull away the painter's tape from the counter.[10] Take the tape off while the caulk is still wet. If you wait until it’s dry, you’ll accidentally pull the caulk off as well.
- If you remove the tape before the silicone gets tacky, you'll have a perfect caulk line that goes exactly where you want it to go.[11]
-
16Wet your index finger and smooth the caulk against the edge of the rim and the counter. This will provide a watertight seal. Press the caulk firmly against both edges of the rim and counter, sliding your finger as you go.
- You can also use a caulk tool to smooth out your line if you don’t want to use your finger.
-
17Re-wet your finger frequently to ensure it slides easily against the caulk.
-
18Wet a paper towel with water.
-
19Use the wet paper towel to wipe up any excess caulk or caulk that has strayed too far from the edge of the rim.
-
20Let the caulk dry for at least 24 hours before using the sink and surrounding area to prevent it from getting wet too early.


Expert Q&A
Did you know you can get expert answers for this article?
Unlock expert answers by supporting wikiHow
-
QuestionWhy does my caulk always end up super messy?
 Kevin TurnerKevin Turner is a handyman and the owner of Red Gator Maintenance, a handyman business based in Fresno, California. Working on handyman-related projects since the age of 12, Kevin specializes in a wide variety of home improvement projects such as (but not limited to) lighting/electrical, plumbing, deck staining, drywall repairs, cabinet installation, air conditioning, trash removal, and window, roof, and appliance repairs.
Commercial HandymanYou really don't want to apply too much caulk. You want the bead to be as thin as possible while still covering the seam. This way, you'll have a much easier time cleaning the caulk up.
Support wikiHow by unlocking this expert answer.
-
QuestionAre there products I can use to get a cleaner line?Kevin TurnerKevin Turner is a handyman and the owner of Red Gator Maintenance, a handyman business based in Fresno, California. Working on handyman-related projects since the age of 12, Kevin specializes in a wide variety of home improvement projects such as (but not limited to) lighting/electrical, plumbing, deck staining, drywall repairs, cabinet installation, air conditioning, trash removal, and window, roof, and appliance repairs.
Commercial HandymanYes, they sell kits that make it a lot easier to smooth the caulk down and get a clean bead.Support wikiHow by unlocking this expert answer.
-
QuestionWhat should I use to wipe the excess caulk away?Kevin TurnerKevin Turner is a handyman and the owner of Red Gator Maintenance, a handyman business based in Fresno, California. Working on handyman-related projects since the age of 12, Kevin specializes in a wide variety of home improvement projects such as (but not limited to) lighting/electrical, plumbing, deck staining, drywall repairs, cabinet installation, air conditioning, trash removal, and window, roof, and appliance repairs.
Commercial HandymanSome people just use their finger to wipe it up, but I'd recommend using a rag or sponge.Support wikiHow by unlocking this expert answer.
Warnings
- The area where the caulk is applied has to be perfectly clean and dry before the caulk can be applied. Any dust, moisture, or old caulk will cause the new job to fail. If in doubt, wait overnight after cleaning the area before applying the new caulk.⧼thumbs_response⧽
Things You'll Need
- Utility knife
- Paper towels
- Rubbing alcohol
- Painter's tape
- Caulk
- Caulk gun
- Water


References
- ↑ https://www.youtube.com/watch?v=iM8QgRtoWkA
- ↑ https://www.youtube.com/watch?v=iM8QgRtoWkA
- ↑ https://www.bobvila.com/articles/bob-vila-radio-kitchen-sink-caulk/
- ↑ https://www.youtube.com/watch?v=iM8QgRtoWkA
- ↑ Art Fricke. Home Renovation & Repair Specialist. Expert Interview. 1 July 2020.
- ↑ Art Fricke. Home Renovation & Repair Specialist. Expert Interview. 1 July 2020.
- ↑ https://www.youtube.com/watch?v=dyBY_y059lk
- ↑ https://www.youtube.com/watch?v=dyBY_y059lk
- ↑ https://www.youtube.com/watch?v=dyBY_y059lk
About This Article