This article was co-authored by Ed Beery. Ed Beery is an Automotive Specialist and the Owner of InTechgrity Automotive Excellence based in Denver, Colorado. With more than eight years of experience, he specializes in providing maintenance and repair services for both individuals and companies. Ed and the InTechgrity Automotive Excellence Team are approved by the American Automobile Association (AAA) for repairs and are Automotive Service Excellence (ASE) certified.
There are 10 references cited in this article, which can be found at the bottom of the page.
This article has been viewed 104,758 times.
Replacing universal joints refers to changing the couplings at either end of the drive shaft, which are an integral component of the suspension system of a vehicle. This process isn't complicated, so anyone with garage access and a moderate amount of automotive experience can accomplish this repair task on their own. Follow these steps for how to replace universal joints.
Steps
-
1Lift up the front end of a vehicle with a floor jack.[1]
-
2Place jack stands under the front end of the frame to ensure stability.[2]Advertisement
-
3Empty the transmission fluid in order to prevent it from leaking.
-
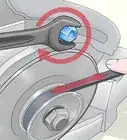
4Dislodge the fill plug for the transmission.
-
5Prepare a container for the fluid and disengage the transmission's drain plug.
-
6Ensure the integrity of the driveshaft assembly by creating reference marks.[3]
-
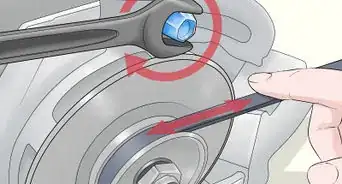
7Detach the mounting clips or bolts which hold the driveshaft to the transmission.
-
8Remove the driveshaft by dislodging the yoke from the transmission.[4]
-
9Prevent the jostling of the needle bearings by securing the bearing caps with tape.
-
10Stabilize the driveshaft in a vise.
-
11Remove the tape.
-
12Dislodge the bearings from the yoke by detaching the retaining rings.
-
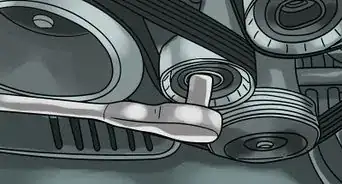
13Use variously sized sockets along with the leverage supplied by the vise, to force the bearing caps from the yoke.
-
14Use pliers to remove the caps as they are pushed through the assembly.
-
15Flip the drive shaft around in the vise and repeat the preceding process on the other end.
-
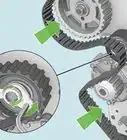
16Dislodge the universal joint from the both the yoke and the driveshaft.
-
17Remove all dirt and debris from the entire drive shaft assembly, assuring that it is completely clean.
-
18Apply a small amount of grease to the replacement caps.
-
19Replace the bearing cap by inserting it partially into the yoke.[5]
-
20Begin installing the universal joint into the cap.
-
21Insert the opposing cap, partially.
-
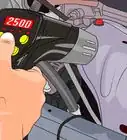
22Line up the universal joint and push the caps into place using a press machine.
-
23Insert the retaining rings.
-
24Lift the driveshaft into position.
-
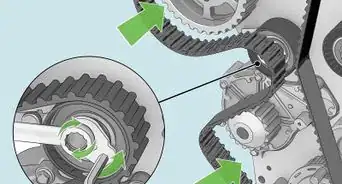
25Confirm that the yoke is properly aligned with the shaft of the transmission.
-
26Consult your reference lines to ensure proper reinstallation of the driveshaft.
-
27Reattach the universal joint mounting clamps or clips.
-
28Insert the grease fitting and apply grease.[6]
-
29Inspect the universal joint to confirm proper installation.
-
30Remove the jack stands and lower the vehicle.
-
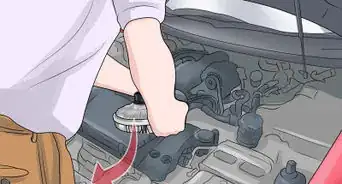
31Confirm that the transmission drain plug has been reinserted and refill the transmission with fluid.[7]
-
32Replace the fill plug.


Expert Q&A
-
QuestionWhat are signs of worn out suspension?
 Ed BeeryEd Beery is an Automotive Specialist and the Owner of InTechgrity Automotive Excellence based in Denver, Colorado. With more than eight years of experience, he specializes in providing maintenance and repair services for both individuals and companies. Ed and the InTechgrity Automotive Excellence Team are approved by the American Automobile Association (AAA) for repairs and are Automotive Service Excellence (ASE) certified.
Automotive SpecialistThe signs of suspension problems include: clunking sounds when hitting holes or speed bumps, vehicle pulling to one side, uneven tire wear and hard or loose steering. -
QuestionIs car suspension expensive to fix?Ed BeeryEd Beery is an Automotive Specialist and the Owner of InTechgrity Automotive Excellence based in Denver, Colorado. With more than eight years of experience, he specializes in providing maintenance and repair services for both individuals and companies. Ed and the InTechgrity Automotive Excellence Team are approved by the American Automobile Association (AAA) for repairs and are Automotive Service Excellence (ASE) certified.
Automotive SpecialistIt will depend on what's gone bad. Vehicle suspension systems are made up of many different parts. Some parts may be going bad, but the entire system will not go bad at one time. -
QuestionCan the 2 rear joints be changed without having to remove or disturb the carrier bearing on a 92 f-150 extended cab truck?
 Uglymug18Community AnswerThe front and rear section of the drive shaft are spliced together at the carrier bearing so yes, you can remove just the rear section.

References
- ↑ https://www.dummies.com/home-garden/car-repair/how-to-safely-jack-up-your-vehicle/
- ↑ https://www.youtube.com/watch?v=X2XdxPJnpNE
- ↑ https://www.youtube.com/watch?v=5gOeBE-ylQw
- ↑ https://shop.advanceautoparts.com/r/car-projects/how-to-replace-u-joints
- ↑ https://shop.advanceautoparts.com/r/car-projects/how-to-replace-a-u-joint
- ↑ https://www.popularmechanics.com/cars/how-to/a86/1272541/
- ↑ https://www.youtube.com/watch?v=yb_1wbiPz9g
- https://www.automd.com/174/how-to-replace-a-ujoint/
- http://www.stu-offroad.com/axle/ujoint1/u-joint-1.htm
About This Article