X
wikiHow is a “wiki,” similar to Wikipedia, which means that many of our articles are co-written by multiple authors. To create this article, 13 people, some anonymous, worked to edit and improve it over time.
This article has been viewed 252,456 times.
Learn more...
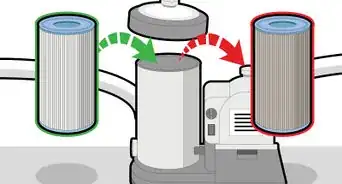
Leaking pumps can destroy the swimming pool motor. Here is some advice on how to replace a pool pump seal. The following instructions are general. Seal components are similar for most centrifugal pumps.
Steps
-
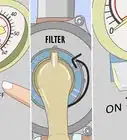
1Separate the pump housing - Most pumps have either a large metal clamp ring or a series of nuts and bolts the hold the pump housing to the motor plate. Using a socket or crescent wrench, remove the nut that is securing clamp together or loosen and remove the series of nuts and bolts. Some banded pumps have a hand knob instead of a nut holding the clamp together. Slide back the half of the pump assembly with the motor attached. Try to place the pump on a suitable work surface. Note: You can either leave the electrical conduit intact while doing this procedure or if you require more space you can disconnect the wires form the motor. Be sure the POWER IS OFF and note the wiring so you reattach the wires the same way![1]
-
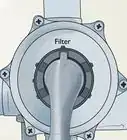
2Expose the Impeller - Remove the screws from the impeller cover (diffuser).Remove the impeller cover (diffuser). Be sure not to lose any of the screws!Advertisement
-
3At this stage it is very important to inspect the impeller for damage since you have the pool pump open. The impeller is one of the more likely pump components to develop wear or damage and inspection at this stage can save you the headache of needing to open and repair the pump a second time in the future.[2]
-
4An impeller can show signs of heat damage and be melted or the leading edge of the impeller fins could be pock marked if the impeller has been exposed to cavitation. Replace the impeller if it shows any signs of damage.[3]
-
5Remove the Impeller - You will need to stop the motor shaft from turning while you rotate the impeller counter-clockwise to remove it. The use of vice grips to hold the shaft is never recommended. Instead, remove the cap from the center of the motor on the end opposite the shaft, and use a screwdriver or open-end wrench to prevent the shaft from turning. Unscrew and remove the impeller.[4]
-
6Remove the seal plate - Remove the (seal plate) from the motor to gain access to the motor shaft. Usually there will be 4 bolts that hold the seal plate to the motor. You will need to remove the impeller before you can remove the seal plate.[5]
-
7Remove the old seal assembly - Using a pair of channel-locks, pull off the old pump spring seal from the motor shaft. Inside the center of the seal plate is the ceramic part of the pump seal. Be careful not to damage the plastic of the seal plate. You can also push it out from behind instead, using a screwdriver knock out the old ceramic seal. Note: Be sure the rubber ring seat is removed with the ceramic portion also.
-
8Clean and prepare to replace the seal - Lightly wipe off the motor shaft and the seal plate. Inspect the seal plate for damage, cracks, melted or out of round will cause the pump to leak even with a new seal. Carefully inspect the impeller for cracks or breaks.
-
9Install the new seal assembly - Note: NEVER touch the FACE of the ceramic with anything metallic or greasy, because you could destroy the integrity of the pump seal. Press the ceramic part of the seal into the seal plate... using clean fingers to get it seated. (The rubber part towards the seal plate, the white ceramic facing away from the motor.)Slide the spring seal part over the motor shaft. Push it past the threads.( Black carbon face of the spring side needs to make contact with the white ceramic side).Do NOT LUBRICATE this seal with anything besides water! If you do, then it could end up slipping against the impeller, and eventually overheat, destroying the seal.
-
10Replace the Impeller - Using the Vice grip method mentioned previously, hold the motor shaft to prevent rotation, and then screw on the impeller. HAND TIGHT. The rotation of the pump motor will keep it tight.
-
11Replace the Diffuser - Now realign the diffuser, and tighten the screws. Ensure that the impeller does not touch or interfere with the diffuser, by rotating it with you finger.[6]
-
12Re assemble the pump and motor - Inspect and lube the large seal plate o-ring for cracks or damage. If it's flattened or stretched out, it may need to be replaced. Be sure the clamp is 'around' the outside rim on both sides of the seal plate and the pump housing. This can be a little tricky to get aligned. Tighten the retaining band with a wrench or socket, or if your pump has a knob, use your hand to tighten it. If you pump uses nuts and blots reassemble and tighten.


Advertisement
Community Q&A
-
QuestionDo I have to use the ceramic if it wasn't on the previous one?
 Community AnswerNo.
Advertisement
Warnings
- Safety Warning!⧼thumbs_response⧽
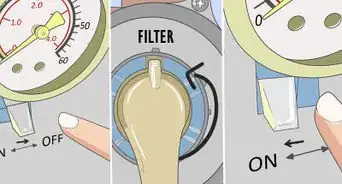
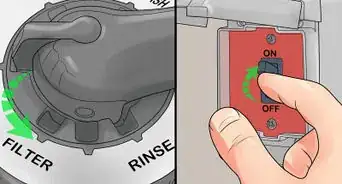
- Turn off the Power BEFORE performing this procedure. Failure to comply with this requirement, can lead to electrical shock and/or electrocution!⧼thumbs_response⧽
Advertisement
Things You'll Need
- wrenches, sockets, screw drivers, vice grips, a new seal, lube, clean rag,
- It will be helpful to look up part numbers of all the components that you will need to replace the pump seal prior to beginning this process.
- Pump owners manuals usually have a pump seal replacement process detailed so be sure to have your owners manual on hand when attempting this repair.


References
- ↑ https://www.youtube.com/watch?v=WrMRbZx7caY
- ↑ http://www.inyopools.com/HowToPage/how_to_replace_a_motor_shaft_seal.aspx
- ↑ http://www.inyopools.com/HowToPage/how_to_replace_a_motor_shaft_seal.aspx
- ↑ https://www.youtube.com/watch?v=Moy34mj_7To
- ↑ https://www.youtube.com/watch?v=Moy34mj_7To
- ↑ https://www.poolpumpexpert.com/how-to-know-pool-pump-repair-replacement/
About This Article
Advertisement