This article was co-authored by Tanglewood Sue. Tanglewood Sue is a DIY and Upcycling Specialist and the Owner of Tanglewood Works out of Hyattsville, Maryland. With over nine years of experience, Sue specializes in upcycled painted furniture and other handmade, personalized, and sustainable goods. With her passion for art and reinvention, marketing experience, and Bachelor’s Degree in Broadcast Media, Sue has been able to create a business that not only provides quality pieces but empowers customers to create their works through her library of DIY tutorials and live demos as well as DIY supplies.
There are 16 references cited in this article, which can be found at the bottom of the page.
This article has been viewed 9,952 times.
A used piece of furniture can be a fabulous find. But years' worth of stains, scratches and cracks can dampen your enthusiasm for it. Fortunately, used furniture can be cleaned up and restored with a few inexpensive items from your local home improvement store. Though each piece of furniture has different restoration needs, it’s possible to fix up a used couch, chair, or table and have it looking almost like new, in just a few hours or days.
Steps
Restoring Wooden Furniture
-
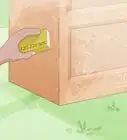
1Clean any grime, oil, or dirt off of your furniture. Before you begin stripping, sanding, and finishing your wooden furniture, you’ll need clean it to the best of your ability. If your furniture is very grimy, try wiping it down with mineral spirits or a degreasing agent, but make sure you work in a well-ventilated area. Otherwise, a simple combination of dish soap and water is a perfectly good cleaning solution.[1] [2]
- To use dish detergent, mix a healthy amount into a large bucket of water. Dip in a sponge, then lightly rub down your piece of furniture. Take care not to soak the wood, and dry it thoroughly.
- For a more aggressive approach, soak a cloth with mineral spirits so it’s wet, but not dripping. Wipe the furniture down in a well-ventilated area, taking care not to touch your mouth or eyes. Wipe off any remaining mineral spirits with a wet cloth to finish.
-
2Scrape off a patch of the existing finish to evaluate its quality. In order to determine the best refinishing method for your wooden furniture, you will need to which paints or varnishes were originally used on it. Find a discreet spot, like the inside of a drawer or the inside of a leg, and use your putty knife or scraping tool to shave off a small patch of the finish. Note whether the bottom layer is paint or varnished wood.[3]
- Depending on these factors, you’ll want to use different refinishing methods.
Advertisement -
3Seal or stain your furniture if the underlying wood is in good condition. If you scrape away the existing finish of your furniture to find that the bottom layer of your furniture’s current finish is varnished wood, that means it has probably retained at least some of its original quality. The wood will be in good enough shape that you can expose the original surface. You can then enhance the appearance of the original wood by using a stain to change its color, or simply coating it with a new layer of polycrylic or polyurethane sealant.[4]
-
4Paint your furniture if the wood is damaged or if you want a specific color. If, after scraping some of your furniture's finish away, you find that the last layer of finish before the original wood is paint, the wood beneath will probably be damaged and not worth revealing. In these cases, you might simply want to brighten up your furniture with a fresh coat of paint. However, even if the underlying wood is of good quality, you can feel free to paint your furniture. It's an especially good option if you want a color that you can't achieve by staining wood, like white or blue.[5]
-
5Sand your furniture if it’s smooth, or if you simply plan to paint it.[6] If your furniture is already smooth, shiny, and unburdened by flaking layers of finish, sand it with sandpaper or a hand-held sanding machine. Start with rough sandpaper, like 60-grit, and begin rubbing away at the furniture’s surface. Wipe away any dust once you’ve sanded the entirety of the piece, then repeat with progressively finer sandpaper until you have exposed the original wood.[7]
- If you find that you can’t sand through the old finish to expose the original wood, you will probably need to use a chemical paint stripper instead of sanding.
-
6Use paint stripper for ornate furniture, or if the existing finish is badly damaged. If your furniture is covered with multiple layers of thick, bubbly, or chipped finish – or if it has detail work would be difficult to get at with sandpaper – it’s best to use a chemical paint stripper. Brush on a thick coat with an old paintbrush before allowing it to sit for as long as the label instructs.[8] Then, wipe it down with a cloth soaked in neutralizer, which will stop the paint stripper from continuing to corrode the existing finish. Scrape the congealed paint stripper off with a putty knife or stripping tool, pushing it away from you while prying the residue up from underneath.
- If you’re working with a large piece of furniture, apply the paint stripper to one portion of it at a time and scrape it off before applying it to another area. If you coat the entirety of a large piece of furniture, parts of it may become too dry before you get around to scraping them.[9]
- Use a metal wire brush to scrape congealed paint stripper from detailed nooks and crannies.
- When stripping fine detail work, it may also help to apply several coats of paint stripper before removing it. This will loosen the paint more effectively and make it easier to remove from hard-to-reach places.
- Make sure to use the kind of neutralizer specified on the label of your paint stripper, or it may not work.
Warnings: Make sure to use paint stripper outdoors or in a well-ventilated area. It’s a powerful, corrosive chemical, and the fumes can be very harmful if inhaled. Wear gloves, eye protection, and a mask when working with paint stripper.
-
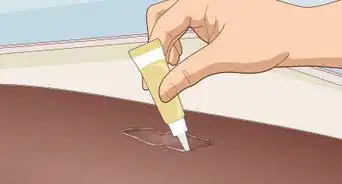
7Fill any holes or cracks in your furniture with wood filler. Scoop a small amount of wood filler out of the container. Work the filler into the hole or crack with a putty knife until filled, then scrape away the excess so the surface. The wood filler should be smooth and flush with the surface of the furniture.[10] [11]
- Wood filler can feel raised to the touch, but don't worry. You can sand it down once it dries.
- Let the wood filler completely set and dry before you do anything else.[12]
-
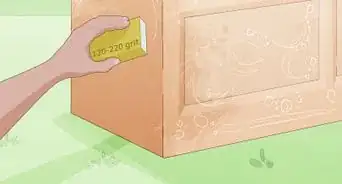
8Sand the surface of your furniture after waiting 24 hours. Allow your piece of furniture to sit for about a day, then use fine sandpaper to remove any remaining residue and smooth down wood fibers that might have been raised during the stripping process. Wipe the furniture down with a clean piece of cloth to remove any dust.[13]
- At this stage, you can also sand down any wood filler that feels bumpy or raised.
-
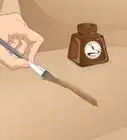
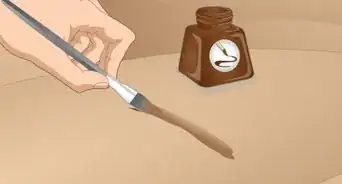
9Apply oil, stain, and a clear protective coat to original wood. If your restoration goal was to strip away an old finish and make the original wood shine through, apply a coat of finishing oil to the sanded and wiped-down wood with a brush or a cloth.[14] Allow it to dry for about ten minutes, then apply a stain if you want to alter or enhance the color of the wood. Finally, finish with a polyurethane or polycrylic clear coat to ensure quality and longevity.[15]
- Try to pick a stain that closely matches the furniture's color.[16]
- You will probably need more than one layer of the clear coat. Wait for your first layer to dry, then sand it down before applying the final layer.[17]
- If you’re pleased with the natural color of the wood, there’s no need to apply stain. Just paint the oiled wood with a protective clear coat, and you’re done!
-
10Prime and paint your furniture if you planned to cover up the original wood. If you intend to do a simple paint job rather than oiling and staining your furniture’s original wood surface, make sure to apply a coat of primer first. Lightly sand your furniture once the primer is dry, and then begin painting, sanding each coat after it's dry. When you are satisfied with the color, paint your furniture with one or two layers of polyurethane or polycrylic coating.[18] [19]
- Brush strokes should begin towards the top of your furniture and travel downward. This way, any accidental drips will be be covered up by the final coat of paint.


Restoring Upholstered Furniture
-
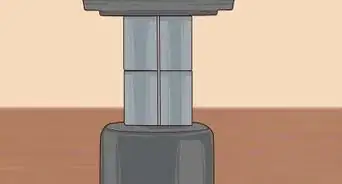
1Vacuum the furniture to remove embedded dust and crumbs. You'll need to use your vacuum cleaner's upholstery and drapery attachments. Vacuum the entire piece of furniture, using the drapery attachment to vacuum the sides, back and underside of the piece.[20]
- The drapery also attachment works well to vacuum cushions that can't be removed.
- Use the upholstery nozzle to vacuum along piping and underneath cushions.
- Consider renting a steam cleaner if your upholstered furniture is especially dirty.
-
2Take off removable cushion covers to wash them. First, spray the cushion covers with stain remover and let them sit for a few minutes and up to 1 hour. Then, place the cushion covers in the washing machine with mild laundry detergent and fabric softener. Use the gentle cycle for newer cushion covers.[21]
- If the cushion covers you're washing are just a few years old, you might place them in the dryer on warm. You can also line dry the covers if you're unsure about their age or quality.
- You might need to handwash antique cushion covers.
- Alternatively, clean an antique cushion cover with warm water and soap. First, place an antique cushion cover on a flat surface like a counter. Dampen a sponge and run the sponge over the surface of the textile gently to clean it. Place the cushion cover on a drying rack to dry.
-
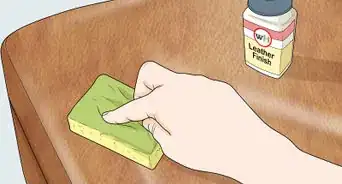
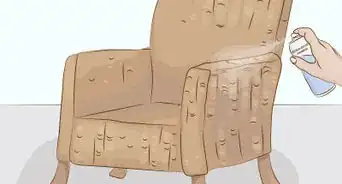
3Clean upholstery that can't be removed with stain remover. Apply spray cleaner to the arms, sides and edges of the furniture.[22] Let the cleaner sit for 30 minutes to 1 hour. Then, dip a sponge in warm soapy water. Wring out most of the water and wipe down the furniture, working in small sections to ensure the furniture gets clean.[23]
- You can also buy cleaning products made specifically for upholstery. While each product has its own set of instructions, some cleaners require you to apply the product, let it sit and then use a vacuum or steam cleaner to finish cleaning the upholstery.
- Upholstered furniture attracts dust easily, so let it dry inside your living space. You might sit the furniture near a window to speed up drying, weather permitting.
-
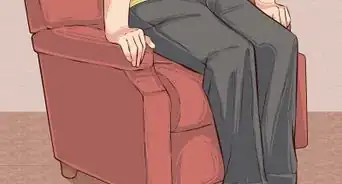
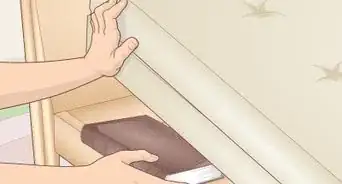
4Re-upholster your furniture if your current upholstery is beyond repair. After vacuuming, washing, and spot-cleaning your old upholstered furniture, it may still be disappointingly dirty. In this case, you may just want to reupholster your furniture. This may involve stripping off old upholstery and replacing stuffing or batting, then measuring, sewing, and attaching new upholstery.[24] It's a labor-intensive process, but it's a great option if you want your furniture to truly look like new.


Expert Q&A
-
QuestionHow do you fix cracks in furniture?
 William & Shannon LatilWilliam & Shannon Latil are Furniture Refinishing & Home Remodeling Specialists and the Founders of Furniture Refinishing Services based in Houston, Texas. With over 30 years of experience, William and Shannon specialize in repairing and restoring wood furniture, refinishing kitchen cabinets, remodeling kitchens, and building live-edge wooden tables. William and Shannon have won Awards for Excellence from the Better Business Bureau and the Houston Chronicle Best Small Business Award. Their work has also been featured in Houston Press Magazine - Kitchen Design. Additionally, the Furniture Refinishing Services team has conducted major refinishing work on venues such as NRG Stadium and Minute Maid Park.
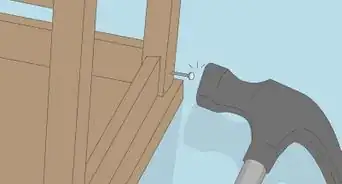
Furniture Refinishing & Home Remodeling SpecialistsYou can use wood filler or wood putty of a similar color to your furniture. After application and letting it set, go over it lightly with a matching color stain.
Warnings
- Some old furniture was painted with lead-based paint, which is a health hazard. You can buy a kit at your local hardware store to test your furniture for lead-based paint. When restoring furniture painted with lead-based paint, take precautions such as restoring the furniture in a workshop away from your home. You might also pass on furniture painted with lead-based paint if you have children in your home. [25]⧼thumbs_response⧽
Things You'll Need
- Heavy-duty gloves
- Mask
- Protective eyewear
- Work apron
Restoring Wooden Furniture
- Heavy-duty gloves
- Mask
- Protective eyewear
- Work apron
- Dish detergent or mineral spirits
- Old paintbrushes
- Paint remover
- Paint remover neutralizer
- Stripping tool/putty knife
- Sandpaper (fine and rough grit)
- Lint-free rags or cloths
- Wood filler (optional)
- Paint or wood stain
- Clear finishing coat
Restoring Upholstered Furniture
- Vacuum cleaner
- Stain remover in a spray bottle
- Dish detergent
- Clean sponges
- Steam cleaner, optional
- Upholstery cleaner, optional


References
- ↑ Tanglewood Sue. DIY & Upcycling Specialist. Expert Interview. 24 March 2021.
- ↑ https://www.bobvila.com/articles/how-to-clean-wood-furniture/
- ↑ https://www.thisoldhouse.com/ideas/read-you-strip-paint-wood
- ↑ Tanglewood Sue. DIY & Upcycling Specialist. Expert Interview. 24 March 2021.
- ↑ https://www.thisoldhouse.com/ideas/read-you-strip-paint-wood
- ↑ Tanglewood Sue. DIY & Upcycling Specialist. Expert Interview. 24 March 2021.
- ↑ https://www.architecturaldigest.com/story/how-to-refinish-a-table
- ↑ https://mrhardware.com/articles-and-videos/paint-stripping/
- ↑ https://www.familyhandyman.com/woodworking/furniture-repair/stripping-furniture-tips-for-refinishing/
- ↑ https://www.askthebuilder.com/how-to-fill-wood-cracks/
- ↑ William & Shannon Latil. Furniture Refinishing & Home Remodeling Specialists. Expert Interview. 29 October 2021.
- ↑ William & Shannon Latil. Furniture Refinishing & Home Remodeling Specialists. Expert Interview. 29 October 2021.
- ↑ https://www.realhomes.com/advice/how-to-restore-old-wooden-furniture
- ↑ https://www.realhomes.com/advice/how-to-restore-old-wooden-furniture
- ↑ https://www.architecturaldigest.com/story/how-to-refinish-a-table
- ↑ William & Shannon Latil. Furniture Refinishing & Home Remodeling Specialists. Expert Interview. 29 October 2021.
- ↑ https://www.familyhandyman.com/woodworking/staining-wood/how-to-stain-furniture/
- ↑ Tanglewood Sue. DIY & Upcycling Specialist. Expert Interview. 24 March 2021.
- ↑ https://www.hgtv.com/design/decorating/design-101/how-to-painting-furniture
- ↑ https://bungalow.com/articles/the-ultimate-guide-to-cleaning-your-couch
- ↑ https://www.apartmenttherapy.com/we-cleaned-our-sofa-in-the-was-105752
- ↑ https://bungalow.com/articles/the-ultimate-guide-to-cleaning-your-couch
- ↑ https://www.esquire.com/style/news/a44009/clean-couch/
- ↑ https://www.bhg.com/decorating/do-it-yourself/fabric-paper-projects/diy-chair-upholstery-guide/
- ↑ https://www.countryliving.com/shopping/antiques/a338/lead-paint-antique-furniture/
About This Article