This article was co-authored by Jeff Huynh and by wikiHow staff writer, Amy Bobinger. Jeff Huynh is the owner of Moseybolt, a full service solution in home services, renovations, and repair in the Greater Seattle area. He has over five years of handyman experience. He has a BS in Business Administration from the San Francisco State University and his Certificate in Industrial Electronics Technology from North Seattle College.
There are 10 references cited in this article, which can be found at the bottom of the page.
This article has been viewed 41,767 times.
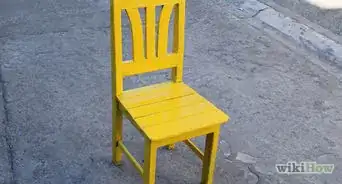
Painting a piece of furniture can give it a second life, and it's a great way to freshen up a room without spending a lot of money. Whether you bought an old dresser at a yard sale or you want to give your dining room chairs a chic makeover, you can paint almost anything. Look for old furniture around your house or at yard sales and antique shops, then try this yourself for a fun weekend project!
Steps
Prepping the Furniture and Your Workspace
-
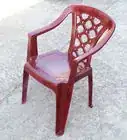
1Place the furniture on top of a drop cloth. A drop cloth or a waterproof tarp will help protect your floors from becoming stained if you’re painting indoors, making cleanup much easier. In addition, it will keep dirt, grass, and insects out of the wet paint if you’re working outside.[1]
- Have someone help you if the piece of furniture is too heavy for you to lift on your own.
-
2Open any windows to ventilate the room if you’re painting inside. Paint fumes can be dangerous if you breathe them in, so be sure to work in a well-ventilated space. Open any windows and doors, or place a fan in the room if that’s not an option.[2]
- Many modern paints are made to give off fewer fumes, but it’s still best practice to work in a ventilated area.
Advertisement -
3Remove any hardware that will come off, like knobs, cushions, or wheels. When you’re painting a piece of furniture, it’s easy to accidentally brush over a cabinet pull, drawer handle, or other pieces that you wanted to leave in their original state, so it’s best to take them off beforehand. Look for screws, clips, or staples that you can undo in order to remove the hardware.[3]
- To make sure you don’t forget how everything went originally, take a picture of any hardware before you take it off.
- If you only want to paint a certain part of the furniture, like the legs of a table or the decorative front on a bookshelf, consider disassembling the furniture and painting the pieces individually.
- If you can't remove something that you don't want painted, use painter's tape and, if necessary, plastic sheeting to cover it.
-
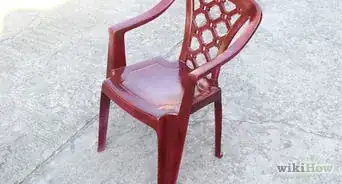
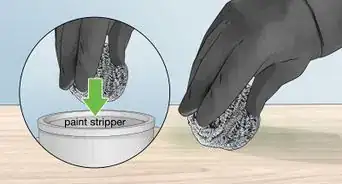
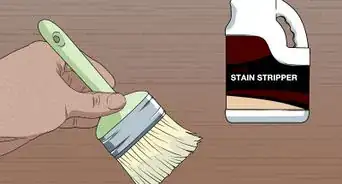
4Strip the wood if it has any kind of finish. You'll need to strip off any existing paint or stain on the wood before painting it.[4] Working in small sections, coat the surface of the furniture with the appropriate solvent for the type of finish. Let it sit for 5-10 seconds, then use steel wool or a coarse cloth to wipe away the solvent. Keep doing this, changing cloths frequently, until you've covered the entire piece. If you need to, scrape away the last of the finish with steel wool or a paint scraper.
- Furniture stripper has very strong fumes and can be damaging to your skin, so wear a face mask with a respirator and heavy rubber gloves while you're doing this.
- You might also want to strip the furniture if the existing paint is flaking, thick, or super glossy. Look for a paint stripper suitable for use on the type of material the furniture is made from.
- For instance, a paint stripper intended for wood should not be used on a metal chair, unless the label indicates it's safe for both surfaces.
-
5Fill in any holes or scratches in wood with putty and sand it smooth. If there are any scratches, chips, or gouges in the furniture, they'll show beneath your paint job. To fix this, use a putty designed for wood. Pick up a generous amount of the putty with a putty knife and spread it across the damaged area, making sure you completely fill in the hole. Give the putty several hours to dry, depending on the manufacturer’s instructions, then sand away any excess putty with 150-grit sandpaper until you have a smooth finish.
- Leaving excess putty will create a texture that you’ll be able to see beneath the paint.
- If you want to preserve the furniture’s weathered appearance, it’s fine to leave the scratches as-is.
- If your furniture is made from a material other than wood, try to find a putty designed for that surface. For instance, if you're painting a plastic chair, you could use an epoxy putty.
-
6Sand the surface you want to paint until it's smooth.[5] Use 150-grit sandpaper, and lightly sand the entire surface that you want to paint. If the furniture is has a grain to it, like wood or some metals, sand the direction of the grain. You only need to sand enough to take away any shine that's on the surface. Be careful not to gouge into the wood itself, or you'll damage the furniture and leave marks that could show beneath your paint.[6]
- If the furniture has been varnished, use 80-grit sandpaper instead of 150-grit. You will need a rougher grain to dull the glossy sheen. Still, be careful not to sand all the way through to the wood beneath the varnish.
- For smaller projects, like the legs of a chair, you can sand by hand, but if you're working with a larger piece of furniture, like a table or a dresser, use an orbital sander.[7]
- Wear a face mask to avoid breathing in the dust particles from sanding. If you're using an orbital sander, wear heavy-duty gloves and safety glasses as well, to protect yourself from debris.[8]
-
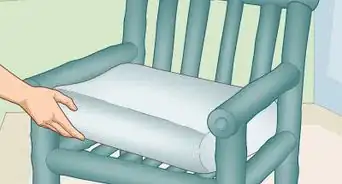
7Wipe the furniture down with a tack cloth. A tack cloth is the best option for removing dust or other fine particles from furniture. Take your time as you’re wiping down the piece, since even the smallest piece of dirt, pet hair, or sawdust could result in a bumpy finish for your paint. Repeat this step after every coat of paint or primer.[9]
- You can find tack cloth at any home improvement store or wherever paint supplies are sold.
-
8Paint the furniture with a coat of primer.[10] Primer is used as a base coat, and it will help produce a smoother look to your finished paint job. Choose a primer designed for use on the material your furniture is made from, then use a soft-bristled brush or a mini-foam roller to cover the furniture in a thin, even coat. Be sure to prime the entire surface you plan on painting, and use extra care around corners or details, as paint and primer tend to collect and drip in these areas.[11]
- Follow the manufacturer's instructions for drying times–some will dry in as few as 10-20 minutes, while others might need a few hours.
- You can use a spray primer rather than one you have to brush on, if you like.[12]
- Opt for grey primer if you’re painting the furniture a darker color, or use white as a primer for lighter paints.
-
9


Choosing the Right Paint or Stain
-
1Stain the wood to preserve its natural appearance. Stain penetrates the wood, rather than sitting on top of it, and it allows you to see the natural grain in the wood. It’s a good option if you want to keep the look of the wood but you don’t like the exact shade.[15]
- If you want to stain the wood, you'll need to strip it first.
-
2Use acrylic paint for a smooth finish on most projects. Acrylic paint is a good option for most furniture pieces because it adheres to most surfaces and is available in a wide range of shades. As it dries, it levels out to a smooth finish, so it doesn't show brush marks as much as some other paints might.[16]
- Acrylic paint has an eggshell finish, also called a satin finish, meaning it has a little shine once it dries, but not much.
- Acrylic can be used to paint wood, metal, and plastic furniture. It can even be used to decorate glass, so if you have a table with a glass top, you can use one color on the legs, then use another color to paint a design directly on the glass.[17]
-
3Choose latex paint for unfinished wood projects. Latex paint is commonly used for painting walls, so it’s affordable and easy to find. However, while it bonds well to unfinished wood, it may not be as durable on other surfaces, even if you prepped the furniture properly.[18]
- Latex paint comes in a full range of finishes, from flat to glossy.
-
4Opt for chalkboard paint for a super-matte, modern look. Chalkboard paint has a chalky, matte finish, and it’s a great way to add a trendy look to an old piece of furniture. It dries quickly, so use light, thin coats to avoid leaving brush strokes.[19]
- Chalk paint will adhere to almost any surface, even if it's very glossy. You can paint wood, plastic, metal, stone, glass, and more, making it a versatile option for furniture.
- Chalkboard paint is great for creating a distressed look. After it dries, lightly rough it up with a piece of 220-grit sandpaper. Focus especially around the edges or handles, where wear would naturally occur.
-
5Be creative with the color. The only limit to the color you choose is your own imagination! Match the paint color to the other decorations in the room, or choose a unique color to make the piece stand out. When you’re choosing the color, think about the proportion of the furniture to the room it’s in. A bright or bold color on a very large piece of furniture can be overwhelming.
- Consider painting a large bookshelf the same color as the walls in your room to help it blend in.
- Primary colors are perfect for a kids’ room!
- Elegant colors like cream and gold are a beautiful option for painted furniture in a more formal setting.


Painting the First Coat
-
1Stir the paint thoroughly with a paint stick. Paint can settle or separate, and if you don’t stir it, you could be left with a streaky finish. To avoid this, use a paint stick, which is a flat, wooden stick, to stir the paint. Be sure to stir all the way to the bottom of the can to ensure the pigment didn’t settle.[20]
- You can find paint sticks wherever paint is sold. They are usually inexpensive or even free.
-
2Dip the brush in the paint and wipe off the excess. Don’t wipe off too much paint, or else you’ll end up with brush marks from using a dry brush. Just swipe one side of the brush against the side of the can to ensure the paint won’t drip off of the brush.[21]
- Choose a brush that's narrower than the surface you're painting. For instance, if you're painting a 2 in (5.1 cm) chair leg, your brush should be no larger than 1 1⁄2 in (3.8 cm). This will minimize drips and give you better control over the brush.
- If you're using an oil-based paint, choose a paintbrush with natural bristles, or opt for synthetic if you're using a water-based latex paint. For other paints, you can choose your preference.[22]
- A brush with an angled tip will help you paint more precisely.
-
3Apply the paint in light, even coats in the direction of the grain. Don’t worry about getting the paint completely opaque on the first pass. You'll get a much better result if you use 2-3 light coats of paint rather than trying to brush it all on in one coat. [23]
- Use a small foam roller or an angled, soft-bristled brush, depending on the size of the furniture and what’s more comfortable for you.[24]
- Use light, smooth strokes with a brush, and try to use as few strokes as possible to avoid leaving brush marks in the paint.
- If the surface you're painting doesn't have a grain, just work side-to-side.
-
4Wipe away any drips with your brush as soon as you see them. If you see paint start to drip, carefully smooth it out with your paint brush. Drips are especially common in corners or around any detailed pieces, so keep an eye out if you’re painting those.[25]
- If the paint drip has started to dry, leave it alone. You'll sand it down later.
-
5Paint into the wet edge rather than away from it. When you lift up your brush to add more paint, don't just start painting where you left off. Instead, load your paintbrush with more paint, then put the bristles of the brush down on an unpainted section of the furniture's surface. Drag the brush toward the area you just painted, stopping when the new paint overlaps the old by about 1–2 in (2.5–5.1 cm)
- If you put your brush down on the area you just painted, then drag the paint outward, you'll leave brush marks in the paint.
-
6Let the paint dry for 6-8 hours, depending on the manufacturer's instructions. Most paint needs about 6-8 hours to dry completely. However, certain kinds of paints, including chalk paint, will dry much faster than that. Check the paint can to see what’s recommended.[26]
- Keep pets away from the furniture while the paint is drying. Paint fumes can be dangerous to many pets, so it's best to keep them out of the area. Furthermore, a curious sniff from the family pet could be all it takes to get fur or dander in the wet paint, leaving fuzz that will show on the finished piece.

Finishing the Piece
-
1Sand the surface of the dried paint lightly with 220-grit sandpaper. Once the paint has dried completely, lightly rough it up with a piece of fine-grit sandpaper. Similar to the way you sanded the primer, this will help the next coat stick better, giving you a smoother finish in the end.
- If there are any dried drips or other mistakes, sand them away as well.[27]
-
2Dust the dried paint with a tack cloth. Sanding will leave dust on the piece, so wipe it down again with your tack cloth. Take your time, and make sure you don’t leave any debris that will leave a bumpy surface under your paint.[28]
- If you forget this step, the next coat of paint will have a rough, bumpy texture. Once that coat dries, you’ll have to sand back down to the primer layer and start over again.
-
3Add another 1-2 coats of paint as needed. Almost all projects will need a second, and maybe a third, coat. Some may even need more than that, especially if the paint is very thin. Repeat the steps, from painting through sanding, for each coat. Be sure to let the paint dry completely after every coat.[29]
- More coats of a thinner paint will look better than fewer coats of a thicker paint.
- If you can see any streaks through the paint once it's dry, it needs another coat. These streaks might not show up in certain light, so look at the furniture at different times of day, such as morning, noon, and evening, as well as under different light sources.
- For instance, you might notice streaks at mid-day when the furniture is lit naturally, but you might not have seen them under an incandescent bulb in the evening.
-
4Seal the furniture with polyurethane if you want a protective finish. It's not necessary to apply paint sealer, but it will help your paint last longer and will make the furniture less susceptible to scratches. If you want to apply sealer, dust the furniture carefully with your tack cloth, and apply the polyurethane with long, smooth strokes. If the surface has a grain, like wood or some metals, work in the direction of the grain. Otherwise, use a side-to-side motion.
- If you used oil-based paint, apply an oil-based sealer. If your paint was water-based, use a water-based sealer.
- Use a clean brush with natural bristles for oil-based polyurethane, or opt for synthetic bristles if the polyurethane is water-based.
-
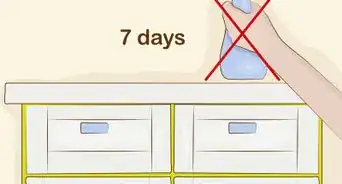
5Let the paint and sealer cure for at least 24 hours. Depending on how many coats of paint you used, the thickness of the paint, and environmental factors like the humidity where you live, it can take weeks for the paint to completely cure. However, you'll need at least 24 hours for the furniture to cure enough for you to move it.
- If you try to move the furniture before the paint has fully cured, you could scratch, dent, or chip the finish.
-
6Reattach any hardware and enjoy your hard work. If you took pictures of the hardware, use them as a reference as you’re reattaching the pieces. Once everything’s re-assembled, sit back and enjoy your furniture’s new look!


Expert Q&A
-
QuestionHow long should I let the paint dry between coats?
 Jeff HuynhJeff Huynh is the owner of Moseybolt, a full service solution in home services, renovations, and repair in the Greater Seattle area. He has over five years of handyman experience. He has a BS in Business Administration from the San Francisco State University and his Certificate in Industrial Electronics Technology from North Seattle College.
Professional HandymanSince wood warps a lot, especially with environmental changes, it's typically a good idea to wait a full day between coats, especially if it's a really heavy coat.
Things You'll Need
Prepping the Furniture
- Drop cloth
- Fan (optional)
- Screwdriver for removing hardware (optional)
- Camera (optional)
- Painter's tape and plastic sheet (optional)
- Solvent for removing paint or stain (if staining)
- Putty (optional)
- Putty knife (optional)
- Sandpaper (80- or 150-grit; 220-grit)
- Orbital sander (optional)
- Face mask
- Heavy-duty gloves and safety glasses (optional)
- Tack cloth
- Primer
- Soft-bristled brush or foam roller
Painting the First Coat
- Your choice of paint or stain
- Wooden paint stick
- Small foam roller or angled, soft-bristled paintbrush
- Tack cloth
- 220-grit sandpaper
Finishing the Piece
- Polyurethane sealer (recommended)
- Brush
- Tack cloth
- 220-grit sandpaper


References
- ↑ https://www.countryliving.com/diy-crafts/tips/a266/paint-furnishings-and-learn-from-my-mistakes/
- ↑ https://www.cpsc.gov/s3fs-public/painting.pdf
- ↑ https://www.apartmenttherapy.com/how-to-paint-furniture-biggest-painting-mistakes-257192
- ↑ Jeff Huynh. Professional Handyman. Expert Interview. 30 April 2019.
- ↑ Jeff Huynh. Professional Handyman. Expert Interview. 30 April 2019.
- ↑ https://www.countryliving.com/diy-crafts/tips/a266/paint-furnishings-and-learn-from-my-mistakes/
- ↑ https://www.bobvila.com/articles/30124-dream-it-do-it-how-to-paint-wood-furniture/
- ↑ https://www.apartmenttherapy.com/how-to-paint-furniture-biggest-painting-mistakes-257192
- ↑ https://www.countryliving.com/diy-crafts/tips/a266/paint-furnishings-and-learn-from-my-mistakes/
- ↑ Jeff Huynh. Professional Handyman. Expert Interview. 30 April 2019.
- ↑ https://www.countryliving.com/diy-crafts/tips/a266/paint-furnishings-and-learn-from-my-mistakes/
- ↑ https://www.bobvila.com/articles/30124-dream-it-do-it-how-to-paint-wood-furniture/
- ↑ Jeff Huynh. Professional Handyman. Expert Interview. 30 April 2019.
- ↑ https://www.countryliving.com/diy-crafts/tips/a266/paint-furnishings-and-learn-from-my-mistakes/
- ↑ https://www.apartmenttherapy.com/how-to-paint-furniture-biggest-painting-mistakes-257192
- ↑ https://refreshliving.us/best-paint-furniture/
- ↑ https://www.artistsnetwork.com/art-mediums/acrylic/8-painting-substrates-acrylic-painting-tips/
- ↑ https://refreshliving.us/best-paint-furniture/
- ↑ https://2beesinapod.com/2018/02/12/how-to-chalk-paint-furniture-our-best-tips/
- ↑ https://2beesinapod.com/2018/02/12/how-to-chalk-paint-furniture-our-best-tips/
- ↑ https://www.apartmenttherapy.com/how-to-paint-furniture-biggest-painting-mistakes-257192
- ↑ https://www.popularmechanics.com/home/how-to/a7647/which-paintbrush-should-you-use/
- ↑ https://www.apartmenttherapy.com/how-to-paint-furniture-biggest-painting-mistakes-257192
- ↑ https://2beesinapod.com/2018/02/12/how-to-chalk-paint-furniture-our-best-tips/
- ↑ https://refreshliving.us/how-to-paint-furniture/
- ↑ https://www.countryliving.com/diy-crafts/tips/a266/paint-furnishings-and-learn-from-my-mistakes/
- ↑ https://www.countryliving.com/diy-crafts/tips/a266/paint-furnishings-and-learn-from-my-mistakes/
- ↑ https://www.countryliving.com/diy-crafts/tips/a266/paint-furnishings-and-learn-from-my-mistakes/
- ↑ https://www.countryliving.com/diy-crafts/tips/a266/paint-furnishings-and-learn-from-my-mistakes/
About This Article
To paint furniture, start by lightly sanding it with 150-grit sandpaper so the primer and paint adhere better. Then, apply a coat of primer using a brush or roller, which will help the paint go on smoother, and let it dry completely. Next, sand the primer with 220-grit sandpaper before applying a coat of acrylic paint. You may also need to add a second and third coat of paint. Finally, once the paint is dry, seal the furniture with polyurethane. To learn how to stain furniture instead of painting it, scroll down!