This article was co-authored by wikiHow Staff. Our trained team of editors and researchers validate articles for accuracy and comprehensiveness. wikiHow's Content Management Team carefully monitors the work from our editorial staff to ensure that each article is backed by trusted research and meets our high quality standards.
There are 13 references cited in this article, which can be found at the bottom of the page.
This article has been viewed 8,687 times.
Learn more...
Wall tiles can be super decorative, beautiful, and not to mention expensive. So rather than just throwing old tiles away, you can find another use for them as a way to upcycle your material. If they’re already on your wall, they’ll need to be removed without damaging them so you can repurpose them. It’s also important that the tiles are clean and don’t have any of their old adhesives still stuck on them so you can reuse them for functional or creative projects, or both!
Steps
Removing Wall Tiles
-
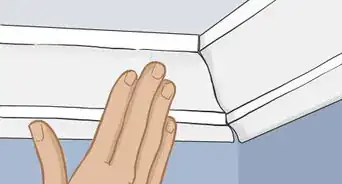
1Cover surfaces near the wall and open windows to increase circulation. Protect any nearby surfaces such as sinks, countertops, or furniture from dust and debris by covering them with a drop cloth or a tarp. Work in a well-ventilated area to avoid breathing in dirt and dust by opening up some windows or adding fans to the room to increase airflow.[1]
- If there’s a lot of dust, cover your nose and mouth with a face mask, cloth, or bandana.
- Move any furniture pressed against the wall out of the way so you can access all of the tiles easily.
-
2Scrape away the grout between the tiles with a grout saw. A grout saw, also known as a grout rake, is a small handheld tool with a flat, sharp edge that’s used to remove grout from between tiles. Take your grout saw and run it back and forth over the grout between the tiles to scrape it away. Scrape all the way through the grout until you make contact with the wall behind it.[2]
- Be careful not to scratch or cut through the wall.
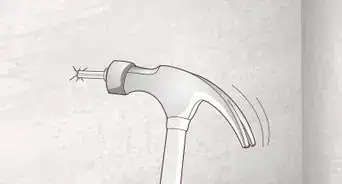
Tile Tip: If you don’t have a grout saw, you can use a utility knife to scrape away the grout.
Advertisement -
3Pry off smaller tiles with a putty knife. Fit a flexible putty knife in the space between the grout you removed and slide it underneath the tile. Hold the tile with 1 hand so it doesn’t fall to the floor and lift the handle of the putty knife to pry it away from the wall. Continue prying the rest of the tiles off of the wall with your putty knife the same way.[3]
- Use a putty knife to remove tiles smaller than 6 by 6 inches (15 by 15 cm) so the thin, flexible blade is able to fit underneath them far enough to pry them up without cracking the tiles.
-
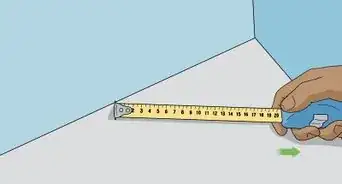
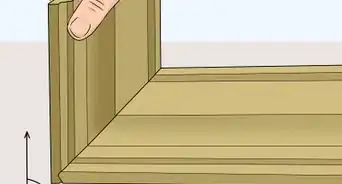
4Fit a flat chisel into the space between the grout lines of large tiles. Tiles larger than 6 by 6 inches (15 by 15 cm) will need more leverage to be properly removed without damaging or breaking them. Fit the flat edge of a chisel into space between the tiles where the grout was and wedge it beneath the edge of the tile you want to remove.[4]
- If you don’t have a chisel, you can use a large flathead screwdriver.
-
5Tap the chisel with a hammer to pry the tile from the wall. With the edge of the chisel wedged beneath the edge of the tile, gently tap the end of it with your hammer to start prying it away from the wall. Move the chisel along the edge of the tile as you tap it to pry it off the wall evenly so it won’t crack or break from the pressure.[5]
- Remove the remaining tiles the same way, using gentle taps from your hammer to avoid damaging them so they can be reused.


Cleaning Old Wall Tiles
-
1Fill a large bucket with warm water and soak the tiles in it for 1 hour. Take a clean, large bucket and fill it about ¾ full with warm water. Carefully place your tiles into the bucket so they don’t crack or chip. Allow the tiles to soak for a full hour to remove dust and dirt and to soften any mortar or adhesive on them so they’re easier to clean off.[6]
- It’s okay to stack the tiles on top of each other, but use shorter stacks so you put too much pressure on the bottom tiles, which could cause them to crack.
- You don’t need to add any soap or solvents to the water.
- If you have a lot of tiles to clean, use multiple buckets or a large container such as a garbage can to hold them all.
-
2Remove the tiles and scrape along the outer edges with a utility knife. Carefully remove the tiles from the water and place them on a clean surface. Take a utility knife and scrape along the outer edges of the tiles to remove any small bits of grout stuck to them so they’re flush and even.[7]
- Remove the grout from the edges of all of your tiles so they’re uniform and consistent.
Tile Tip: If the grout is particularly stubborn and difficult to remove, you can use your hammer and chisel to knock it off. But be very careful so you don’t chip or crack your tiles!
-
3Scrape off the adhesive from the back of the tiles with a floor scraper. A floor scraper is a metal tool that’s used to remove grout, mortar, and old flooring. Take a small, 4 in (10 cm) floor scraper and hold the edge at an angle with the surface of the back of the tile. Use the flat edge to scrape away any adhesive, mortar, and other backing material away from the surface.[8]
- Remove the adhesive and backing materials from all of the tiles with your floor scraper.
- You can find 4 in (10 cm) floor scrapers at your local hardware and home improvement store, or by ordering one online.
-
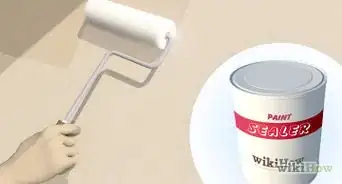
4Scrub the tiles with grout cleaner and a scouring pad to clean them. Once you’ve removed all of the grout, adhesive, and any other materials from your tiles, apply some grout cleaner over the surface of the front and back of them. Use a scouring pad to scrub away dirt, dust, and grime so the tiles are completely clean.[9]
- You can find grout cleaner and scouring pads at department stores and by ordering them online.
-
5Rinse the tiles off with clean water and let them dry. Give the tiles a good rinse to remove any last bits of dirt, debris, and adhesive from the surface. Then, spread them out face up on a flat surface to allow them to air dry. If you plan to use the tiles immediately after cleaning them, dry them off with a clean cloth or towel.[10]
- Make sure you use clean water so you don’t spread more dirt onto them.
- If you plan to store the tiles, stack them neatly on each other and keep them in a cool, dry location so they aren’t exposed to temperature fluctuations that could damage them.


Repurposing Old Wall Tiles
-
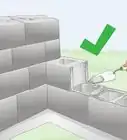
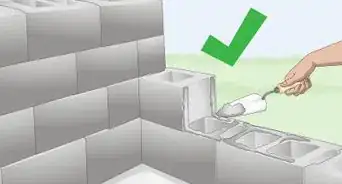
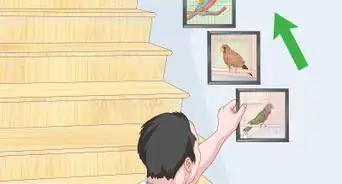
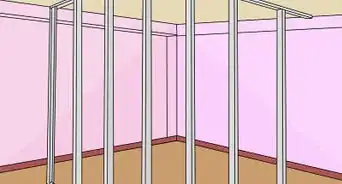
1Install the tiles onto a new wall to reuse them if you have enough. If you’ve got enough old tile to cover an entire wall, it’s a great way to upcycle them! Sand the wall with 80-grit sandpaper and wipe it down with a damp sponge to remove the dust. Apply about a 1⁄8 inch (0.32 cm) layer of adhesive to the wall and use a trowel to add grooves. Then, hang your tiles by pressing them into the adhesive. Fill the spaces between the tiles with grout and let your wall dry for 6-8 hours so it sets.[11]
- Mix your adhesive and grout according to the directions on the packaging.
-
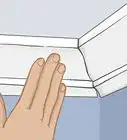
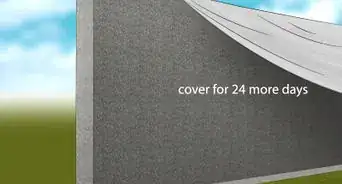
2Cover a countertop or table with the tiles. If you have decorative or antique wall tiles that you want to repurpose, use them to cover your kitchen countertop by installing a plywood base and concrete board, applying your mortar, and pressing the tiles into the mortar. You could also decorate a tabletop by attaching them to the surface with wood glue and then adding grout between the tiles to seal the surface.[12]
- Allow the countertop or table to dry for a full 24 hours before you use them.
- Mix the mortar or grout according to the directions on the packaging.
Tile Tip: To really jazz up your tabletop design, add glitter to your grout mix!
-
3Glue cork sheet to the back of the tiles to make decorative coasters. Take thin sheets of cork and cut them to fit the back of your tiles with a utility knife. Apply some super glue to the back of your tiles and press the cork onto the surface. Hold the cork in place for about 10 seconds so it sticks to it well.[13]
- You could also use hot glue to attach the cork sheet.
- You can use your tiles as coasters immediately after you attach the cork to them.
- If the tiles are large enough, print out photographs or designs, attach them to the front of your tiles with mod podge, and cover them with clear tape to laminate them!
-
4Attach a magnet to the tiles to make fridge magnets. If you have smaller pieces of tile, use super glue to attach small magnets to the backside of them so you can stick them to your fridge. Add stickers, designs, or even small photographs to your magnets to make them both functional and decorative.[14]
- Some magnets even come with a self-adhesive on 1 side so all you need to do is remove the paper backing to expose the adhesive and stick the magnets to your tiles.
-
5Roll sheet tile around a vase to decorate it. If you have some sheet tile, pick up a cheap plastic vase, wrap it around the vase, and use a utility knife to cut the sheet so it fits neatly over the surface. Cover the vase with a layer of mortar about 1⁄8 inch (0.32 cm) thick. Line up the sheet of tile with the edge of the vase and carefully roll it over the surface, pressing it into the mortar. Fill the space where the 2 edges of the sheet connect with grout and let the vase dry for 24 hours before you use it.[15]


Warnings
- Wear a facemask, cloth, or bandana to cover your mouth and nose if you’re removing tiles and there’s a lot of dust.⧼thumbs_response⧽
Things You’ll Need
Removing Wall Tiles
- Drop cloths or tarp to cover surfaces
- Grout saw
- Putty knife (for small tiles)
- Chisel and hammer (for larger tiles)
Cleaning Old Wall Tiles
- Utility knife
- Large bucket
- 4 in (10 cm) floor scraper
- Grout cleaner
- Scouring pad
Repurposing Old Wall Tiles
- Grout and mortar mix (to install tiles on a wall, countertop, or table)
- Super glue and cork sheet (for coasters)
- Magnets and super glue (for fridge magnets)
- Cheap vase (for decorative vase)


References
- ↑ https://youtu.be/gmu_jd_77k0?t=59
- ↑ https://todayshomeowner.com/how-to-remove-tile-without-breaking/
- ↑ https://todayshomeowner.com/how-to-remove-tile-without-breaking/
- ↑ https://youtu.be/gmu_jd_77k0?t=125
- ↑ https://youtu.be/gmu_jd_77k0?t=131
- ↑ https://youtu.be/nEayQuWBs_w?t=63
- ↑ https://youtu.be/-72KxE6Q4tc?t=15
- ↑ https://youtu.be/-72KxE6Q4tc?t=74
- ↑ https://youtu.be/Y02N-cpejSU?t=59
- ↑ https://www.realsimple.com/home-organizing/cleaning/cleaning-bathroom/how-clean-bathroom
- ↑ https://youtu.be/ae4xdn_KqN4?t=98
- ↑ https://www.brit.co/diy-mixed-titled-table/
- ↑ https://www.diyncrafts.com/31259/repurpose/18-innovative-repurposing-projects-to-upcycle-flooring-tiles
- ↑ https://www.apartmenttherapy.com/diy-ideas-13-ways-to-reuse-leftover-tiles-248257
- ↑ https://www.apartmenttherapy.com/diy-ideas-13-ways-to-reuse-leftover-tiles-248257
About This Article