This article was co-authored by Deanna Ranlett. Deanna Ranlett is a Pottery and Ceramics Professional and the Owner of Mudfire Inc. in Decatur, Georgia. With more than 22 years of experience in the ceramics industry and eight years of experience owning a studio, they specialize in glaze formulation, firing ceramic and pottery pieces, general clay projects, and screen printing for ceramics. Deanna holds a BFA in Ceramic Arts and Ceramics from Georgia State University.
There are 10 references cited in this article, which can be found at the bottom of the page.
This article has been viewed 180,856 times.
Clay is a wonderful sculpting medium due to its versatility and pliability. While clay is a marvelous medium to work with, it can be frustrating to return to your clay stores only to find a hardened, dried-out lump. Fortunately, dried-out clay does not need to immediately be thrown away; instead, you can revive your clay with a few simple methods depending on whether your clay is air-dry, ceramic, or child's putty.
Steps
Reviving Air-Dry Clay
-
1Work with the air-dry clay a little. Knead it, bend it, and twist it to see if it will revive of its own accord. The heat and moisture from your hands may be enough to bring your clay back to life. Give it about 5 minutes of consistent movement and kneading to determine if this is the case.[1]
- In some instances, your clay will require more than your own natural oils and warmth. If this is the case, move on to the next step.
- If working the clay with your hands is enough to give it new vigor, make sure you store it in a sealed, air-tight bag to prevent drying out again in the future.
-
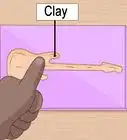
2Place the air-dry clay into a sealable plastic bag.[2] Although most clay comes in large plastic bags, most of these bags do not have a means of sealing. Remove your clay from the bag it came in and place it in a large, sealable plastic bag.
- If you do not have a bag large enough to fit all of your clay, cut your clay into manageable clumps and practice this method one small piece at a time.
Advertisement -
3
-
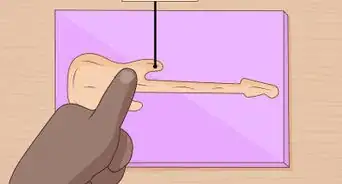
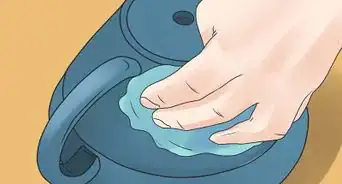
4Seal the bag and set aside.[5] Let the water and clay sit for a few minutes to absorb the moisture. Double check the seal to make sure it is air-tight and none of the moisture is able to leak out.
- Keep it away from heat or direct sunlight during this process, as both can cause moisture to evaporate.
-
5Remove the air-dry clay from the bag. After waiting 5-10 minutes, open the bag and remove the clay, checking the moisture content as you do so. Does it have more spring to it? Twist and knead your clay, checking for easy movement and manipulation.[6]
- If your clay has returned to a usable state, you are done!
-
6If needed, return the air-dry clay to the bag. After returning your clay to a sealed bag, add a few more drops of water. Seal and set aside once more, leaving the water to seep into the clay for up to 30 minutes.
- Once more, avoid heat and sunlight in this step. A bathroom is a great moist environment to allow your clay to sit in.
-
7Remove the clay again and knead. If the clay has become malleable, success! Continue to store it in a sealed bag or container to prevent it from drying out in the future. If you cannot get to your clay regularly, consider storing it in a moist environment, such as the bathroom or kitchen, to keep moisture contained.
- If the clay remains hard or difficult to work with, it may be past the point of saving, and will need to be replaced.

Reviving Ceramic Clay
-
1Fill a large container with clean, filtered water. Measure the clay you need to soak and make sure it will fit in the basin before beginning. The entirety of the clay needs to be submerged, so make sure you use a container large enough for your clay.[7]
- If you do not have a basin large enough, you can cut your clay into smaller pieces and do this gradually.
-
2Soak ceramic clay in clean water. Place your ceramic clay inside of the water, making sure it is completely submerged. Some pieces may break apart and float to the surface or some debris may come loose. Both are okay, and will not affect the soaking process.[8]
- Do not stir the clay as it soaks. Stirring will interfere with the soaking process and will not allow the porous nature of your clay to properly take in water.
-
3Soak the clay for 2-3 days. Placing a towel or other cover on top of your container to keep out curious pets or pesky dust particles, give the clay 2-3 days to thoroughly soak up all of the water. At the end of the three days, the clay should look like a handful of mush.
- If your clay does not seem to be affected after 3 days, allow it to soak for an additional day, until it begins to loosen up.
-
4Drain the basin of water. At the end of the three days (or when the clay is moist), begin to remove the water. Because the clay will be extremely mushy in texture, you will not be able to turn the basin upside-down to drain the water. Instead, you can remove water using a ladle or siphon water out using a tool such as a turkey baster.
- The tools you use may be at risk for coming into contact with clay. If you are not comfortable with the possibility of ruining the ladle or baster, purchase an additional set for this purpose.
-
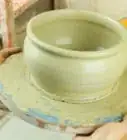
5Firm your clay. Remove the clay from the basin using your hands and place it atop a concrete slab, plaster slab, canvas, or denim surface, making sure your surface is clean first. Spread the mixture 2-3 inches (5-8 cm) thick to dry, smoothing your hands over the top of the clay to prevent uneven drying.[9]
- To help your clay dry out faster, you can place a fan beside it as it dries.
-
6Store clay in sealed containers. Once your clay has dried, seal it in proper storage containers, making sure air cannot reach the clay and dry it out a second time.[10]
- You can simply place your clay in a sealed container once it has hardened or you can roll it into coils and place your coils into plastic wrap or sealed plastic bags.
- The length of time you expect to store your clay will play a role in how you store it. If you plan to store it for an extended period of time, tight plastic storage is the preferred method.

Moisturizing Children's Putty
-
1Gather all of the pieces of putty or dough. Old children's putty often separates into multiple dried, hardened chunks. Gather all of the pieces you want to moisturize and place them in your hand, molding them into a ball as much as is possible.
-
2Rinse the dough for 10-15 seconds. Place your ball of clay beneath a steady stream of water for 10-15 seconds--or longer, if the dough is completely hardened. Hold it carefully in your hands, as extremely dried-out clay may begin to come apart and could fall down the drain.
- Alternatively, you can fill a cup with water and pour the water directly onto the clay.
- To prevent clogging the drain, lay down a drain trap to catch any runaway pieces of clay.
-
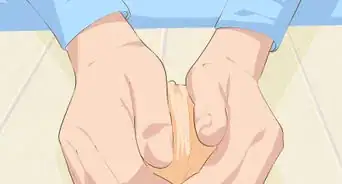
3Knead the dough for 30 seconds. Place the dough on a clean, non-stick surface, such as a granite counter or porcelain sink. Work the dough through your hands, keeping all pieces of the dough together.[11]
-
4Rinse the dough a second time. Take the kneaded dough and run it under the tap (or cup) for another 10-20 seconds, kneading the dough as you do so, allowing the water to reach all pieces of the clay. Squeeze the dough through your fingers to help the water penetrate the clay thoroughly.[12]
- If the clay persists in being dry or unworkable, add an additional 10 seconds to your underwater kneading time.
-
5Knead a second time. Place your dough back onto the nonstick surface and knead once more, this time for 60-90 seconds. Make sure you work the clay through your hands, as well, as the oils and moisture from your hands can help bring the dough back to life.
-
6Repeat the process. Continue the process of wetting and kneading until the dough has reached the desired consistency. Once it has reached the desired consistency, be sure to store it in a sealed, airtight container to prevent drying out in the future.
- If the clay does not become usable again after repeating the steps above 4-5 times, it may no longer be viable.
Expert Q&A
-
QuestionHow long does it take to rehydrate clay?
 Deanna RanlettDeanna Ranlett is a Pottery and Ceramics Professional and the Owner of Mudfire Inc. in Decatur, Georgia. With more than 22 years of experience in the ceramics industry and eight years of experience owning a studio, they specialize in glaze formulation, firing ceramic and pottery pieces, general clay projects, and screen printing for ceramics. Deanna holds a BFA in Ceramic Arts and Ceramics from Georgia State University.
Pottery & Ceramics ProfessionalIt really depends on how much clay you're rehydrating, as well as where you live. For instance, clay may rehydrate more quickly in a humid climate than it would in a dry climate.
Warnings
- Not all clay can be revived. If, after following the steps above, your clay continues to be dry and difficult to manipulate, you may have to throw it out in favor of new clay.⧼thumbs_response⧽
- Some people recommend poking holes in the dry clay to help with the water absorption, but you can hurt yourself trying to jam a tool into a hardened clay. Don't do that.[13]⧼thumbs_response⧽
Things You'll Need
- A resealable bag
- Water
- Sealed containers
- A clean kneading surface


-Oven-Step-15.webp)
References
- ↑ http://www.redtedart.com/how-to-soften-hardened-air-dry-clay/
- ↑ Deanna Ranlett. Pottery & Ceramics Professional. Expert Interview. 12 November 2021.
- ↑ Deanna Ranlett. Pottery & Ceramics Professional. Expert Interview. 12 November 2021.
- ↑ http://www.athomewithali.net/2012/10/tips-for-working-with-air-drying-clay.html
- ↑ Deanna Ranlett. Pottery & Ceramics Professional. Expert Interview. 12 November 2021.
- ↑ http://kottke.org/09/12/how-to-revive-dry-play-doh
- ↑ http://www.ceramicstoday.com/howto/htrecycle.htm
- ↑ http://www.potterymakinginfo.com/news/recycle-clay/
- ↑ http://ceramicartsdaily.org/ceramic-supplies/pottery-clay/recycling-clay-tips-for-collecting-storing-reclaiming-and-reprocessing-your-clay-scraps/
- ↑ https://recyclenation.com/2014/06/recycle-clay/
- ↑ https://functionandbeauty.wordpress.com/2012/10/24/rehydrating-play-dough/
- ↑ https://pinknpurplebowtique.wordpress.com/2013/05/20/how-to-fix-dried-out-play-doh/
- ↑ Deanna Ranlett. Pottery & Ceramics Professional. Expert Interview. 12 November 2021.
About This Article

If your clay’s gone dry, you can easily revive it and use it again. For air-dry clay, try kneading it for 5 minutes. The heat and moisture from your hands should soften it. If that doesn’t work, mist the clay with water and leave it in a sealable bag for 5 to 10 minutes. For ceramic clay, you’ll need to soak it in a bowl of clean water for 2 to 3 days. Then, remove the water with a ladle or turkey baster and spread the clay 2 inches thick on a concrete, canvas, or denim surface to dry. Once it's dried, store your clay in a sealed container to keep it fresh for longer. For more tips, including how to revive dry children’s putty, read on!