This article was co-authored by Deanna Ranlett and by wikiHow staff writer, Sophia Latorre. Deanna Ranlett is a Pottery and Ceramics Professional and the Owner of Mudfire Inc. in Decatur, Georgia. With more than 22 years of experience in the ceramics industry and eight years of experience owning a studio, they specialize in glaze formulation, firing ceramic and pottery pieces, general clay projects, and screen printing for ceramics. Deanna holds a BFA in Ceramic Arts and Ceramics from Georgia State University.
There are 7 references cited in this article, which can be found at the bottom of the page.
This article has been viewed 216,202 times.
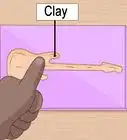
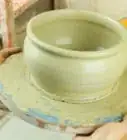
Polymer clay can be used to create anything from beads and charms to sculptures and mugs. No matter what kind of project you have in mind, you can easily cure the clay by baking it in an oven, so there’s no need to search for a kiln. You can choose between a conventional or toaster oven, depending on the size of the project. Either way, you’ll end up with a cured clay creation in no time.
Steps
Using a Conventional Oven
-
1Preheat your oven according to the clay’s instructions. The type of clay will determine what the oven should be heated to, so refer to the package instructions. Usually, Cernit, Fimo, Premo, Sculpey, and Souffle clay should be baked at 275 °F (135 °C). Kato clay should be baked at 300 °F (149 °C) and Pardo clay should be baked at 325 °F (163 °C).[1]
- Open windows to allow the fumes from baking the clay to escape your kitchen.
-
2Place a piece of paper on top of a ceramic tile inside an aluminum pan.[2] Pick up a few rectangular aluminum pans from your local grocery store or supermarket. They should be deep enough that your clay creation can fit inside one, with the other one inverted as the lid. Place one of the pans on a flat surface and center a piece of ceramic tile in the bottom of it. Then, place a piece of copy paper or parchment paper on top of the tile.[3]
- The ceramic tile helps to stabilize the temperature inside the pans and the paper protects the clay from the glaze on the tile.
- Keeping the project covered protects it from the heat, avoids scorching, and contains the fumes.
Advertisement -
3Set your project on top of the paper and cover it with the other pan. Carefully center your project on top of the paper and tile. Then, flip the other pan over and use it as a lid to cover the project. Place 2 binder clips on opposite sides of the pans to secure them together.[4]
- You can cover a roasting pan with aluminum foil if you can’t find a large enough aluminum pan.
-
4Bake the clay for 30-45 minutes per 1⁄4 inch (0.64 cm) of thickness. Place the pans inside the oven, making sure they’re centered and equidistant from the walls of the oven and the heating elements. The type of clay and the thickness of the sculpture dictates the baking time, so refer to the package instructions. Generally, you should aim for 45 minutes per 1⁄4 inch (0.64 cm) of thickness.[5]
- For instance, if the piece is 1.75 inches (4.4 cm) thick, bake it for 3.5 to 5.25 hours.
- Polymer clay won’t burn when baked at a low temperature, so don’t be afraid to leave it in the oven too long.
-
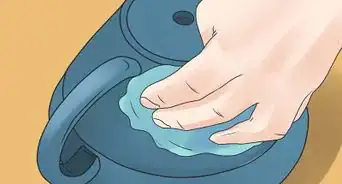
5Let the clay cool completely for 30-60 minutes. Remove the pans from the oven using oven mitts and carefully transfer the project to a heat-safe surface. Allow the clay to cool completely, which can take from 30-60 minutes. Unfortunately, the only way to tell if the clay is done is to break it—crumbly clay means it’s underdone, but if it flexes before it breaks, it’s cured.[6]
- You may want to make some test projects to find the perfect temperature and time for pieces of varying thicknesses.
- If you think your creation is under-baked, you can cure it again in the oven using the same method as before.


Baking in a Toaster Oven
-
1Preheat the oven to the temperature indicated on the clay instructions. Different brands of clay fuse at different temperatures, so read the instructions to determine the correct heat. If you are using a mix of different clays or no longer have the instructions, preheat the oven to 265 °F (129 °C). Ensure the area is well ventilated so the fumes can escape.[7]
- The clay doesn’t need to be specifically formulated for baking in a toaster oven; following the directions for use in a conventional oven will have the same results.
- You may want to use a separate oven thermometer to gauge the temperature as some toaster ovens are prone to spikes and dips in temperature.[8]
- Because a toaster oven is small, this method works best for beads, charms, ornaments, or small sculptures.
-
2Place a ceramic tile covered with parchment paper on the baking tray. Place a ceramic plate or tile on top of the baking tray that came with the toaster oven. The tile will help evenly distribute the heat. If the ceramic is glazed, cover it with a piece of parchment paper or copy paper.[9]
-
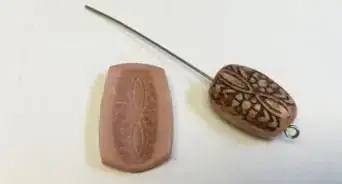
3Add the clay and cover it with “tented” parchment paper. Carefully arrange the clay pieces on top of the paper and tile. Fold a piece of parchment paper in half to create a crease. Place the folded paper on top of the clay so it forms a “tent.” The tent will prevent the heat from scorching the clay. Make sure the parchment paper does not touch the heating element inside the toaster oven.[10]
-
4Bake the clay for 30-45 minutes per 1⁄4 inch (0.64 cm) of thickness. Carefully place the baking tray with the tile and clay inside the toaster oven. The brand and thickness of the clay impact the baking time, so refer to the package instructions. Usually, you can bake the clay for 30-45 minutes per 1⁄4 inch (0.64 cm) of thickness. Keep in mind that it’s better to bake the clay longer than the instructions say in order to make sure the piece is fully cured.[11]
- For instance, if the clay piece is 2.5 inches (6.4 cm) thick, bake it for 5 to 7.5 hours.
- If the clay is covered, it shouldn’t burn even if you leave it in the oven for hours.
-
5Remove the clay and let it cool for 30-60 minutes. When the time is up, use oven mitts to carefully remove the tray from the oven. Place it on a heat-safe surface and transfer the clay to a work surface. Allow it to cool completely, which may take between 30-60 minutes. Although there isn’t a great way to tell if the clay is cured by looking at it, you can bake it again using the same method if you think it is underdone.[12]
- It’s a good idea to bake several test pieces of varying thickness to help you find the best temperature and time for each.


Expert Q&A
-
QuestionWhat should I bake my polymer clay on?
 Deanna RanlettDeanna Ranlett is a Pottery and Ceramics Professional and the Owner of Mudfire Inc. in Decatur, Georgia. With more than 22 years of experience in the ceramics industry and eight years of experience owning a studio, they specialize in glaze formulation, firing ceramic and pottery pieces, general clay projects, and screen printing for ceramics. Deanna holds a BFA in Ceramic Arts and Ceramics from Georgia State University.
Pottery & Ceramics ProfessionalUse a sheet of parchment paper or a silicone mat! Polymer clay has a lot of colorants, and you don't want those transferring to a cooking surface that you'll eventually reuse for food. -
QuestionIs it safe to bake polymer clay in home oven?Deanna RanlettDeanna Ranlett is a Pottery and Ceramics Professional and the Owner of Mudfire Inc. in Decatur, Georgia. With more than 22 years of experience in the ceramics industry and eight years of experience owning a studio, they specialize in glaze formulation, firing ceramic and pottery pieces, general clay projects, and screen printing for ceramics. Deanna holds a BFA in Ceramic Arts and Ceramics from Georgia State University.
Pottery & Ceramics ProfessionalDefinitely! Just make sure you flip on your oven fan so there's a little ventilation going on during the process. -
QuestionCan broken 40 year old clay bricks be recycled into bricks again? If so, how?
 T. ChinsenTop AnswererLiquid Sculpey clay softener can be added to make the clay soft, and is generally the best method. Fimo Mix Quick and Sculpey Mold Maker can also work. Mixing in translucent clay, which is generally softer, is another option. Be aware that it will take some work to get the clay back to a pliable state.
Warnings
- Polymer clay can give off semi-toxic fumes if it is baked at too high of a temperature and allowed to burn. Always work in a well-ventilated area.[14]⧼thumbs_response⧽
- Never bake food in the oven at the same time you’re curing clay as the fumes would make the food unsafe to eat.[15] [16]⧼thumbs_response⧽
Things You’ll Need
Using a Conventional Oven
- 2 aluminum pans
- Ceramic tile
- Copy or parchment paper
- Binder clip
Baking in a Toaster Oven
- Ceramic tile or plate
- Copy or parchment paper


-Oven-Step-15.webp)
References
- ↑ https://thebluebottletree.com/bake-polymer-clay-how-tips-tricks/
- ↑ Deanna Ranlett. Pottery & Ceramics Professional. Expert Interview. 12 November 2021.
- ↑ https://thebluebottletree.com/bake-polymer-clay-how-tips-tricks/
- ↑ https://thebluebottletree.com/bake-polymer-clay-how-tips-tricks/
- ↑ https://thebluebottletree.com/bake-polymer-clay-how-tips-tricks/
- ↑ https://thebluebottletree.com/how-long-bake-polymer-clay/
- ↑ http://www.earthguild.com/products/riff/rpolymer.htm
- ↑ https://katersacres.com/polyclay/hints/how-to-bake-polymer-clay-2/
- ↑ http://www.beadsandbeading.com/blog/how-to-bake-white-polymer-clay/107/
- ↑ http://www.beadsandbeading.com/blog/how-to-bake-white-polymer-clay/107/
- ↑ http://www.earthguild.com/products/riff/rpolymer.htm
- ↑ https://thebluebottletree.com/how-long-bake-polymer-clay/
- ↑ http://www.polypediaonline.com/133688/Polymer-Clay-Baking
- ↑ Deanna Ranlett. Pottery & Ceramics Professional. Expert Interview. 12 November 2021.
- ↑ http://www.polypediaonline.com/133688/Polymer-Clay-Baking
- ↑ Deanna Ranlett. Pottery & Ceramics Professional. Expert Interview. 12 November 2021.
About This Article

To bake clay in the oven, start by preheating your oven to 275 degrees Fahrenheit. Then, place a ceramic tile in the bottom of an aluminum pan, which will help stabilize the temperature, and cover it with parchment paper so the glaze on the tile doesn't get on your clay. Next, place your clay on top of the paper, and cover it with another aluminum pan. Finally, bake the clay in the oven for 45 minutes per 1/4 inch of thickness. To learn how to bake clay in a toaster oven, scroll down!