This article was co-authored by wikiHow Staff. Our trained team of editors and researchers validate articles for accuracy and comprehensiveness. wikiHow's Content Management Team carefully monitors the work from our editorial staff to ensure that each article is backed by trusted research and meets our high quality standards.
The wikiHow Video Team also followed the article's instructions and verified that they work.
This article has been viewed 588,844 times.
Learn more...
Do you have to make a model of a volcano for school, a science fair, or just for fun? Well, it's easy and cheap. Just look here and you'll have an awesome volcano!
Steps
Making the Clay
-
1Round up the ingredients for the volcano from the kitchen. You'll be making a simple clay, much like Play-Doh. You'll need:
- 6 cups of flour
- 2 cups of water
- 4 Tablespoons Vegetable Oil
- 2 Cups of Salt
- An old plastic water bottle, cut in half.
- Food Coloring (optional)
-
2Pour the salt, flour, and oil into the mixing bowl. Throw all of the ingredients into the same bowl so that you can mix them up. It can help to pre-sift the flour with a whisk, sift, or fork to get break up big chunks.Advertisement
-
3Pour the water into a large mixing bowl, adding 2-3 drops of food coloring if wanted. Adding the food coloring to the water will help it distribute evenly, meaning your whole volcano will be the same color, not streaky.
- If you don't want to add food color, you can paint the volcano with acrylic poster colors after setting up the clay.
-
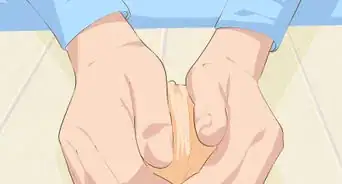
4Mix and knead the ingredients with your hands. Mix and then knead until a dough is formed. Get squishy, molding and mixing until you have a big ball of dough. You can use a rubber spatula to help get it off the sides of the bowl, but use your hands to form a nice, consistent ball. Make sure the clay is neither too watery nor too dry. It should be in a format which allows us to shape it.
- If the dough is dry as you work, add a tablespoon or so of water.
- If it is wet, through in a little more flour.
-
5Let the dough dry for 1-2 hours before shaping. You want it to be wet enough to work with, but not so dry that it crumbles or falls apart. You can always add a touch more water if need be, but not too much.


Forming the Volcano
-
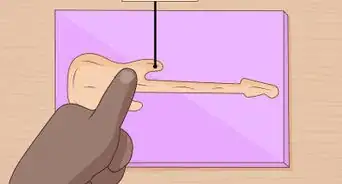
1Create a protective surface. Lay down a sheet of wax paper, a thick layer of newspaper, or a box or tray which you can line with tinfoil.
-
2Get your lava container. This container will be the center of your volcano. You can use lots of different containers like soda cans, mason jars, plastic bottles, and so on.
-
3Shape your clay. Starting from the bottom and working your way up, place your clay around the volcano to form the outside. Try to make it lumpy and uneven, since volcanoes rarely look like perfect cones!
-
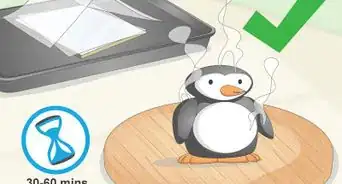
4Allow the volcano to dry overnight, or cook it for one hour at 225F. Shape your volcano first and then let the dough set. As this is technically playdough (rather than clay), you will want to let it set for about 24 hrs to get dry and hard before completing your project. If you're in a hurry, put it in the oven for about an hour on low heat to dry it out quicker.
- Do not forget to paint your volcano when done![1]
-
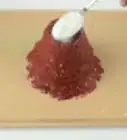
5Put the baking soda in the volcano.
-
6Prepare some vinegar. Add red food coloring to the vinegar. Mix in a tablespoon of dish washing soap to add an extra bubbly final effect!
-
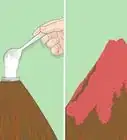
7Add the vinegar mixture into the container. Using a funnel might make this easier.
-
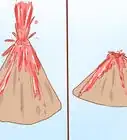
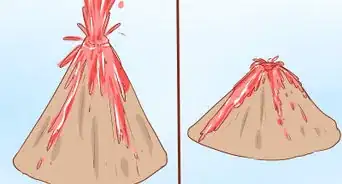
8Run away! The toilet paper will dissolve, exposing the baking soda to the vinegar. This will cause the volcano to erupt!

Community Q&A
-
QuestionIs this safe for kids under nine-years-old?
 Community AnswerYes, it is safe, but I would keep it out of the reach of any children five and under.
 -
QuestionDo you have to put baking soda and vinegar in the volcano?
 Community AnswerNo. If you just want to make a model it is okay to leave the experiment, which is mainly for the entertainment of children or for science projects, out. The model still looks cool and could be used for a geography project, for example. Instead of using the baking soda and vinegar, you could try putting other things inside the volcano for different reactions. For instance, laundry detergent, warm water and glitter glue can be combined to create slime.
 -
QuestionCan I make a volcano and use it for my science project?Community AnswerOf course! Why not? Try to add your own creativity to make it more unique and interesting.
Warnings
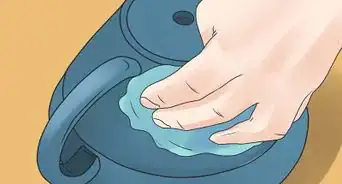
- Wash your hand with warm water and soap after finishing the project.⧼thumbs_response⧽
- This will get messy - you may want to complete these steps outside.⧼thumbs_response⧽
Things You'll Need
- A plastic 2-L soda bottle and a funnel
- Modeling clay
- Red food dye
- paint
- paper
- 1 cup of vinegar
- 1 tablespoon of baking soda


References
- ↑ https://www.youtube.com/watch?v=yMpFIWRkouM
- Videos provided by RMC Create Station
About This Article

To make a clay volcano, place a small cup or jar on a sheet of wax paper. This will be the container for your lava. Pat your clay into place around the container, starting from the bottom and working your way up. Try to make the clay lumpy and uneven to resemble a real volcano. Allow the clay to dry overnight, or cook it for one hour at 225 °F, then paint the clay and let the paint dry. To make the volcano erupt, pour baking soda into the center of the volcano, then pour in vinegar mixed dish soap and red food coloring. For tips on what to do if the dough is too dry and flaky, read on!