This article was co-authored by wikiHow staff writer, Jack Lloyd. Jack Lloyd is a Technology Writer and Editor for wikiHow. He has over two years of experience writing and editing technology-related articles. He is technology enthusiast and an English teacher.
There are 7 references cited in this article, which can be found at the bottom of the page.
This article has been viewed 15,118 times.
Learn more...
Your network is what allows your devices to communicate with each other and with the outside world. Unfortunately, more and more hackers are targeting devices other than your computer.[1] Luckily, there are many things that you can do to keep your network secure. This wikiHow teaches you how to secure your wireless network against online threats and malware.
Steps
Accessing Your Router's Page on Windows
-
1Make sure that you're connected to the Internet. Your computer must be connected wirelessly to your router before you can open your router's page.
-
2Advertisement
-
3
-
4
-
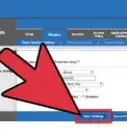
5Click View your network properties. You'll find it near the bottom of the window.
- You may have to scroll down to view this link.
-
6Scroll down to the "Wi-Fi" section. You'll find the "Wi-Fi" heading to the right of one of the "Name:" headings on this page.
-
7Look for the "Default gateway" heading. It's near the bottom of the "Wi-Fi" section.
- Review the default gateway number. The number to the right of the "Default gateway" heading is your router's address, which is what you'll enter in a web browser to see your router's page.
-
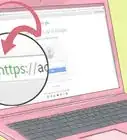
8Open your router's page. In a web browser, click the address bar, type in the default gateway number, and press ↵ Enter.
- For example, if the default gateway number is "192.168.1.1", you would type 192.168.1.1 into the address bar.
-
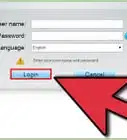
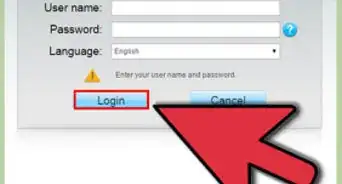
9Enter your router's username and password. If prompted, type in the username and password used to open your router's page. You may not be prompted for this information—if so, skip this step.
- If you don't know your router's login information, look for a sticker that lists the username and password on the back or the bottom of the router.
- If you've forgotten your login information and it isn't the information listed on the back or bottom of your router, you will have to reset the router.
-
10Wait for the page to open. Once the router's page finishes opening, you can proceed with securing your network.


Accessing Your Router's Page on Mac
-
1Make sure that you're connected to the Internet. Your Mac must be connected wirelessly to your router before you can open your router's page.
-
2
-
3Click System Preferences…. It's in the drop-down menu. The System Preferences window will open.
-
4Click Network. You'll find this globe-shaped icon in the System Preferences window. This opens the Network window.
-
5Click Advanced…. It's in the lower-right side of the window. This prompts a pop-up window to appear.
-
6Click the TCP/IP tab. This is at the top of the pop-up window.
-
7Review the number next to the "Router" heading. The number to the right of "Router:" is your router's address.
-
8Open your router's page. In a web browser, click the address bar, type in the default gateway number, and press ⏎ Return.
- For example, if the default gateway number is "192.168.1.1", you would type 192.168.1.1 into the address bar.
-
9Enter your router's username and password. If prompted, type in the username and password used to open your router's page. You may not be prompted for this information—if so, skip this step.
- If you don't know your router's login information, look for a sticker that lists the username and password on the back or the bottom of the router.
- If you've forgotten your login information and it isn't the information listed on the back or bottom of your router, you will have to reset the router.
-
10Wait for the page to open. Once the router's page finishes opening, you can proceed with securing your network.


Securing Your Network
-
1Understand how router pages work. Each router's page will differ depending on the router's manufacturer, so the following instructions may not apply exactly to your router's page. Nevertheless, most routers have all of the following options; you'll just need to search your router page's menus to find them.
- You can consult your router's manual or online documentation to find directions for specific preferences.
-
2Change your routers password[2] . If you weren't asked for a password when you opened the router's page, or if the password is still the default one, then you'll want to secure the page immediately by adding or changing the access password.
- You may find the option to add a password on your router's main page, but you may have to enable this option from within "Settings" or "Advanced" section.
- Make sure that the password you use is at least 8 characters, has upper- and lower-case letters, and contains numbers and symbols. Also make sure that you don't use this password anywhere else.
-
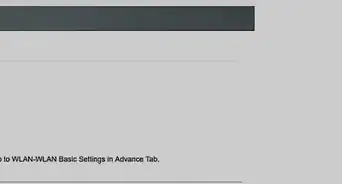
3Change your network's name and password. Ideally, your router will use a boring network name and a jumble of letters and numbers as its password. You should be able to change both the network password and the network name from the same area on most routers:
- Look for a password change option (e.g., "Password and SSID").
- Change the Wi-Fi password.
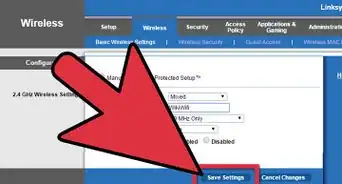
- Save your changes by clicking Save or Apply.
-
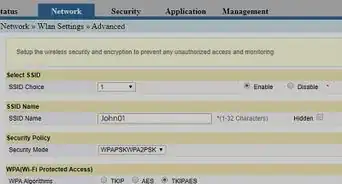
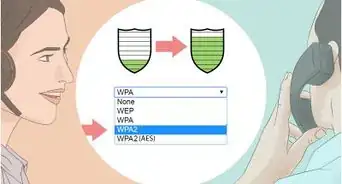
4Enable WPA2 encryption. WPA2 is the most secure form of Wi-Fi encryption available.[3] If your router does not have the option to use WPA2, then you should buy a new one. You can change your encryption settings by doing the following:
- Find and select the Security or Encryption section. This section is normally in the same area as the Wi-Fi name and password settings.
- Click the "Security Type" or "Encryption" drop-down box if there is one.
- Select WPA2 from the drop-down menu.
- Save your changes by clicking Save or Apply at the bottom of the page.
-
5Turn off Wi-Fi-protected setup.[4] Wi-Fi-protected setup (WPS) is a huge liability because it allows people to connect to the router by selecting your network on a computer (or phone/tablet) and then pressing a button on the router to connect. This means that your encryption settings don't matter if someone has physical access to the router.
- You can usually disable WPS by opening the WPS or Wi-Fi Protected Setup section of your router's settings, checking the "Off" switch, and clicking Save.
- Not all routers have Wi-Fi-protected setup. You might want to check your router's documentation to see if WPS is included before searching for it.
-
6Keep your equipment up-to-date. Routers, computers, and any other equipment that connects to your network should be updated regularly according to their respective documentation. Updates prevent flaws and vulnerabilities from being exploited by intruders or malware.
- You'll need to replace your router every couple of years to maintain both optimal speed and proper security.
- You should check back every few months to see if a new update has been released for your router.
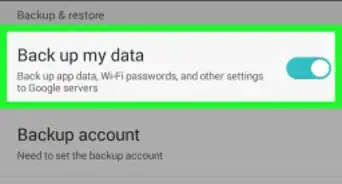
- If your router has the option to automatically install updates, enable it. Then you won't have to worry about it anymore.
-
7Don't give out the network password. Keeping your network's password as private as possible will prevent the chances of strangers being able to access your network.
- If you're securing a business network, you'll need to give the password to employees; however, make sure that they don't write down the password, and don't post the password anywhere in the office (or online).
-
8Set up a guest network. A guest network is a separate network that you can set up on your router that is isolated from your main network. You can give your guest network information to friends and family while keeping your main network information secret. While you may trust your friends and family to not hack you, you can't trust that your friends or family won't have a virus on their devices that can spread to yours.
- Make sure to also set a unique network name and password on your guest network.
- Disable your guest network when you are not using it to protect it from hackers.
-
9Disable SSID broadcast. When you disable SSID broadcast, your network won't broadcast its existence to anyone in range. When you want to connect to your network, you will have to manually enter your network name instead of tapping on your network in a list.
- This only protects your network from the most casual of hacking, as hackers can analyze the wireless signals between your devices and retrieve the network name. Because of this, you should not rely on this method alone to protect you network.
- Disabling SSID broadcast can make it harder to set up devices and it can cause issues with some devices. Because of this and the fact that disabling it does not improve your security very much, you might not want to do this.
-
10Disable remote management.[5] Remote management allows you to access the router configuration interface from outside of your network. This can allow hackers to hack your router from anywhere in the world. Most home users don't make use of this feature and it should be disabled.
- If you do use remote management, make sure to only allow remote management from certain IP addresses to limit the amount of people that can attempt to access your router.
-
11
-
12Protect your routers USB ports. Don't plug in just any device into the routers USB port. Your router can be hacked by a USB device that is plugged into it. If you do plug a USB device into your router, then make sure to scan it with your antivirus software before your plug it in.
- Some routers allow you to disable untrusted devices that are plugged into the routers USB port. If your router has this feature, then enable it. This will give you an extra line of security.
-
13Enable protection from DOS attacks. DOS attacks are a type of attack that tries to overwhelm your router to force you offline. Gamers in particular are targeted by DOS attacks to kick them from a match so that the opposing player can win.
- Make sure that you have DOS protection enabled and that you disable respond to ping on internet port. Both of these setting will not prevent all DOS attacks, but they will help stop some.
-
14Enable MAC address filtering (advanced). Every device has a unique number assigned to it called a MAC address. You can set up your router to only allow specific devices with a specific MAC address to connect to your network.
- MAC address filtering is known as access control on some devices.


-Connection-Step-12-Version-5.webp)


References
- ↑ https://www.bleepingcomputer.com/news/security/smart-homes-at-risk-due-to-unpatched-vulnerabilities-weak-credentials/
- ↑ https://www.lifewire.com/changing-default-password-on-wifi-network-816567
- ↑ https://www.howtogeek.com/167783/htg-explains-the-difference-between-wep-wpa-and-wpa2-wireless-encryption-and-why-it-matters/
- ↑ https://www.alphr.com/realworld/374104/why-you-shouldnt-use-wps-on-your-wi-fi-network
- ↑ https://www.businessinsider.com/router-firmware-update-reboot-password-fbi-warning-2018-5#3-disable-the-remote-management-settings-suggested-by-the-fbi-3
- ↑ https://www.howtogeek.com/122487/htg-explains-is-upnp-a-security-risk/
- ↑ https://tiptopsecurity.com/3-features-you-should-disable-on-your-wireless-network-upnp-wps-remote-administration/