This article was co-authored by wikiHow staff writer, Travis Boylls. Travis Boylls is a Technology Writer and Editor for wikiHow. Travis has experience writing technology-related articles, providing software customer service, and in graphic design. He specializes in Windows, macOS, Android, iOS, and Linux platforms. He studied graphic design at Pikes Peak Community College.
This article has been viewed 12,873 times.
Learn more...
The Xbox Series X is the newest game console from Microsoft. To set up the Xbox Series X, you will need an HD television or monitor. The system comes with everything else you need to set it up. This wikiHow teaches you how to set up the Xbox Series X.
Steps
Connecting the Series X to a TV
-
1Connect the power cable to the Xbox Series X. The power cable connects to the port that resembles an "8" on the back of the console. Insert the end of the power cable that has a similar shape into the port on the back of the console. Plug the other end of the power cable into an electrical outlet or power strip.
-
2Connect the Xbox Series X to a display. You can connect the Xbox Series X to a high definition television or computer monitor. To connect the Xbox Series X to a display, connect an HDMI cable to the port labeled "HDMI Out" on the back of the Xbox Series X console. Then connect the other end of the HDMI cable to an HDMI port on the back of your display. Be sure to note which HDMI port you connect the Xbox Series X too on your display so that you can select it as an input source.
- The Xbox Series X supports 4K graphics with up to 120 frames-per-second (FPS). You will need a TV or computer monitor that has a 4K resolution in order to play your Xbox Series X in 4K resolution. You will also need a TV or computer monitor with a refresh rate of 120 Hz or more to view your Xbox Series X at 120 FPS.
- To play the Xbox Series X in 4K graphics at 120 FPS, you will need an HDMI 2.1 cable. HDMI 2.0 can only support 4K up to 60 FPS. HDMI 1.1 can support 4K at 30 FPS.
Advertisement -
3Connect an ethernet cable to the back of the Xbox Series X (optional). Your Xbox Series X will need an internet connection. You can connect your Xbox Series X to the internet using Wi-Fi or an ethernet connection. An ethernet connection provides a faster and more reliable connection. To connect your Xbox Series X using an ethernet connection, connect an ethernet cable to the port that resembles a phone jack on the back of the Xbox Series X. Then connect the other end of the ethernet cable to a LAN port on the back of your modem or router.
-
4Connect a storage expansion card (optional). If you want additional hard drive space on your Xbox Series X, you can purchase an additional Xbox Series X expansion card. If you have one, insert it into the port labeled "Storage Expansion" on the back of the card.
- You can also connect a USB 3.1 hard drive to one of the USB ports on the Xbox Series X. You won't be able to play games off of it, but you can store game data and save data on it. It will need to be formatted for the Xbox Series X. If you already have an external hard drive you use with your Xbox One, you can use it with the Xbox Series X without formatting it.
-
5Power on your display and select the source the Xbox Series X is connected to. Use your TV remote on your TV to turn it on. Then press the Source button on your TV remote until it switches to the HDMI port that the Xbox Series X is connected to.
-
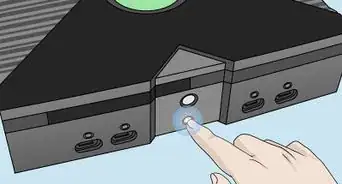
6Power on the Xbox Series X. To power on the Xbox Series X, press the button that resembles an Xbox logo in the upper-left corner on the front panel of the Xbox Series X console. This button will light up and you should see the Xbox logo on your display.
-
7Pair the controller with the Xbox Series X. To pair the Xbox controller with the Xbox Series X, first press the Xbox button in the center of the controller to power it on. It will glow white. Press and hold the pairing button in the lower-right corner of the front panel of the Xbox Series X console just above the USB port. The power button on the console should start flashing. Press and hold the pairing button on the top-center-left of the Xbox Series X controller. The Xbox button on the controller will start flashing. Once both lights stop flashing, the controller is paired.
- Alternatively, you can connect your Xbox Series X controller to the console using a USB-C cable to pair it with the console. Connect the USB charging cable that came with your Xbox Series X, or any USB-C cable into the bottom of the controller. Then plug the controller into any free USB port on the Xbox Series X. There is one in the lower-right corner and a couple on the back of the console.[1]


Installing the Xbox Mobile App
-
1Download and open the Xbox app on your smartphone. You don't need to use the smartphone app, but it's the easier way to do it and the way Microsoft prefers you to do it. You can download the Xbox app from the Google Play Store on Android or the App Store on iPhone and iPad.
- If you choose not to use the smartphone app to set up your Xbox Series X, you can do these steps on your TV screen, but you will have to use the controller and it will take longer.[2]
-
2Sign in or create a Microsoft account. If you haven't already done so, sign in to the Xbox app with your Microsoft account. To sign in to your Microsoft account on the Xbox app, tap Sign In and sign in with the email address and password associated with your Microsoft account. If you don't have a Microsoft account, tap Create one and follow the instructions to create a Microsoft account
- If you have already signed into other Microsoft apps on your smartphone, it may identify your account automatically and ask if you want to use the same account.
-
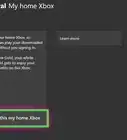
3Tap the console icon and tap Get Started. The console icon is the icon that resembles a game console in the upper-right corner next to the bell icon. Tap this icon Then tap the green button that says "Get Started" at the bottom of the screen.


Setting Up Your Xbox Series X with the Smartphone App
-
1Tap + Set up a new console. It's the first button below the 10 boxes at the top of the screen.
-
2Enter the code displayed on your display screen and tap Connect to Console. Use the 10 boxes on the smartphone app to enter the code on your display. Then tap the button below the boxes to pair the app with your Xbox Series X.
-
3Tap Join followed by Next. Your phone will inform you that "Xbox" wants to join your Wi-Fi network. Tap Join to allow the Xbox app to communicate over your Wi-Fi network. Tap the green button that says Next once it is connected.
-
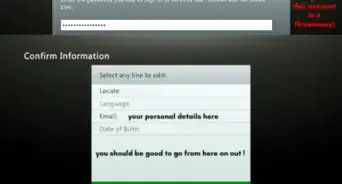
4Select your language and location and tap Next. Use the drop-down menu at the top of the page to select your language. Then use the second drop-down menu to select the country you are from. Tap Next at the bottom when you are finished.
-
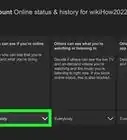
5Connect your Xbox Series X to your Wi-Fi network. If you are not using an ethernet connection, you will need to connect your Xbox Series X to a Wi-Fi network. To do so, tap your Wi-Fi network and then enter your wireless password. Then tap Join. You will see a message informing you your Xbox Series X is online once it is connected. Tap Next to continue.
-
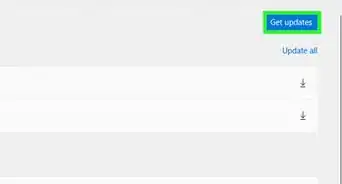
6Update your console. Your console will most likely need to be updated. Tap Next to start updating your console. This may take several minutes.
-
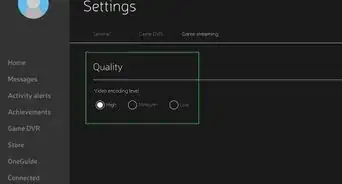
7Select your power mode and tap Next. There are two power modes available. Tap the power mode you want to use and tap Next. The power modes are as follows:
- Energy Saver: This mode uses the least amount of power when your Xbox Series X is in rest mode. However, you will not be able to instantly start-up or manage your console from your smartphone.
- Instant On: This mode uses more power when your Xbox Series X is in rest mode, but you can power it up quicker and also download and manage games on your console using your mobile phone while your console is in rest mode.
-
8Choose your sign-in and security preferences and tap Next. There are three security options you can select during the setup process. These determine your password settings on your Xbox Series X. The three options are as follows:
- No Barriers: This option does not require any password to sign in to your console, make purchases, or access data on web pages that use your Microsoft account via the web browser.
- Ask for my passkey: This option allows you to create a numeric passkey that you will be required to enter when signing in, making purchases, or changing your settings.
- Lock it down: This option requires you to enter your Microsoft password when signing in, making purchases, or changing your settings.
-
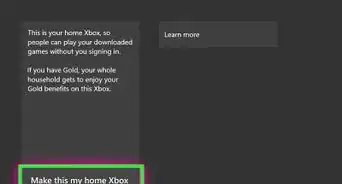
9Enable instant sign-in (optional). If you want to allow instant sign-in when you power on your Xbox Series X, tap Enable Instant Sign-in. If you do not wish to enable this, tap No thanks instead.
-
10Enable automatic updates (optional) and tap Next. If you want your games and apps to update automatically, tap Next at the bottom of the screen to continue. If you do not want to allow your games and apps to update automatically, tap the toggle switch next to "Keep my games and apps up to date" and then tap Next. The toggle switch is set to "On", by default.
-
11Enable remote features (optional). Remote features allow you to control your console using the Xbox app, install games from your mobile phone, and play games remotely on your phone. To enable these features, tap Turn On. If you don't wish to enable these features, tap Skip.
-
12Tap Next twice to sign in with your Xbox profile. You will see two screens on your mobile phone. The first one informs you that it will sign in to your Xbox profile on the Xbox Series X console. The second screen informs that Xbox collects some data to keep your console up-to-date and running properly. Tap Next to continue.
-
13Tap Send Optional Data or No Thanks. In addition to the required data Microsoft needs to keep your console running smoothly, you can also send optional data to keep your console in optimal running condition. Tap Send optional data to allow Microsoft to collect this optional data. Tap No Thanks to opt-out of sending optional data.
- Optional data includes actions taken while using the Xbox Series X, errors that occur, details about the Xbox Series X hardware state, and Xbox Series X performance data.[3]
-
14Tap Next. The next screen informs you that Microsoft shares data it collects with game and app publishers. This helps the publishers keep their products running smoothly. Tap Next to continue. Tap Show Me More to see more information about Microsoft's data collection policy and how to stop it.
-
15Type a name for your console and tap Next. Use the field at the top of the page to type a name for your Xbox console. Alternatively, you can tap one of the suggested names listed. Tap Next to continue.
-
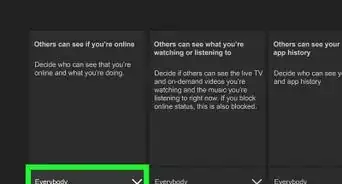
16Enable or disable info & offers and tap Next. If you do not want to receive info and offers from Microsoft, tap the toggle switch at the top of the screen to disable info and offers from Microsoft. If you do not want to receive info and offers from publishers, tap the second toggle switch to disable apps and info from publishers.


Completing the Setup Process
-
1Allow your Xbox Series X to finish updating. After you finish the setup process using the mobile app, your Xbox Series X console may still be updating. Allow the update to finish. The console may restart several times during the update process.
-
2Press the Xbox button on your controller followed by A. When prompted, press the Xbox button in the center of the controller to power on the controller. Then press the "A" button when prompted.
-
3Update your controller if needed, then select Next. If the controller needs to be updated, press the "A" button on the controller to start the update process. This may take several minutes. Be sure to keep the controller near the Xbox Series X console until the update is complete.
-
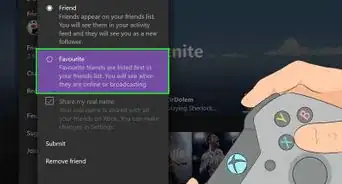
4Apply your previous settings (optional). After your Xbox Series X finishes setting up, it scans your Xbox profile for any settings you had applied to previous Xbox consoles. Tap Apply Settings to apply your previous settings. Tap No Thanks to skip this step and start fresh.
-
5Apply the current image settings. Your Xbox Series X will try to automatically apply the best image settings for your display. It will display a screen asking "How does this look?" If you are using a 4K display, select Keep display at 4K to apply 4K settings. Select Go Back to go back to the previous image settings. If you cannot see this screen, it will automatically revert back to the previous image settings after 15 seconds.
-
6Select Take Me Home. This completes the setup process. You will immediately be taken to the Xbox dashboard.


-Step-13.webp)


References
About This Article

1. Connect the power cable to the port on the back of your console and plug it on.
2. Use an HDMI cable to connect the Xbox Series X to your display.
3. Press the Xbox button on the front of the console to turn it on.
4, Press the Xbox button on the controller to turn it on.
5. Press the pairing button on the top fo the controller and the lower-right corner of the console to pair the controller
6. Download the Xbox app on your smartphone, open it and sign in with your Microsoft account.
7. Tap the console button in the upper-right corner and tap Get Started.
8. Tap Set up a New Console.
9. Follow the instructions to complete the Setup process.


-Step-13.webp)