This article was co-authored by Oz Tzalalihin. Oz Tzalalihin is a Project Manager for Vitoli Builders, based in Calabasas, California. He has a passion for working with sloped terrains and has shared his expertise through contributions to local publications. Oz holds a PMP (Project Management Professional) degree from Cornell University and specializes in building pools and structures on hillside properties. With his education and experience, he is a valuable asset to Vitoli Builders and is dedicated to delivering quality results and smooth construction.
This article has been viewed 262,083 times.
Instruction manual or no, pools can be tricky to set up—even when those pools are named “Easy Set.” Intex Easy Set Pools may be more intuitive and hassle-free than a multitude of other above-ground pools available right now, but there are still several preparations to be made before beginning the task.
Steps
Planning for Pool Ownership
-
1Call your local zoning office. Everywhere will have different regulations regarding the necessity of ladders, fencing, or alarms for your pool, and a small fee will likely be necessary for obtaining the required permit. [1] Skipping this step can cause headaches down the line, as the office can force you to take your pool down if their regulations have not been adhered to.
-
2Size up the selection. Intex offers a variety of Easy Set pools, from 6’ x 20” kiddie pools to 18’ x 48” monsters which require ladder entry. The size you choose will be contingent on both the needs of likely swimmers and the space you have available, so we should probably take a walk around your yard and see what’s possible.
- The first number in these dimensions refers to the diameter of the pool, and the second refers to the height of the pool (and depth of the water). So the aforementioned kiddie pool is six feet wide and twenty inches (four inches shy of two feet) deep.
Advertisement -
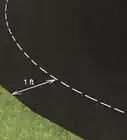
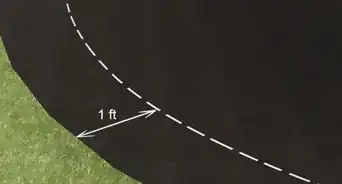
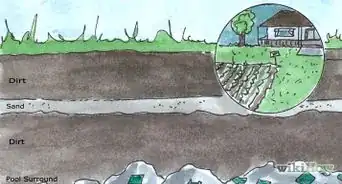
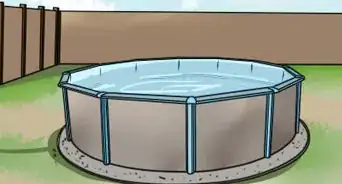
3Find a location for the pool with even ground. A pool placed on uneven ground will have uneven water and may sag to one side, causing overflow and discomfort while in the pool. It can also have dangerous effects on the structural integrity of your pool over time. Look for a circular space that’s at least as wide as the pool’s diameter, plus two feet.
- While trees may seem appealing for the shade they’d provide for pool goers, don’t put your pool under them unless you want to be cleaning a lot of debris out of the water.
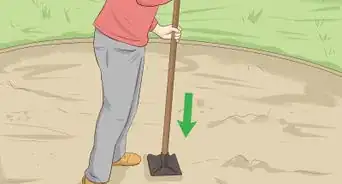
- Minor landscaping may be necessary to level out your ground, using a shovel or a sod scraper. You should always bring higher areas down to match lower areas, rather than filling in the lower areas. Filled-in and dirt will compact under the weight of the pool over time and cause those areas to be uneven. [2]
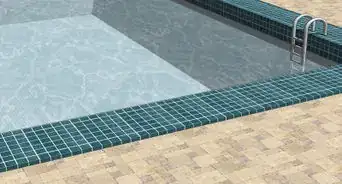
- Concrete is also acceptable to place your pool on, and may even be preferable. Ensure there are no cracks or sharp edges in the areas, however, as these can tear the pool’s liner, and never drag your pool along concrete.
-
4Clear all potential hazards from the selected location. Before you set anything on the ground, clear the area of any rocks, sticks, twigs, or sharp objects that could puncture the pool.
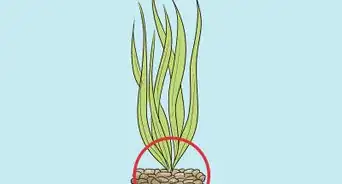
- Bermuda, St. Augustine, and other types of hardy grass are capable of growing up through your pool liner and ground cloth over time. You should remove these grasses if they’re present. [3]


Filling Up Your Pool
-
1Take inventory. You'll want to make sure that the pool you purchased has all its requisite supplies accounted for. If your box is missing anything, exchange it at the store where you purchased it for another pool or contact Intex to order replacement parts.
- The boxes of every size of pool should at least contain the Intex pool set, the pump, a filter, and an owner’s manual.
- Refer to this site for help referencing specific missing or malfunction pieces.
-
2Lay out the pool and tarp. Before setting out the pool, it is a good idea to lay a tarp on the ground first, below where the pool will sit. This will help to protect against punctures and tears. Unfold the pool atop this tarp, centering it as much as possible and smoothing it out. The blue inflatable ring should be facing up, in as circular a shape as can be managed.
-
3Inflate the ring. You will want to use an air pump or air compressor, or you will have an incredibly arduous task ahead of you (and your lungs). When properly inflated, the ring should be firm, but not hard. Take care not to over-inflate.
- In the heat of the day, the air inside your pool will expand somewhat. This is not a problem in and of itself, but over-inflation means this routine expansion could lead to a your pool bursting.
-
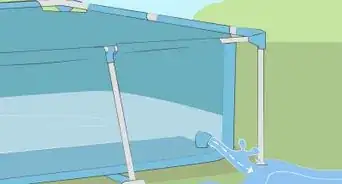
4Fill the pool about one inch. After ensuring that the drain plug is tightly closed, begin filling your pool with a garden hose. Friends and family can help by standing in the pool while it fills and spreading out the wrinkles in the bottom of the pool.
- Make sure the water is distributing evenly while filling the pool at this point. If it isn’t, you will need to move the pool to a different area or take steps to level the ground.
-
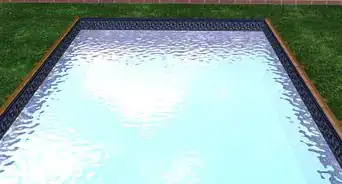
5Continue filling the pool. The walls will rise and be supported as the pool fills up. The pool will be completely filled when the water has reached the line near the bottom of the inflatable ring.
- The time this step will take is dependent on the size of your pool, but there’s nothing wrong with splashing about a little bit while it fills!
-
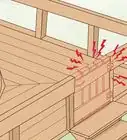
6Assemble your filter pump. The filter pump has two hoses, one leading from the pool to the pump (intake), and one heading back from the pump toward the pool (outbound). Connect these into the appropriate outlets on the pool, and securely tighten them using a penny or tool.
- It’s a good idea to consult your owner’s manual for additional clarification during the filter setup process.
-
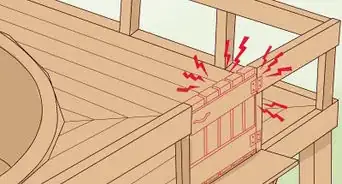
7Initiate the filter. Remove the two plugs in your pool which are currently blocking water from the filter pump’s hoses. Once the tubes begin filling with water, insert the strainer piece into the unplugged intake hole (to keep solid debris from entering the filter) and insert the open hole piece into the unplugged outbound hole. Unscrew the knob on top of the pump until water has visibly begun flowing out, then screw it back into position. [4]
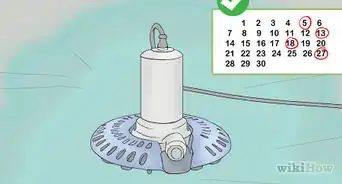
- The filter should not run constantly. Most establish a schedule of filtering at night, and turning it off during the day.
- Never turn the filter on while swimmers are in the pool.


Maintaining Your Pool
-
1Begin treatment. Immediately after purchasing your pool, stabilized chlorine tablets will be sufficient. For a few weeks, simply add one tablet into the water (or as many as the specific product recommends) and replace it once it’s totally dissolved.
-
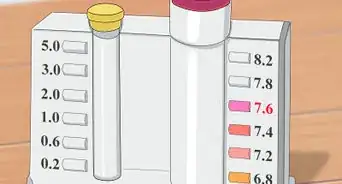
2Establish a chemical balance. After the first several weeks, you’ll want to begin testing your water’s stabilizer level. Upon reaching the appropriate stabilizer levels—the tests should indicate this—you’ll want to begin using chlorine bleach to treat your pool.
- The amount necessary will depend on sunlight, pool size, and other environmental factors, but a cup per day is a good starting point. Be sure to test your water every 2-3 days to ensure you’re on the right track with your chemical treatment.
- Properly balanced chlorine levels will mean your swimmers don’t even know it’s there! It’s not recommended to test this by adding chlorine while they’re swimming, however.
- Be aware that chlorine levels will naturally fall as it kills off algae and bacteria.
- Using stabilizers past the necessary timeframe will provide too harsh a treatment. Chlorine alone will suffice.
- PH levels are not necessary to test for above-ground pools of this size.
-
3Think about purchasing a pool cover. A cover will help to keep debris out, maintain the water’s heat overnight, and will reduce water loss through evaporation (meaning you will have to add water to your pool less often).
- Always completely remove your pool cover before swimming Never swim while your pool is covered.
-
4Familiarize yourself with the owner’s manual. This will provide answers to many small questions that may arise, and will equip with the pertinent information for safely enjoying your pool. Some pools come with instructional DVDs as well, but most Easy Set pools currently do not.
- Professional pool builders visit the homeowner's house and know their ideas. Then they tweak them to ensure they are up to the code.
- At the first meeting, the in-house designer may take measurements of the whole property.
- They may return to the site two weeks later with the Oculus VR or virtual reality. The homeowner can wear these glasses and walk around in their three-dimensional new backyard or new area. They can feel the space and not only see it. They may say they need more space at a particular place or ask to add something at the top or bottom.


Community Q&A
-
QuestionHow can I find a leak in the top ring?
 Community AnswerUse a clean spray bottle filled with water and 15 to 20 drops of ordinary household liquid dish soap. Spray the inflated ring surface and watch for bubbles. This indicates a leak.
 -
QuestionHow do I install suction fittings in an Intex easy set pool?Community AnswerSuction fittings are pushed through the pool liner and seal themselves through a sleeve that jets through to the outside of the pool. Then the suction hose from the pool pump fits over this sleeve and clamps down tightly with a power clamp.
-
QuestionDo I have to have the pump?
 Community AnswerYes, the pump is the filter. Without it, your pool will not remain clean and the water will be stagnant.
Warnings
- Did you know that over 250 children under 5 years of age drown every year? Make sure your pool or property is completely surrounded by fencing that cannot be climbed over and has a self-closing and self-latching gate. This is an easy step that shouldn't cost much and that could easily prevent a tragedy in your home.⧼thumbs_response⧽


References
- ↑ https://kidmania.wordpress.com/2010/06/25/how-to-set-up-an-intex-above-ground-easy-set-pool/
- ↑ https://kidmania.wordpress.com/2010/06/25/how-to-set-up-an-intex-above-ground-easy-set-pool/
- ↑ http://www.intexcorp.com/support/28175eh.html
- ↑ https://kidmania.wordpress.com/2010/06/25/how-to-set-up-an-intex-above-ground-easy-set-pool/
- ↑ http://www.intexcorp.com/support/28175eh.html
About This Article

Before you set up a new Intex Easy Set Pool, call your local zoning office to make sure you have all required permits. When you’re ready, find an area of even ground that is free of sticks or rocks and place a tarp where your pool will stand. Then, use an air compressor to inflate the pool before filling it with a gardening hose. Once you have a full pool, make sure to keep it clean by installing a filter and adding chlorine tablets. To find out maintenance tips for your Intex Easy Set Pool, like protecting your pool with a cover, keep reading.