X
This article was co-authored by wikiHow Staff. Our trained team of editors and researchers validate articles for accuracy and comprehensiveness. wikiHow's Content Management Team carefully monitors the work from our editorial staff to ensure that each article is backed by trusted research and meets our high quality standards.
This article has been viewed 48,364 times.
Learn more...
Piping is a popular way to add contrast and detail to pillows and bags. You can also use it on other sewing projects, including jackets and dresses. Whether you are using pre-made piping or making your own from scratch, sewing it in properly can give you a clean, professional finish.
Steps
Part 1
Part 1 of 3:
Making the Bias Tape
-
1Get cotton fabric that goes well with your project. Most people choose to make their piping using a contrasting color, but you can use the same color as the rest of your project. The fabric can be solid or patterned.
- If you are using pre-made piping, cut off however much you need for your project, then click here to continue.
- If you are using pre-made bias tape, cut off however much you need, open it up, and iron it flat to remove the creases. Click here to continue.
-
2Wash, dry, and iron your fabric. Use a gentle cycle on your washing machine, and cold water. Allow the fabric to hang-dry, or speed the process up in a dryer. Iron the fabric once it has dried to remove any wrinkles.
- You should still wash the fabric, even if the bolt says "pre-shrunk." This will remove any coatings.
Advertisement -
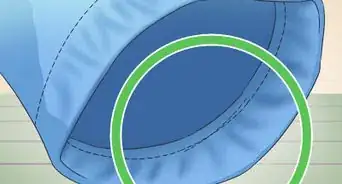
3Fold the fabric in half diagonally on the bias. Bring the top-right and bottom-left corners together so that the top edge matches up with the left side edge. Smooth the fabric so that it lays flat. It does not matter which side of the fabric is facing out at this point.[1]
- Cutting your fabric on the bias will make your piping more flexible in the end.
-
4Cut the fabric across the bias into 1 1⁄2 in (3.8 cm) wide strips. Use a straight edge and a tailor's chalk or pen to draw lines across the bias. The lines should be 1 1⁄2 inches (3.8 cm) apart, and parallel to the folded edge of your fabric. Cut along these lines when you are done.[2]
- Cut as many strips as needed to outline the area that you will be piping. You will also need extra fabric for the seam allowances.
- Discard the strip from the folded edge, or cut it in half lengthwise to make 2 identical 1 1⁄2 in (3.8 cm) wide strips.
-
5Pin and sew the ends of 2 strips to form a right angle. Pin the ends of 2 strips together to form a right angle, with the wrong sides facing out. Use a sewing machine to sew across the corner, from 1 outside edge to the other. Use a straight stitch and a thread color that matches the fabric.[3]
- If you are using solid-colored pattern, there is no right or wrong side. If you are using patterned fabric, the patterned side is the right side.
- Do not sew from the outside edge to the inside edge of the right angle.
-
6Cut the seam allowance down to 1⁄4 inch (0.64 cm). Make sure that you are cutting from the smaller side of the right angle. You want to end up with 2 strips of fabric joined into a right angle, with a 1⁄4 in (0.64 cm) seam allowance in the corner.[4]
-
7Open up the right angle and press the seam open. Pull open the right angle to form a straight line. Turn it so that the wrong side of the fabric is facing you. Split open the seam so that it lays flat, with the stitching running down the middle. Iron the seam flat using the cotton setting on your iron.[5]
- Join more strips of bias tape as needed until you have enough to create your piping.


Advertisement
Part 2
Part 2 of 3:
Creating the Piping
-
1Fold in 1 of the narrow ends of the bias tape, if needed. If you are piping the circumference of an item, like a pillow, you will need to join both ends of the piping together. Fold 1 of the narrow ends of your bias tape in by 1 inch (2.5 cm), then press it with an iron.
- Make sure that the wrong side of the bias tape is facing you during this step.
- Skip this step if you are piping a straight seam that does not join together to form a circle or a square.
-
2Lay a strip of cording down the center of your bias tape. Turn the bias tape so that the wrong side is facing you. Lay your cording down the middle, with the end 1 inch (2.5 cm) away from the folded end of the bias tape. Trim the other end of the cording so that it is even with the other end of the bias tape.[6]
- Choose cording that is between 4⁄32 and 5⁄32 inch (0.32 and 0.40 cm).
- If you did not fold the end of your bias tape, then both ends of the cording should match up with both ends of the bias tape.
-
3Fold the strip over the piping and secure it with pins. Fold the strip in half lengthwise so that the cording is sandwiched inside. Secure the fabric every 8 to 12 inches (20 to 30 cm) with a sewing pin as you fold it.[7]
-
4Place the strip under the zipper foot and adjust the needle. Replace the standard foot on your sewing machine with a zipper foot. Place the folded strip under the zipper foot, then bring the foot down on it; the corded part should be under the raised part of the foot. Move the needle to the left or right so that it is as close as possible to the cording.
- If you have a piping foot, place the piping in the foot's groove. Adjust the needle so that it is right on the piping's stitching.
- How you replace the zipper foot depends on the type of sewing machine you have. Most sewing machines have a release clutch just behind the needle.
-
5Sew along the folded bias tape. Use a straight stitch and the longest stitch length on your sewing machine. Make sure that the thread matches the fabric. Be careful not to sew the piping too tightly.[8]
- Your seam allowances should be about 1⁄2 inch (1.3 cm). This may vary, however, depending on the thickness of your cording.
- If you folded in 1 of the narrow ends of the bias tape, stop sewing 1 inch (2.5 cm) from the folded end. You need this end to be open.


Advertisement
Part 3
Part 3 of 3:
Attaching the Piping
-
1Open up the stitching on pre-made piping, if needed. If you are piping the circumference of an item, such as a sleeve cuff, then you will need to join both ends. Use a steam ripper to open up the stitching on the first 2 inches (5.1 cm) of your pre-made piping. Cut the cording inside the piping by 2 inches (5.1 cm). Fold the end of the fabric in by 1 inch (2.5 cm), and press it flat with an iron. Leave the other end of the piping intact.
- Skip this step if you are using homemade piping, or if you just need to pipe a single, straight edge.
-
2Pin the piping the the right side of your fabric. If you have not already done so, cut out the pieces for your project. Spread the first piece down with the right side facing up. Pin the piping around the edges that you want to pipe. Make sure that the raw edge of the piping is aligned with the raw edge of the fabric.[9]
- If you are piping the perimeter of an item, then leave 1 inch (2.5 cm) at each end of the piping unpinned.
-
3Tuck the raw end of the piping into the folded end. You should do this only if you are piping the perimeter of your project. Slip the raw end of the piping into the folded end, then secure it with sewing pins. If you need to, trim the raw end down until it fits inside the folded end.[10]
- Skip this step if you are piping just a single, straight line and don't need to join both ends.
-
4Cut V-shaped slits into the corners and curved edges. You will need 3 V-shaped slits for corners, and at least 3 for curves. Curves are all different, so you may need to cut more in order to get the fabric to lay flat. Cut the slits as close to the stitching as possible, without actually cutting through it.
-
5Baste the piping to the fabric. Use a straight stitch and the longest stitch length on your sewing machine. Make sure that the thread color matches the piping; you will use it as a guide in a later step. Try to sew across the original stitching on the piping as much as possible.
- If you are sewing piping that is joined together, begin and finish sewing at the folded seam.
-
6Pin and sew the second piece of fabric on top. Place the second piece of your fabric on top of your project, right-side-down, and secure it with pins. Turn your project so that the back is facing you and you can see the basting stitches. Sew just inside these stitches. This will help tighten the piping up.[11]
-
7Trim the seams, then turn the project right-side-out. Trim the seams so that they are between 1⁄4 to 1⁄2 inch (0.64 to 1.27 cm). If you need to, cut more slits into any corners or curves that won't lay flat. When you are done, turn your project right-side-out.[12]
- Press the seams to either side of the piping for a nicer finish.
- You can go over the raw edges of the inside seams with a zigzag stitch to prevent fraying.


Advertisement
Things You'll Need
- Fabric or pre-made bias tape (omit for pre-made piping)
- Cording (omit for pre-made piping)
- Straight edge (omit for pre-made piping/bias tape)
- Tailor's chalk/pen (omit for pre-made piping/bias tape)
- Thread
- Fabric scissors
- Sewing machine
- Zipper foot or piping foot
- Item to sew piping to


References
- ↑ https://swoonpatterns.com/tutorial-how-to-make-piping/
- ↑ https://swoonpatterns.com/tutorial-how-to-make-piping/
- ↑ https://swoonpatterns.com/tutorial-how-to-make-piping/
- ↑ https://www.seasonedhomemaker.com/how-to-add-piping-to-envelope-pillow/
- ↑ https://www.seasonedhomemaker.com/how-to-add-piping-to-envelope-pillow/
- ↑ https://swoonpatterns.com/tutorial-how-to-make-piping/
- ↑ https://www.seasonedhomemaker.com/how-to-add-piping-to-envelope-pillow/
- ↑ https://www.seasonedhomemaker.com/how-to-add-piping-to-envelope-pillow/
- ↑ https://www.seasonedhomemaker.com/how-to-add-piping-to-envelope-pillow/
About This Article

wikiHow Staff
wikiHow Staff Writer
This article was co-authored by wikiHow Staff. Our trained team of editors and researchers validate articles for accuracy and comprehensiveness. wikiHow's Content Management Team carefully monitors the work from our editorial staff to ensure that each article is backed by trusted research and meets our high quality standards. This article has been viewed 48,364 times.
Co-authors: 4
Updated: June 22, 2022
Views: 48,364
Categories: Sewing | Sewing Crafts
Advertisement