X
wikiHow is a “wiki,” similar to Wikipedia, which means that many of our articles are co-written by multiple authors. To create this article, 9 people, some anonymous, worked to edit and improve it over time.
This article has been viewed 31,539 times.
Learn more...
A bodice that fits can make you feel like Royalty. Whether you are wearing a tight fitted bodice or a flowing blouse, the image you want to give is that of comfort and confidence. Necklines, shoulders, bustline and waistline can be the noticed item in your garment, so make them happen. Here's how...
Steps
-
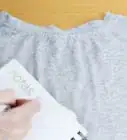
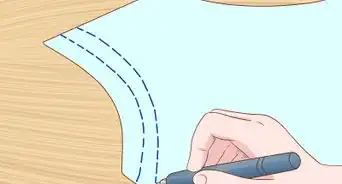
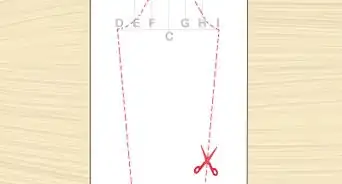
1Be aware that one of the most important items in the construction of a bodice is the fit and location of required darts. If your pattern requires darts, which are usually used in fitted bodice patterns, (sometimes both front and back) it is essential for the darts to be done accurately. As tedious as ironing open seams can be, it is a total requirement for the bodice, so turn that iron on and have it ready. Darts should be done FIRST. No cheating on using the markers, whether using a roller and colored transfer paper or using tailor pencils or chalk, it is really important to mark the beginning, middle and end of where the dart is located. Remember, one quarter inch can make the difference in whether a bodice fits or not. Use accurate fold and mark. Measure both darts to verify they are the same length. Slow as you go sewing is used for darts, some people prefer not to back stitch and leaving the threads long on the top and bottom of darts. Once sewed and measured (tried on) for accuracy, tie the ends into a knot and clip. Iron the dart as indicated (usually to the outside.) When the front and back have been connected by shoulder seams, try it on with the bra you plan on wearing with the garment. By doing this it will be evident that the darts are correct, then when you sew the side seams, you will be comfortable with the fit. If you don't like where the darts are fitting, this is where you can make the adjustments, re-do the darts.
-
2Check your pattern. At this point, many patterns will require that if there is a lining, you would repeat the same thing for the lining. Again, it is SO IMPORTANT that the darts match. Whatever adjustments you made to your garment, you should make to the lining in the same way. When the lining is fit to the main garment, it should become as one with the main material.Advertisement
-
3If a lining is not used but a facing is used for neck and arms, this is where you will be working on those pieces. When working with facings for necklines as well as armholes, it is essential to use the method of basting to "fit" the material of the facing to the main bodice. By doing this, it will reduce the puckering that can occur with facings. When "turning under raw edge" use the slow sew method unless using a serger to make the raw edge hemmed. Hemming a curved edge when turning under 1⁄4 inch (0.6 cm) requires making slight folds as you go along to make sure the facing is not puckering or ruffled so that it lays flat on the inside of the bodice. Make sure to iron facing before attaching to main garment. Marking the facings to fit the neckline is as important as making good darts, so don't ignore the circle or triangle markings. Match the facings to the bodice at indicated markings and use a good seam length to insure a tight connection. Iron the seams open first, then iron to the entire facing to the inside of the garment. An old 'trick' was to sew the seam to the facing side to insure the seam stayed down. This can still be done with fabric that holds up to the extra seam. Don't use this with fabrics that can't hold up to the extra seams. (some chiffons, silks and light weave cottons) Facings as well as linings should not be noticeable at all. Again, "try-on" the front and back once the shoulders are sewed together to determine just how fitted you want the sides as well as underarms.
-
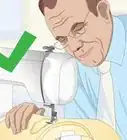
4Be aware most blouses call for side seams then sleeves, but sleeves can be fit into armholes prior to sewing side seams. This procedure is great if you do not have a machine that has removable plate for a small armhole circle. This is easiest for sleeves that have very gathered sleeves at the top. Gather the sleeves using double seam gathering method and pull threads evenly to ensure gathers are fit between markings. Sew the top of the sleeve to the armhole at the top. Finish the bottom of the sleeve first, hem and then starting as the bottom of the sleeve, slowly start sewing up to the armhole then continue with a slight U turn of the machine to sew down the side-seam of the bodice. You can go back and sew the U again to fortify the seam. This particular way of sewing sleeves and side-seams in one continuing motion can save time and help in making a well fit sleeve and underarm. (Really important for comfort.)
-
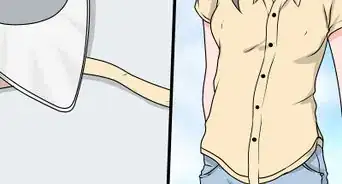
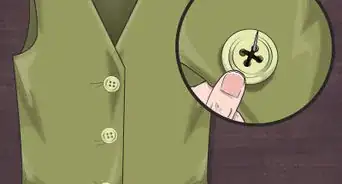
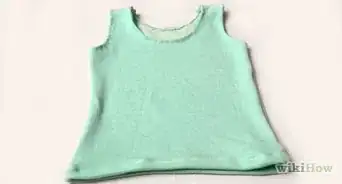
5If this is the end of your blouse, all that is left is the finish work of hem, buttons, hook and eye or whatever is called for. Hemming is extremely important especially if the blouse is to be worn outside of the lower garment. Make it look finished! If you are making a jersey top and you are using serger for edges, then use that for finishing. If using a fancier pattern and material, then hem it proper!
-
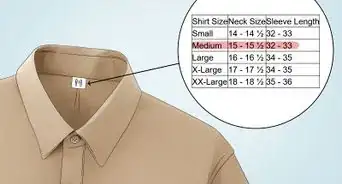
6If you are attaching your bodice to a lower portion (skirt or pant) of the pattern this is where you will make sure that the waistline is as perfect as you can get it. This is really the last place you want any puckering, whether in the front or in the back. Take care to make sure that any gathering required of the top of the skirt or pant is done with the same care as the sleeve gathering. Gathers at the waist need to be done very evenly so that it is not bulky. Make sure to 'try-on' prior to sewing top to bottom to verify the waist is actually on your waistline! (especially if you did NOT fit pattern to your own measurements prior to starting project) You have worked so hard to make sure your Bodice part of the project is perfect, so take the time to make sure the attachment to the bottom is done with the same care. Follow instructions to finish your project.
-
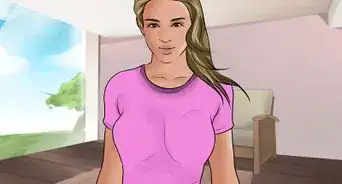
7Remember, other than jewels, nothing makes a girl feel prettier than a nice fitting garment. If you are comfortable, confident and you feel pretty, you look pretty!


Advertisement
Warnings
- Take care to make sure that straight pins are all facing to the inside of the seam, so that the left hand can remove the pins safely prior to the sewing machine needle going over the pin. This reduces pucker, broken machine needles, and allows removing by the pin head.⧼thumbs_response⧽
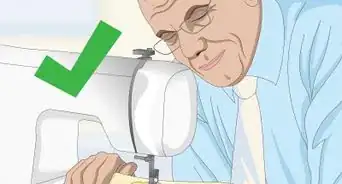
- Hot irons are always a possible danger both to the person ironing as well as to the fabric. Take precaution to set the iron on the lowest setting required for the material being used.⧼thumbs_response⧽
Advertisement
Things You'll Need
- Sewing Machine and if you like a Serger
- Straight pins
- Transfer Paper and roller for marking or tailor chalk/pencil/pen
- Pins
- Thread specifically chosen for material type (really important!)
- Zipper or buttons if required
About This Article
Advertisement