This article was co-authored by Abyssinia Campbell and by wikiHow staff writer, Jessica Gibson. Abyssinia Campbell is an Executive Chef and the Owner of Chef Abyssinia, Personal Chef and Catering. With over ten years of experience, she specializes in catering, event planning, menu development, meal planning, and food business operations. When it comes to cooking, Chef Abyssinia enjoys using fruits, vegetables, healthy food alternatives, and local farm-fresh ingredients. She holds a BASc in Culinary Arts and Food Service Management from Johnson and Wales University.
There are 9 references cited in this article, which can be found at the bottom of the page.
This article has been viewed 3,381 times.
Peanuts are a naturally healthy food, so you might be looking for more ways to add them to your diet. Why not soak and sprout them? Some people find that sprouted peanuts are easier to digest. If you've never sprouted peanuts before, no problem! We'll walk you through the soaking and sprouting process for peanuts (including raw red skin peanuts), plus show you how to use and store them.
Things You Should Know
- Rinse the peanuts and then soak them in salted water overnight.
- Pour out the water and continue to rinse them once a day, every day until they sprout (usually 2-4 days).
- Use sprouted peanuts by eating them plain, adding them to salads, or making homemade peanut butter.
- You can store them in the fridge for up to 3 days.
Steps
Soaking and Sprouting Peanuts
-
1Gather as many whole raw peanuts as you like. Look through your batch of peanuts and discard any that look broken or split. Peanut halves or pieces might not sprout—this is fine if you're just planning on soaking them, though.[1]
- Roasted peanuts won't sprout, which is why it's really important to get raw peanuts if you plan on soaking and sprouting them.
-
2Put the peanuts into a large jar and rinse them. The peanuts will double in size once you soak them, so use a big jar. For instance, put 1 cup of raw peanuts into a 2 c (470 ml) size mason jar. Then, fill the jar with cool water and swish it around. Drain off the water and keep rinsing until the water is clear.[2]
- If you don't have a big jar handy, put the raw peanuts into a large bowl. When you drain them, just pour the peanuts into a colander before you return them to the bowl.
- To make it easier to drain, poke holes into the lid of the mason jar and screw it on. When you drain the peanuts, the lid catches them but the holes let the water drain out.
Advertisement -
3Add salt and cover the peanuts with filtered water. The salt prevents the peanuts from molding as they soak. Just add about 1 1/2 teaspoons (8 g) of salt to the jar of peanuts and fill it to the top with filtered water. The important thing is to completely cover the peanuts so they can fully soak.[3]
- It's fine to leave the salt out of the soaking solution if you're planning on a really quick soak where the peanuts don't actually sprout.
-
4Cover the jar with cheesecloth and soak the peanuts overnight. Within 12 hours, the peanuts will swell and the water will turn a slightly darker color—this is totally normal![4]
- If you have a small piece of fine mesh, you could place it over the jar instead of cheesecloth.
- If the peanuts absorb all of the water, top up the jar with more filtered water.
-
5Rinse the peanuts once a day for 2 days. Drain the water and rinse the peanuts with warm filtered water. Pour out the water, but leave the peanuts in the jar. Then, set them aside at room temperature without refilling the container with water. This gives the peanuts a chance to sprout. Rinse and drain the peanuts every day until you see sprouts forming—this usually takes 2 to 4 days.[5]
- It's really important to rinse the peanuts each day, so bacteria don't grow.


Using Sprouted Peanuts
-
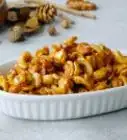
1Add the sprouted peanuts to your meals for flavor and texture. Scatter sprouted peanuts onto salads, combine them with other sprouted nuts or seeds for a snack, add them to soup, or add them to quesadillas for instance.
-
2Use the sprouted peanuts to make creamy nut milk. Put your freshly sprouted peanuts into a blender and pour in enough water to completely cover the nuts. Keep in mind that the less water you use, the creamier the milk will be! Blend the mixture until the liquid is smooth. Then, pour the peanut milk through a cheesecloth-lined strainer into a bowl.[6]
- If you like slightly sweet milk, add a few chopped dates or a drizzle of honey to the blender along with the peanuts.
- Compost the leftover peanut pulp or spread it flat on a baking sheet and dehydrate it. Then, grind it into a fine powder that you can use in baking.
- Fresh peanut milk lasts for up to 2 days in the refrigerator.
-
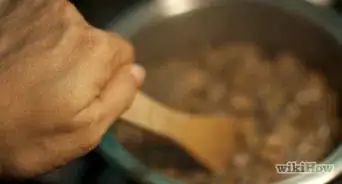
3Blend the dry sprouted peanuts to make peanut butter. Fill a food processor or blender half full with sprouted peanuts that you've dried. Then, add salt or sugar and blend the peanuts for up to 5 minutes or until the peanut butter is as smooth as you like.[7]
- Stop the machine and scrape down the sides occasionally.
- If you want really smooth peanut butter, rub the peanuts between your fingers so the red skin falls off.


Storing Sprouted Peanuts
-
1Refrigerate your sprouted peanuts for up to 3 days. Put the nuts into an airtight container in the fridge and use them within a few days. They will become soft or slimy the longer you store them, so only prepare as many peanuts as you plan to use.
-
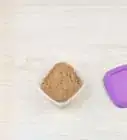
2Dehydrate the sprouted peanuts for longer storage. Dried peanuts can last up to 6 months and they have a crunchy texture. If you prefer crisp nuts instead of the chewy, firm texture of freshly sprouted nuts, use your dehydrator. Spread the peanuts in a single layer on dehydrator sheets and put them into the machine. Dry the peanuts at 110 °F (43 °C) for about 24 hours or until they're totally dry.[8]
- Put the dehydrated peanuts in an airtight container and store them at room temperature for up to 6 months.
-
3Use an oven if you don't have a dehydrator. An oven works perfectly well to dry the nuts—in some cases, it's faster. Spread the peanuts on a baking sheet in a single layer, so they dry evenly. Then, stick them in the oven at the lowest temperature possible. Let them dry in the oven overnight and check to see if they're totally dry.[9]
- It may take up to 17 hours for the peanuts to completely dry out.


Things You’ll Need
- Large mason jar
- Cheesecloth or strainer
- Blender or food processor, optional
- Dehydrator, optional


References
- ↑ https://harvesttotable.com/peanut-seed-starting-tips/
- ↑ https://youtu.be/CbODODkBlmQ?t=24
- ↑ https://myculturedpalate.com/how-to-soak-and-dehydrate-nuts/#recipe
- ↑ https://youtu.be/CbODODkBlmQ?t=51
- ↑ https://www.verticalveg.org.uk/6-easy-steps-to-sprout-heaven/
- ↑ https://youtu.be/ja3ikZCKMvY?t=82
- ↑ https://www.ivermarjerison.com/food-blog-posts/2017/4/17/homemade-sprouted-peanut-butter
- ↑ https://youtu.be/HF0bZCEkffg?t=131
- ↑ https://youtu.be/WoSWsp6sZnA?t=118
About This Article