X
wikiHow is a “wiki,” similar to Wikipedia, which means that many of our articles are co-written by multiple authors. To create this article, volunteer authors worked to edit and improve it over time.
This article has been viewed 26,197 times.
Learn more...
Contact adhesive is great for attaching large pieces of plastic, laminate, wood, plywood or canvas to each other. This type of glue is designed to attach to itself, which is why you apply it to either side of an object. These adhesives are available in a wide variety of applications, sprays and tubs, so ensure you are choosing the right adhesive for the job at hand.
Steps
Part 1
Part 1 of 3:
Preparing the Surface
-
1Sand both surfaces if you are using wood, plywood or other rough surfaces. Wipe up the excess dust with a shop vacuum and tack cloths. Both surfaces must be completely dust free.
- It is a good idea to vacuum in the workspace to avoid adhesion problems and blowing dust.
-
2Clean the surfaces. Use a solvent to remove oil and dirt if the item can’t be washed with mild detergent and water. Dry the surfaces completely.Advertisement
-
3Ensure the ambient temperature of the items and the workspace is at least 65 degrees Fahrenheit (18 degrees Celsius). Read the package to determine more specific temperature requirements for the adhesive you are using.


Advertisement
Part 2
Part 2 of 3:
Applying the Contact Adhesive
-
1Ask for directions using the spray container if it is rented. Hand held spray applicators are ideal for small jobs. High volume, low-pressure applicators are ideal for medium to large jobs jobs.
- Automatic spray applicators are ideal for the largest jobs. They will require larger air compressors.
- Pressurized cylinders and compressors require care during storage and use.
-
2Wear a mask, gloves and ventilation mask when working with adhesives. Adhesives can contain strong chemicals.
-
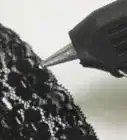
3Practice spraying the contact adhesive on a practice item. Turn on the adhesive and apply it one coat at a time, until you are comfortable and ready to work on your main project.[1]
-
4Prop up your surfaces onto worktables or sawhorses. Both surfaces need to be facing up to apply the adhesive.
-
5Apply a coat of adhesive to glossy surfaces. Spray a uniform layer and then let it dry for 30 minutes. These surfaces require two coats of adhesive to adhere completely.
-
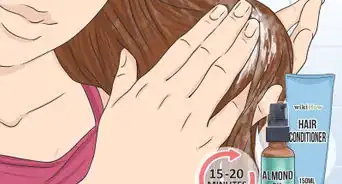
6Apply a uniform and generous coat of adhesive to other surfaces or a second coat to the glossy surface. Allow it to dry for 10 to 30 minutes, or the amount indicated on package directions. It must dry slightly to evaporate some of the liquid before it is ready to adhere.
- Some adhesives require you to wait four to 24 hours before bonding. Bonding is the act of connecting the two adhesive surfaces together and smoothing the air bubbles out.[2]


Advertisement
Part 3
Part 3 of 3:
Bonding the Contact Adhesive
-
1Place spacers or dowels on top of surfaces that require exact positioning. Use several parallel spacers. Place your other surface on top of these spacers and position it exactly.
-
2Ask an assistant to hold the top item in place while you remove the spacers. Set the top surface carefully on the bottom surface.
-
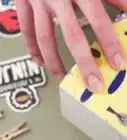
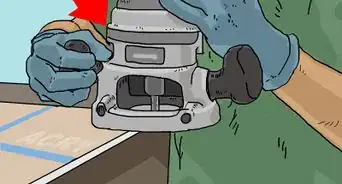
3Apply uniform pressure on the two surfaces to adhere them. Start in the center and work out toward the edges.
-
4Use a three-inch (7.5cm) roller to rid the surface of air bubbles, working from center to edge in all directions. Try a pinch or nip roll for best results.[3]
-
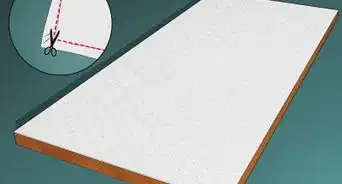
5Trim the sides after the surfaces have been rolled and the bond has been set. If you’ve done a thorough job of applying pressure, you can trim the edges almost immediately with power tools or machinery.


Advertisement
Community Q&A
-
QuestionIs contact adhesive highly toxic?
 T. ChinsenTop AnswererThe adhesive itself may not be toxic. The solvent and propellants in spray adhesive are generally toxic and potentially carcinogenic. All items that are hazardous to health are always labeled clearly on the packaging.
Advertisement
Warnings
- Don’t use low pressure, air operated piston pumps with contact adhesive.⧼thumbs_response⧽
- Never allow dust to blow onto the contact adhesive while it is drying and before you bond it. It will jeopardize the strength of the bond.⧼thumbs_response⧽
Advertisement
Things You'll Need
- Spray equipment
- Shop vac
- Tack cloths
- Ventilation mask
- Gloves
- Safety glasses
- Three-inch (7.5cm) pinch/nip roller
- Water
- Detergent
- Solvent
- Spacers
- Timer
References
About This Article
Advertisement