This article was co-authored by Andrew Lokenauth and by wikiHow staff writer, Jennifer Mueller, JD. Andrew Lokenauth is a Finance Executive who has over 15 years of experience working on Wall St. and in Tech & Start-ups. Andrew helps management teams translate their financials into actionable business decisions. He has held positions at Goldman Sachs, Citi, and JPMorgan Asset Management. He is the founder of Fluent in Finance, a firm that provides resources to help others learn to build wealth, understand the importance of investing, create a healthy budget, strategize debt pay-off, develop a retirement roadmap, and create a personalized investing plan. His insights have been quoted in Forbes, TIME, Business Insider, Nasdaq, Yahoo Finance, BankRate, and U.S. News. Andrew has a Bachelor of Business Administration Degree (BBA), Accounting and Finance from Pace University.
There are 7 references cited in this article, which can be found at the bottom of the page.
This article has been viewed 19,849 times.
Like other cryptocurrencies, it is possible to build your own mining rig and mine Ethereum yourself, rather than purchasing coins on an exchange. Building a mining rig is a fairly expensive endeavor that also requires significant computer hardware and software skills. Once you've built your rig, all you need to do is choose an Ethereum wallet and join a pool to start mining Ethereum. However, you shouldn't expect to actually profit from your mining venture for several years.[1]
Steps
Building Your Mining Rig
-
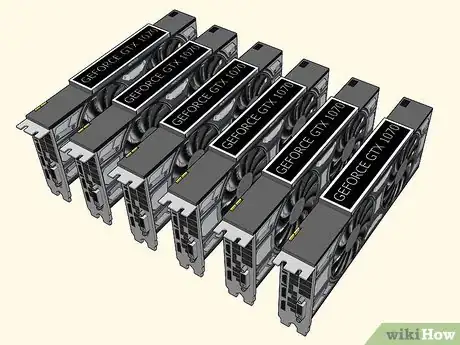
1Invest in at least 6 video cards (GPUs). The video cards are the most important part of your mining rig since they actually do the work of solving the equations in the blockchain to mine the cryptocurrency. Most mining rigs include at least 6 video cards. This will typically be the most expensive part of your mining rig.
- The more powerful your video cards are, the faster they'll solve equations – this is referred to as their hash rate. However, the most powerful video cards may run more than $1,000 USD a piece, an expense that will definitely cut into whatever profit you might earn.
-
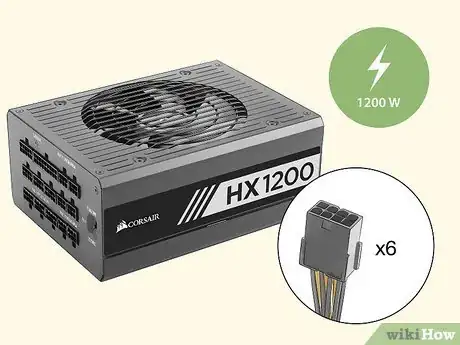
2Buy a 1200W power supply. If you're running 6 GPUs, you need at least 1200 watts to support the total power draw for your system. You also want to make sure you have a buffer of 10 to 15 percent in case of fluctuations. Your power supply will typically cost you between $100 and $200 USD.
- Make sure your power supply has enough connection to support the number of GPUs you're running.
- Since your energy costs have the most direct impact on your mining profits, get a plug for your rig that has energy monitoring capabilities. If your rig is consuming too much energy, you can shut it down temporarily.
Advertisement -
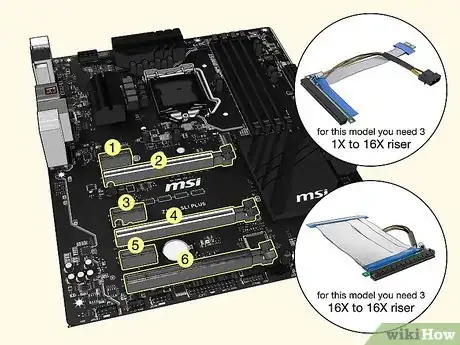
3Choose a motherboard with at least 6 PCIe slots. If you're using 6 GPUs, you need a motherboard with enough slots to connect them all. Along with the motherboard, get 6 risers so that you can connect your GPUs to the motherboard without attaching them directly onto the board. Risers also allow you to connect your GPUs directly to your power supply, to reduce the power drain on your motherboard.[2]
- Expect to spend between $100 and $200 USD for your motherboard. You can get a 6-pack of risers for under $50 USD.
Tip: Your rig doesn't come with a power button, so you'll have to jump the power switch pins on your motherboard each time you turn it on. If you plan on turning it off and on frequently, you can buy a power button for less than $5 USD.
-
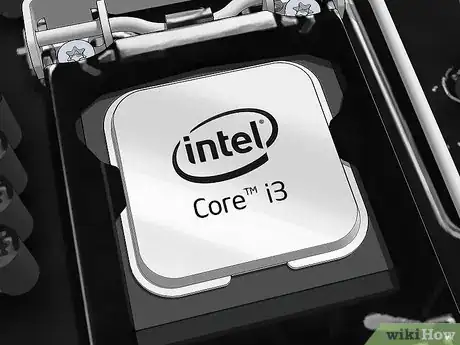
4Get a lower power processor (CPU). Since your GPUs are doing all the work, you don't need a high-powered processor (like you might on a regular personal computer). Save some energy usage with the lowest power processor you can find that will run the rig.
- In a 6-GPU set-up, an Intel i3 or Celeron chip should work to power your motherboard. These typically run under $200 USD.
-
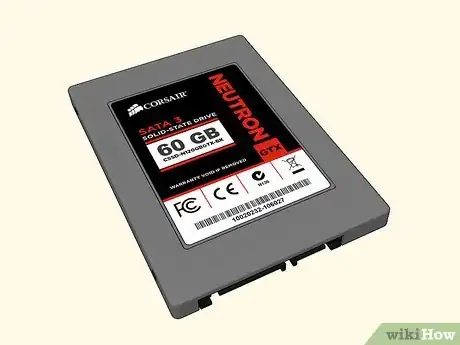
5Use a solid state hard drive to prevent crashes. A solid-state hard drive allows the OS to run smoothly during mining operations. For a 6-GPU set-up, a 60gb hard drive should be big enough for you to mine efficiently. You can find these for under $50 USD.[3]
- If you were going to mine on your own without joining a pool, you would need a larger hard drive so you could download the entire blockchain. However, it's not worth it to mine on your own with a rig this small – you would spend more than you made.
-
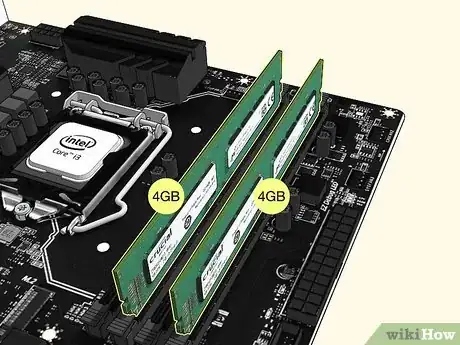
6Add RAM depending on which OS you're running. Unlike a personal computer, RAM isn't very important for a mining rig, so you don't need very much. However, different operating systems have different requirements.
- You can get the RAM you need for under $50 USD. If you plan on running Linux, you can get away with 4gb worth of RAM. If you're running Windows, get at least 8gb worth of RAM.
-
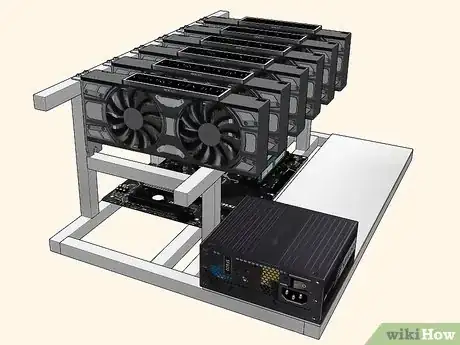
7Set up your rig in an open-air mining case. Running 6 GPUs can generate a lot of heat. An open-air case provides better cooling for your rig than a closed case with fans. Keeping air circulating around your GPUs ensures optimal performance.
- You can build your own case with basic building materials such as wood and aluminum, or you can buy a pre-built frame. Even a pre-built case typically won't cost you more than $50 USD.
Tip: If you plan on running your rig 24/7, it's going to put off a lot of heat. In addition to an open-air case, you'll likely need multiple fans blowing on it constantly.
-
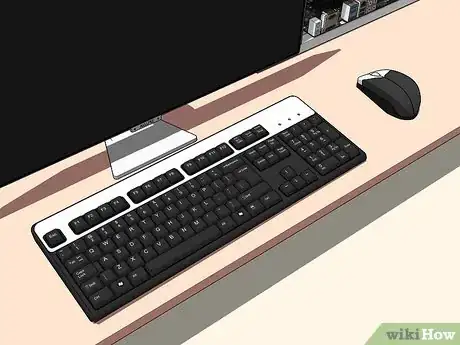
8Connect a standard keyboard, monitor, and mouse. You need a keyboard, mouse, and monitor so you can install the OS and software to run your mining rig. You can use old or used models for these, they don't have to be anything fancy.[4]
- It's possible to use the monitor, mouse, and keyboard from your personal computer and just swap them back and forth when needed. Check your manuals or the manufacturer's website for compatibility questions.
Installing Your Mining Software
-
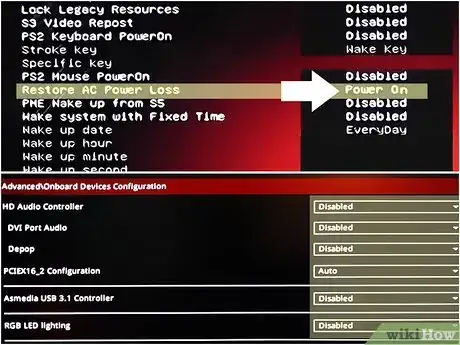
1Configure your mining rig's BIOS settings. Turn your rig on and press the "delete" key several times until the BIOS configuration screen comes up. Then you'll need to change a few options so that your rig runs at maximum efficiency.[5]
- If you plan on running your rig 24/7, change the power options so that it automatically comes on when it has power. That way in the event of a power outage, your rig will come back online when power is restored. This is also handy if you haven't installed a power button.
- Disable components you won't use to save a little power. Typically you can disable onboard audio and most of the peripheral ports.
- Set the PCIe speed to Gen1 to ensure your OS recognizes all of your GPUs.
Tip: You may have to come back and tweak this later if you have GPUs that aren't showing up in your OS.
-
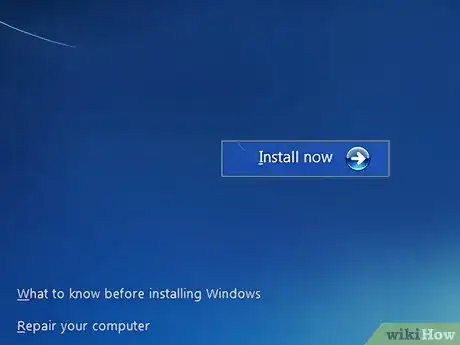
2Set up an operating system on your mining rig. Windows 10 is the most common operating system for mining rigs. If you're comfortable with command-line programming, you can also run Linux. However, for most miners, Windows is more functional.[6]
- If you want to mine Ethereum, you should already have a working familiarity with most basic Windows tasks, including how to install the operating system.
-
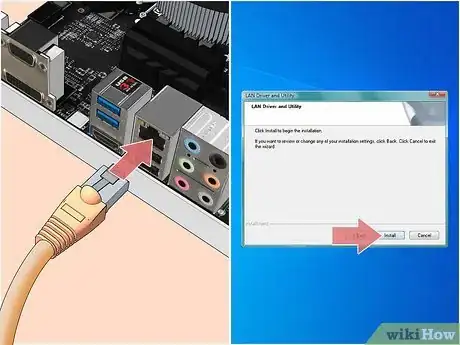
3Set up the LAN/ethernet driver that came with your motherboard. You need to be able to get online to mine Ethereum, as well as access the rest of the software you need to get your mining rig up and running. Use an ethernet cable plugged directly into your rig for the best results.[7]
- Do not use a wireless connection or connect your mining rig to any WiFi network. No matter how secure you think it is, it's likely not secure enough. Additionally, your signal likely won't be strong enough to mine consistently.[8]
-
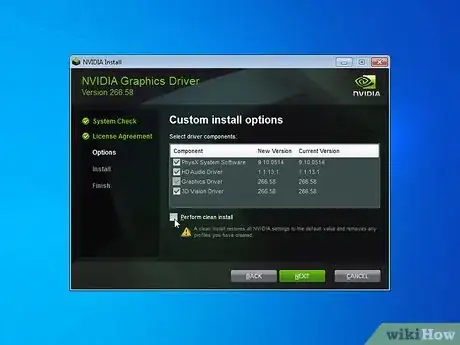
4Install your video card drivers. Head to the website for the manufacturer of your video cards and download the current version of the driver for your video cards. Install the driver as you normally would, then reboot your rig. Your GPUs should all appear in your Device Manager.[9]
- If you have problems getting the OS to recognize all of your video cards, you may need to play around a little bit. You can tweak your BIOS settings, or uninstall all of your GPUs and then reinstall them one by one.
- If you have to delete drivers, use an uninstaller program to remove them cleanly – don't just move them to the trash.
-
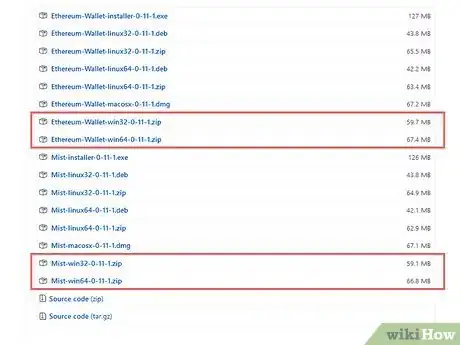
5Download the Ethereum browser if you're new to cryptocurrency. The Mist package includes the Ethereum browser as well as the official Ethereum wallet. This package includes messaging, social networking features, and tutorials that are helpful for beginners.[10]
- To download the Mist package, go to https://github.com/ethereum/mist/releases and scroll down until you find the most recent version for your OS. It will be the version with the highest number.
- When you download the zip file, you'll need to extract it using a file extraction tool. Your browser may have already come with one of these – if not, you'll need to download one.
- If you're familiar with cryptocurrency and already know what you're doing, you can use any cryptocurrency wallet to store the Ethereum you mine.
-
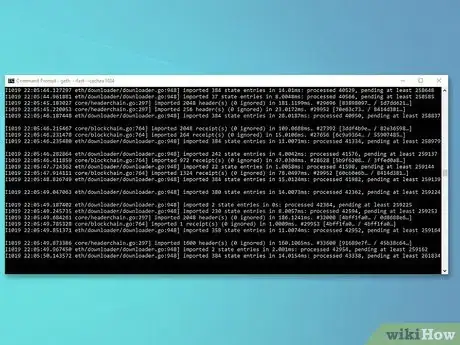
6Sync the blockchain. The entire blockchain is more than 10 gigs worth of data, so it will take a while to sync with your rig. While you're waiting, you can explore the Mist app and check out some of its features.[11]
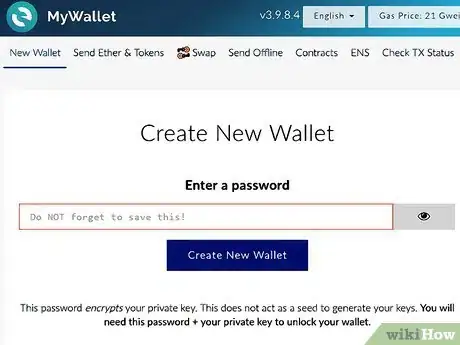
- If you're planning on joining a mining pool, you don't necessarily have to download the entire blockchain. However, you do have to download it to use the Mist app. If you want to bypass downloading the entire blockchain, you can instead create an Ethereum wallet at https://www.myetherwallet.com/.
-
7Set up your Ethereum wallet. Open your wallet and add a new account. Give your account a memorable name and record your password to keep in a secure place. Keep in mind that anyone who has your password can access your wallet and all of the Ethereum you have stored there.[12]
- Copy the address (a string of characters starting with "0x") to a text file or write it down somewhere handy. This is the address you'll give to your pool so your Ethereum can be deposited. It isn't necessary to secure your address the way you do your password – it only allows anyone who has it to deposit Ethereum into your account, not to withdraw anything.
-
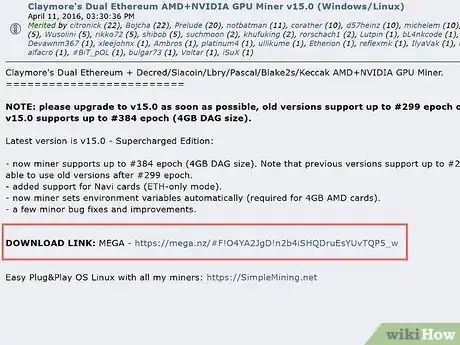
8Download mining software. Claymore Miner is the mining software that most mining pools use to mine Ethereum. While there is other mining software available, Claymore is the most popular and the easiest to use.[13]
- You can download the latest version of the software on the BitcoinTalk Forum. Look for the original post by Claymore, the developer of the software.
-
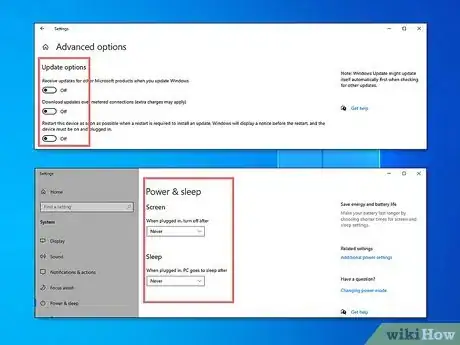
9Modify your Windows settings for more efficient mining. Disable automatic updates and adjust your power settings so that Windows never sleeps. Sleeping or restarts will interrupt your mining.[14]
- You don't necessarily have to disable automatic updates. If you do, monitor for updates and install manually when you can.
- If you're running anti-virus software, add an exception for the Claymore mining executable file, EthDcrMiner64.exe. This will keep the program from flagging the file as a virus and attempting to disable or delete it.
Joining a Mining Pool
-
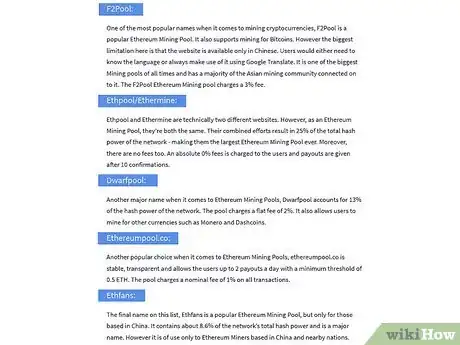
1Choose a mining pool near you to join. Check out several mining pools and compare the fees charged, frequency of payout, and location. Generally, you want to choose a mining pool that has a server in your general geographic area.[15]
- For example, if you live in the United States, you wouldn't want to join a mining pool in China. The further away from the server you are, the greater the lag time between your rig and the server. If there's a significant lag, your rig may be working on blocks that have already been solved.
- Research the reputation of mining pools before you choose one to join. Avoid pools that have only been in existence for a year or less.
Tip: Nanopool and Etheremine are 2 popular mining pools that are both established and reputable. F2Pool is based in China and used by a majority of the Asian mining community.
-
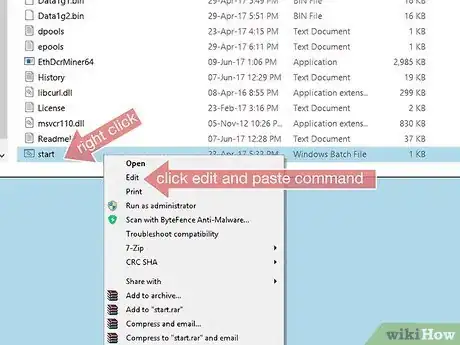
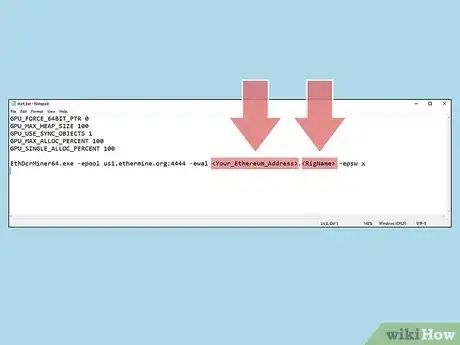
2Copy the commands from the pool into your mining start file. Go to the home page of the pool you want to join to find instructions on how to mine in that pool. The instructions may be directly on the home page, on a Help page, or on an FAQ page. The instructions consist of text code you will configure to create a batch file to start mining.[16]
- Copy the code from the pool's website. Then, from your desktop, open your Claymore miner folder. Right-click the text file named "Start" and click "Edit." Paste the code into that file.
-
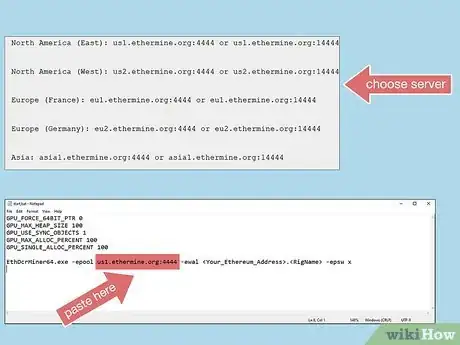
3Update the server string with the server you want to use. Below the code on the pool's website, you'll see a list of servers. Choose the server that is located nearest you, and copy the address string from the website.[17]
- Paste the address string in your text file, replacing the server string or filler text that was originally in the code.
-
4Provide your Ethereum wallet address and rig name. In the code you copy, you'll see filler text in the spaces where you need to paste your Ethereum wallet address and the name of your rig. You can choose any name you want for your rig – it's just for identification purposes.[18]
- Your rig name is like your WiFi network name – avoid using your name or any private information, such as your birthday. Your rig name will be public within the pool.
-
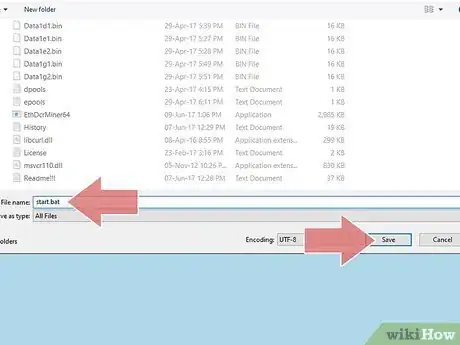
5Save your start file as a batch file. Once you've finished configuring the code, choose "File > Save As" and create a name for your file in the box for "File Name." After the name, type the extension ".bat." Under "Save as type," change the file type to "All Files."[19]
- Once you've saved your batch file, create a shortcut to the file on your desktop for easy access. You can delete the original text file you created.
-
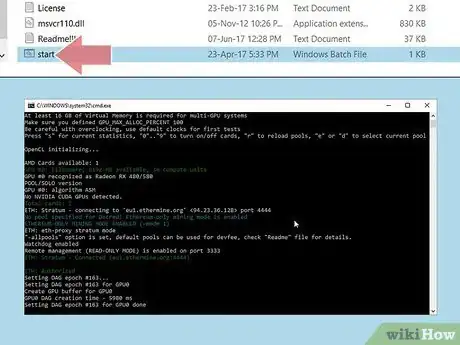
6Double-click your batch file to start mining. Your batch file connects you to the pool and begins your mining operation. Double-click your shortcut when you're ready to start. the miner will initialize your GPUs and start hashing away at the blockchain.[20]
- Give your miner about 20 seconds to get going, then click "s." This will display your hash rate. You can plug your hash rate and other information into a profitability calculator, such as https://etherscan.io/ether-mining-calculator, to determine how much Ethereum your rig will mine.
Warnings
- Beginning in 2017, Ethereum unveiled a transition to proof-of-stake, which would eliminate Ethereum mining. As of the end of 2018, that transition had not yet happened.[21] However, when Ethereum mining ends you can use your rig to mine a different cryptocurrency.[22]⧼thumbs_response⧽
- In most cases, Ethereum mining rigs cost more in electricity than they earn in Ether. You can cut power costs by not running your rig during peak hours, or only running it a few hours a day.⧼thumbs_response⧽
References
- ↑ https://99bitcoins.com/ethereum-mining/
- ↑ http://www.lifeisafile.com/how-to-setup-an-ethereum-mining-rig-at-home/
- ↑ http://www.lifeisafile.com/how-to-setup-an-ethereum-mining-rig-at-home/
- ↑ https://99bitcoins.com/ethereum-mining/
- ↑ http://www.cryptobadger.com/2017/04/build-ethereum-mining-rig-windows/
- ↑ http://www.cryptobadger.com/2017/04/build-ethereum-mining-rig-windows/
- ↑ http://www.cryptobadger.com/2017/04/build-ethereum-mining-rig-windows/
- ↑ https://blockonomi.com/how-to-mine-ethereum/
- ↑ https://99bitcoins.com/ethereum-mining/
- ↑ https://99bitcoins.com/ethereum-mining/
- ↑ https://99bitcoins.com/ethereum-mining/
- ↑ https://99bitcoins.com/ethereum-mining/
- ↑ https://99bitcoins.com/ethereum-mining/
- ↑ https://99bitcoins.com/ethereum-mining/
- ↑ https://www.cryptoground.com/guide/ethereum-mining-pools
- ↑ https://99bitcoins.com/ethereum-mining/
- ↑ https://99bitcoins.com/ethereum-mining/
- ↑ https://99bitcoins.com/ethereum-mining/
- ↑ https://99bitcoins.com/ethereum-mining/
- ↑ https://99bitcoins.com/ethereum-mining/
- ↑ https://cryptoiq.co/ethereums-hard-fork-could-send-ethereum-below-50/
- ↑ https://www.coindesk.com/forget-staking-still-coins-for-pow-ethereum-miners
