This article was co-authored by Jennifer Levasseur. Chef Jennifer Levasseur is a Personal Chef and the Owner of The Happy Cuisiniere based in Breckenridge, Colorado. She has over 12 years of culinary experience and specializes in Mountain and Contemporary Rustic cuisine. Moreover, she can craft dishes and modify menus to accommodate dietary restrictions, such as gluten-free, vegetarian, vegan, pescatarian, and dairy-free diets. In addition to a Bachelor’s degree in Marketing and Management from the University of Houston, Chef Jennifer holds Associate’s degrees in Culinary Arts and Baking & Pastry Arts from Houston Community College.
There are 8 references cited in this article, which can be found at the bottom of the page.
This article has been viewed 45,122 times.
Butternut squash is harvested in the fall after its skin hardens and turns orange. Proper storage depends on preserving that skin, much like pumpkins and other types of winter squash. You do not need to store squash in the refrigerator or freezer until it is cut open or otherwise damaged. Freshly-picked squash can also be cured and placed in a cool, dry area to keep it fresh for longer.
Steps
Keeping Butternut Squash Fresh
-
1Store uncut squash in a cool, dark place for up to 1 month. As long as the squash's skin is intact, avoid putting it in the refrigerator. The moisture from the refrigerator causes it to soften and decay quickly. To preserve it for longer, move it to a storage spot such as a closet or cellar. Keep it on a shelf, if possible, to avoid cold floors or moisture that can lead to rotting.[1]
- Squash will develop soft spots or dark marks when it starts going bad.
- Watch out for broken stems or blemishes. Plan on using damaged squash first, since they will soften and rot faster than the rest.
-
2Peel the squash if you plan on storing it in the refrigerator. An easy way to remove the tough outer layer of skin is with a vegetable peeler. Start by slicing off the entire stem with a chef’s knife. Then, use the peeler to strip away the orange layer of skin to expose the brighter flesh beneath it.[2]
- You can cut larger squash in half before peeling them. Depending on the squash’s size, the smaller pieces can be easier to handle.
Advertisement -
3Cut the squash if you want smaller pieces. Slice the squash horizontally, exposing the seeds in the wider, rounder end. Scoop these out with a spoon before attempting to cut the squash. You can then slice the squash up into a convenient shape for storage, such as cubes or spirals.
- Consider how you plan on using the squash. Cubes are good for roasting, for instance, while spirals make for great “noodles.”
- Be careful when using a sharp knife. When slicing through the squash, avoid moving the blade towards you.
-
4Store cut squash in containers for up to 5 days in the refrigerator. Fit the squash into resealable plastic containers or bags, making sure they are closed tightly before putting them in the refrigerator. You can cut the squash as needed to make it fit. Write the date on the container so you know when you put it in your fridge. Throw away the squash when it turns mushy or starts developing dark spots.
- If you don’t wish to cut up the entire squash right away, you can wrap it up tightly in a few layers of plastic wrap.
- Cooked squash will last a similar length of time as raw squash.
-
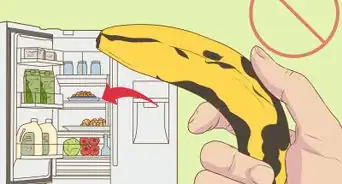
5Move squash away from apples, pears, and other ripening fruits. These fruits produce an invisible gas called ethylene which inevitably causes squash to go bad faster. Bananas, peaches, avocados are a few more examples of fruits to avoid. If you can, store the squash as far away from them as possible.[3]
- If you have cut or cooked squash in a resealable container, this is less of problem. The gas can affect raw squash stored outside of the refrigerator or inside an open bag.


Freezing Butternut Squash
-
1Remove the stem and peel the squash. Use a sharp knife to cut through the stem at the base, giving you more space to maneuver the peeler. Scrape away the orange layer of skin with a vegetable peeler until you get down to the orange flesh.[4]
- For your safety, take precautions when using a sharp knife. Hold the squash down on a flat surface like a cutting board. Move the blade away from your body and fingers when slicing off the stem.
-
2Cut the squash in half and remove the seeds. Lay the squash down on a flat surface. The seeds are in the larger, rounded end of the squash. To access them, slice the squash in half horizontally with a sharp knife. Then, use a spoon to scoop out the seeds.
- Move the knife away from your body as you cut the squash in half.
-
3Slice the squash into 1 in (2.5 cm) cubes. The squash cubes do not have to be exact, but try to keep the pieces as even as possible so they all freeze at the same rate. Cut up both halves of the squash with your knife.[5]
- You can also try freezing spirals or pureed butternut squash, but keep in mind that they may freeze faster and spoil faster than cubes due to their size.
- To cut spirals, divide and clean the squash as you normally would, then use a spiralizer to shred the pieces into noodles.
-
4Spread the squash in a single layer on a baking tray. Choose a baking tray you don’t mind sticking in the freezer for a little while. You will need to solidify the squash chunks before storing them long-term. Make sure they aren’t stacked on top of one another so all of the sides freeze evenly.[6]
- To prevent the squash from sticking to the tray, you can place a piece of parchment paper on the tray before adding the squash.
- For squash spirals, freeze them on the tray as you normally would. For pureed squash, you can freeze it directly in a container or ice tray.
-
5Freeze the squash pieces for 1 hour until they are frozen through. Place the baking tray directly in the freezer, then set your timer. After the time is up, test the squash by touching it. Make sure the chunks feel solid on all sides.[7]
- Freezing the chunks this way takes water out of them, ensuring they last longer in storage. Improperly frozen butternut squash can soften over time. It also prevents them from sticking together, so thawing portions is easier.
-
6Transfer the squash chunks to a freezer bag or container. Make sure your storage method is resealable and freezer-safe. Leave about 1⁄2 in (1.3 cm) at the top of each bag or container in case the squash expands.[8]
- If the squash chunks stick to the baking tray, leave the tray out at room temperature. Wait a minute for the squash to come unstuck.[9]
-
7Label the container with the current date. This will help you remember when you put the squash in the freezer. You can write directly on most storage bags with permanent marker. If you’re using a container, try writing the date on a sticker and placing it on the container.
- If you freeze lots of squash, clear labels will also help you keep track of what to use first. The longer the squash has been in storage, the quicker it needs to be used.
-
8Store the squash in the freezer for up to 8 months. The squash chunks will last a while in the freezer, so you can take them out whenever you need them. After 8 months, butternut squash may soften, take on freezer burn, or lose flavor, so try to use it before this happens.[10]
- Cooked squash can also be stored the same way. Put it directly in a sealed container and into the freezer. It will last a similar length of time as raw squash.


Curing Fresh Squash
-
1Cure the squash in sunlight for up to 10 days. Curing removes water from butternut squash, hardening it so it lasts in storage. Cut the squash off the vine, preserving the stem. Then, lay the squash on a wire mesh in a sunny area. After about 7 days, test the squash with your fingernail. If you can’t dent it with your fingernail, it is ready for storage.[11]
- The ideal storage environment is between 80 and 85 °F (27 and 29 °C) with a relative humidity between 80% and 85%. If you don’t have space outdoors, you can position the squash by a heater and set up a fan for circulation.[12]
- Keep the stem at least 2 in (5.1 cm) long. A butternut squash with a broken stem or blemishes will not last long in storage, so use it first.
-
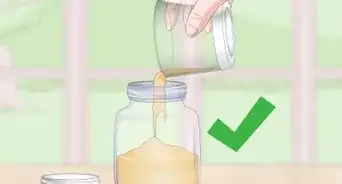
2Wash squash with diluted bleach to clean it. Combine about 1 part bleach with 10 parts water, then turn the squash in the mixture. This will clear off a lot of bacteria and fungi spores that can ruin the squash. When you’re finished, rinse the squash off under clean water and dry it off completely with a soft cloth.
- A vinegar solution may also be used in place of the bleach solution. Mix about 1 part vinegar to 4 parts water, then wash the squash as you normally would.[13]
- Washing the squash improves the chance of it lasting a long time in storage. You can try storing your squash without cleaning it, but be aware that it may start to go bad faster than usual.
-
3Find a cool, dry storage spot between 50 and 55 °F (10 and 13 °C). This is the ideal temperature range for preserving butternut squash. Some good storage places include a closet or a basement. For the best results, keep the relative humidity between 50% and 70%.[14]
- Temperatures below 50 °F (10 °C) will cause butternut squash to freeze and rot. They can be stored safely in warmer temperatures but may spoil faster than usual.
-
4Store the squash on a shelf away from moisture. Moisture causes the squash to soften and rot prematurely, so be aware of any leaks in your home. Keep the squash off the cold ground to avoid damage. For proper storage, arrange the squash in a single layer on the shelf with space between each one.[15]
- To protect the squash from moisture, you can wrap them individually in newspaper and even store them in a cardboard box. This makes blemishes a little more difficult to spot without searching, though.
-
5Store cured butternut squash for up to 3 months on a shelf. When properly cured, butternut squash can last much longer than it would when cut up and put in the refrigerator. The important part to remember is that the storage time can vary from squash to squash. Your squash may start to soften or rot as soon as 2 months in storage.[16]
- Damaged squash won’t last the full 3 months. Look out for any with a broken stem or damaged skin.
- Any squash exposed to freezing temperatures won’t last the full 3 months, either. Use them as soon as possible.
-
6Inspect the stored squash every week for damage. Your squash may take on fungi, bacteria, or water damage over time. These spots show up as brown or green blemishes. Healthy butternut squash has light orange skin. When you spot a blemished squash, move the squash away from the others.
- Squash with water marks are usually safe to eat, but make use of them right away. Soft, green spots are due to mold and should be avoided.
- If you notice your squash softening, it is about to spoil. Use it as soon as possible to avoid having to throw it away.


Things You’ll Need
Keeping Butternut Squash Fresh
- Cool, dry place
- Peeler
- Containers for cut squash
- Refrigerator or freezer
Freezing Butternut Squash
- Peeler
- Knife
- Baking tray
- Freezer
- Resealable containers
Curing Fresh Squash
- Wire mesh
- Bleach
- Water
- Cool, dry spot
- Shelf
- Newspaper or cardboard


References
- ↑ https://www.bonappetit.com/test-kitchen/ingredients/article/butternut-squash
- ↑ https://www.seriouseats.com/2017/11/winter-squash-shopping-guide.html
- ↑ https://catalog.extension.oregonstate.edu/sites/catalog/files/project/pdf/ec1632.pdf
- ↑ https://spoonuniversity.com/how-to/how-to-freeze-butternut-squash
- ↑ https://www.thekitchn.com/two-ways-to-freeze-winter-squash-178166
- ↑ https://www.thekitchn.com/two-ways-to-freeze-winter-squash-178166
- ↑ https://spoonuniversity.com/how-to/how-to-freeze-butternut-squash
- ↑ https://www.thekitchn.com/two-ways-to-freeze-winter-squash-178166
- ↑ https://spoonuniversity.com/how-to/how-to-freeze-butternut-squash
- ↑ https://www.eatbydate.com/fruits/fresh/how-long-does-winter-squash-last/
- ↑ https://wholefully.com/how-to-cure-and-store-winter-squash/
- ↑ https://catalog.extension.oregonstate.edu/sites/catalog/files/project/pdf/ec1632.pdf
- ↑ https://wholefully.com/how-to-cure-and-store-winter-squash/
- ↑ https://content.ces.ncsu.edu/storing-winter-squash-and-pumpkins
- ↑ https://catalog.extension.oregonstate.edu/sites/catalog/files/project/pdf/ec1632.pdf
- ↑ https://content.ces.ncsu.edu/storing-winter-squash-and-pumpkins
About This Article