This article was co-authored by Ollie George Cigliano. Ollie George Cigliano is a Private Chef, Food Educator, and Owner of Ollie George Cooks, based in Long Beach, California. With over 20 years of experience, she specializes in utilizing fresh, fun ingredients and mixing traditional and innovative cooking techniques. Ollie George holds a BA in Comparative Literature from The University of California, Berkeley, and a Nutrition and Healthy Living Certificate from eCornell University.
This article has been viewed 128,585 times.
Green beans are a great addition in stir fries, casseroles or salads, as well as on their own as a healthy snack. They are a good source of vitamin C, A, and K, and are free of fat, cholesterol, or sodium. To store fresh green beans, start by trimming them so they will taste their best. If you plan to eat the green beans within 1 week, store them in the refrigerator. If you want to keep the green beans for longer, freeze them so they stay fresh for several months.
Steps
Trimming the Green Beans
-
1Use a sharp chef’s knife to trim the ends off. Remove the knobby ends on the beans by cutting them off with the knife. Trimming off the ends will make the beans more appetizing when you add them to dishes or meals.[1]
- You can also trim off the tapered ends on the beans if you’d like, though this will not affect the taste or flavor of the beans.
-
2Cut the beans into 1 to 2 inches (2.5 to 5.1 cm) pieces. If you plan to add the green beans to soups and casseroles, cut them up before you store them. This will make it easier for you to put them in dishes as you cook. Make sure all the beans are cut to around the same size and length.[2]Advertisement
-
3Leave the beans whole for green bean dishes. If you are planning to serve the beans whole in a steamed green bean dish, do not cut them before you store them.
- You may cut a portion of the beans and leave the other portion whole so you have some variety.


Refrigerating the Green Beans
-
1Do not wash the beans. Washing the beans can leave moisture on them, which can cause them to mold. Use your hand to wipe off any dirt or debris on the beans, if any.[3]
-
2Place a paper towel in a large resealable freezer bag. The paper towel will help to soak up moisture on the beans and prevent them from becoming moldy.[4]
-
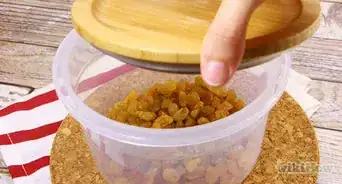
3Put the green beans in the bag. Make sure the green beans sit flat in the bag. Push as much air as you can out of the bag before you seal it.
-
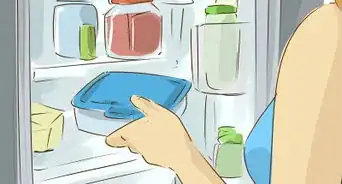
4Refrigerate for up to 1 week. Keep the beans in the vegetable crisper drawer in your refrigerator so they stay fresh.[5]
-
5Wash the beans before using them in dishes. Before you toss the beans in a dish, take them out of the fridge and give them a rinse under cool running water. Make sure they appear hard and supple, not soggy or wet. Then, put them in casseroles, stir frys, and salads for a healthy crunch.[6]


Freezing the Green Beans
-
1Boil the green beans in water. Blanching the beans will prevent bacteria from forming and keep them crunchy, rather than soggy or wet. Put 1 gallon (3.8 l) of water in a large pot. Bring it to a boil and put the beans in the water in batches.[7]
- Let small beans boil for 2 minutes. Medium beans can be boiled for 3 minutes, and large beans can be boiled for 4 minutes.
-
2Cool the beans in a bowl of ice water. Make ice water by putting ice cubes in cold water in a bowl. Put the boiled beans in the ice water to blanch them. After the beans have cooled, take them out of the ice water and pat them dry with a paper towel.[8]
- Cool the beans for the same amount of time that you boiled them. For example, if you boiled small beans for 2 minutes, cool them for 2 minutes.
- You may need to add more ice to the ice water to keep it cold.
- Use tongs or a slotted spoon to transfer the beans from the hot water to the ice bath.
-
3Place the beans in a large resealable freezer bag. Make sure the beans sit flat in the bag. Seal the top shut, leaving a small space. Then, press down on the bag to remove air in the bag. This will prevent freezer burn and keep the beans fresh.[9]
- Another option is to use a vacuum sealer to remove air in the bags.
-
4Label the bag with the date and amount. Use a permanent marker to note the date you froze the beans and the amount in the bag. You can also write “green beans” on the bag so it is easy for you to identify them when you pull them out of the freezer.[10]
-
5Freeze the beans for 8-10 months. They will keep in your freezer as long as they stay sealed in the freezer bag. Try to keep the beans stacked flat in your freezer.[11]
-
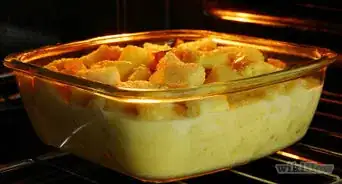
6Take them out of the freezer and use them in dishes. You do not need to defrost the beans before you put them in casseroles, soups, or stir frys. Simply remove them from the freezer bag and add them to dishes, allowing them to heat up as you cook them.


Things You'll Need
- A sharp chef’s knife
- Large resealable freezer bags
- Paper towels
- A permanent marker
- Bowl of ice water
- Pot for boiling water
- Access to a stove top


References
- ↑ http://www.bhg.com/recipes/how-to/preserving-canning/freeze-green-beans/
- ↑ http://www.bhg.com/recipes/how-to/preserving-canning/freeze-green-beans/
- ↑ https://www.eatbydate.com/vegetables/fresh-vegetables/green-beans/
- ↑ http://www.latimes.com/food/la-fo-green-beans-s-story.html
- ↑ http://www.latimes.com/food/la-fo-green-beans-s-story.html
- ↑ http://www.latimes.com/food/la-fo-green-beans-s-story.html
- ↑ http://www.bhg.com/recipes/how-to/preserving-canning/freeze-green-beans/
- ↑ http://pickyourown.org/beansfreezing.htm
- ↑ https://pickyourown.org/beansfreezing.htm#jmmuwHJhLr6w3WHS.99
About This Article

If you need to store fresh green beans to use within a week, use a sharp knife to carefully cut off the knobby ends of the beans. Do not wash the beans before you store them, as the moisture can cause mold to form. Fold a paper towel and place it into a large resealable plastic bag to absorb moisture. Then, fill the bag with the green beans. Push as much air out of the bag as you can before you seal it. Wash the beans before you use them.