This article was co-authored by wikiHow staff writer, Jessica Gibson. Jessica Gibson is a Writer and Editor who's been with wikiHow since 2014. After completing a year of art studies at the Emily Carr University in Vancouver, she graduated from Columbia College with a BA in History. Jessica also completed an MA in History from The University of Oregon in 2013.
This article has been viewed 36,073 times.
Learn more...
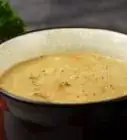
If you roasted a turkey, don't throw out the drippings from the pan! This flavorful liquid makes a great base for gravy, stock, or soup. Start by pouring the liquid through a fine mesh strainer and discard the solids. Then remove the fat that floats to the top. You can now freeze the liquid for up to 6 months or use it to make a simple pan gravy.
Ingredients
Turkey Gravy
- Pan drippings from a 12 to 14 lb (5.4 to 6.4 kg) roasted turkey
- 1 to 1 1⁄2 cups (240 to 350 ml) of low-sodium broth or water, divided
- Vegetable oil or butter, as needed
- 1/4 cup (30 g) of all-purpose flour
- Salt and ground pepper to taste
Makes about 2 cups (470 ml) of gravy
Steps
Straining
-
1Remove the roasted turkey from the roasting pan. Insert a sturdy wooden spoon into the turkey's cavity and hold the turkey up so the juices drain into the pan. Transfer the turkey to a cutting board and let it rest while you strain the drippings.[1]
- You'll need a 12 to 14 lb (5.4 to 6.4 kg) roasted turkey to make enough drippings to make gravy.
- If you're struggling to lift the turkey, ask another person to lift up the other end of the turkey. Then you can both place the turkey on the cutting board.
-
2Pour 1 cup (240 ml) of broth or water in the pan and scrape the pan. Use a wooden spoon to scrape the bits that are stuck to the bottom of the pan. The broth or water will loosen them.[2]
- You can use either vegetable or chicken broth. However, it's important to use low-sodium broth or water because the drippings will already be salty.
Did You Know? You can now use the flavorful liquid to make gravy or turkey stock.
Advertisement -
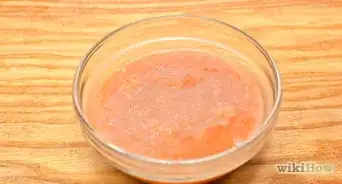
3Pour the liquid through a fine mesh strainer. Place the strainer over a bowl or large measuring jug. Slowly pour the liquid from the roasting pan into the bowl so the solids are caught by the strainer.[3]
- Discard the solid bits from the strainer.
-
4Chill the liquid for 30 minutes to make it easier to remove the fat. Place the bowl of strained liquid in the refrigerator or freezer. As the liquid sits, the fat will rise to the top and harden, which will make it easier to remove.[4]
- Try to chill the liquid in a tall, narrow bowl or container since it's easier to remove a thick layer of fat.
- You can cover and refrigerate the liquid for up to 3 to 4 days.
-
5Remove the fat and reserve some of it if you want to make gravy. Once the fat has floated to the top of the liquid and hardened, take a spoon and scoop it off. Set the fat aside in another bowl if you plan on making turkey gravy. If you don't plan on using the fat, throw it in the trash.[5]
- Since fat can clog your pipes, avoid putting the fat down the drain or your sink's food disposal.


Freezing
-
1Transfer the liquid to a storage container. If you'd like to store all of the liquid in a single container, pour it into a sealable freezer bag, airtight container, or freezer-safe jar.[6]
- If you want to freeze the liquid in small portions, pour the liquid into a clean ice cube tray.
Did You Know? Leave 1⁄2 inch (1.3 cm) of space at the top of rigid containers or jars to allow for expansion as the liquid freezes.
-
2Label the container. Write what's in the container and the date you put it in the freezer so you can easily find the liquid when you need it. The label will also help you keep track of when you need to use the liquid by.[7]
-
3Freeze the liquid for up to 6 months. Put the container in the freezer and store it until you're ready to make stock, gravy, or soup with it. If you're freezing the liquid in ice cube trays, transfer the frozen cubes to a sealable freezer bag and use them within 6 months.[8]
- While you can freeze the liquid for more than 6 months, it may develop freezer burn which will affect the flavor.


Making Gravy
-
1Thaw the frozen liquid overnight before you make the gravy. Transfer the container of frozen liquid to the refrigerator the night before you plan to make the gravy. This will give it time to thaw.
- You'll need to thaw about 1 cup (240 ml) of the liquid.
Tip: If you're in a hurry or forgot to put it in the fridge, put the frozen liquid into a microwave-safe bowl and use the machine's defrost setting to thaw the liquid.
-
2Heat 1⁄4 cup (59 ml) of fat or butter in a saucepan over medium. If you reserved some of the fat from the drippings, put 1⁄4 cup (59 ml) of it into a saucepan and turn on the burner. The fat should melt after a minute.[9]
- Use unsalted butter if you didn't keep the fat that you scooped off of the liquid from the roasting pan.
-
3Stir in flour to make a paste. Add 1/4 cup (30 g) of all-purpose flour to the melted fat and stir constantly so the fat absorbs the flour. The paste should be pale in color. Keep stirring and cook the paste for about 2 minutes so it begins to darken a little and bubble gently.[10]
- This paste is called a roux, which is the basis for thickening your turkey gravy.
-
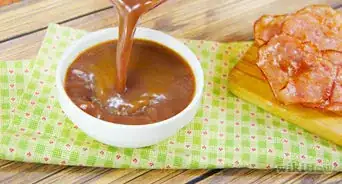
4Whisk 1 cup (240 ml) of the strained liquid into the saucepan. Keep the burner at medium heat and slowly whisk in the liquid from the turkey. Keep whisking so the paste dissolves in the liquid. You shouldn't see any lumps of the paste.[11]
- If you can't whisk out all of the lumps, you can strain the gravy through a fine mesh strainer.
-
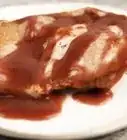
5Stir in the remaining 1⁄2 cup (120 ml) of broth or water. The gravy should begin to thicken as the roux breaks down in the liquid. Gradually pour in the rest of the broth or water so the gravy thins a little. Turn off the burner and stir the gravy well.[12]
- Remember to season the gravy with salt or pepper according to your taste.
- Use the hot gravy immediately for the best texture or put it in an airtight container and refrigerate it for up to 2 days.


Things You'll Need
- Wooden spoon
- Roasting pan
- Fine mesh strainer
- Bowl
- Airtight storage container
- Saucepan
- Whisk


References
- ↑ https://www.bowlofdelicious.com/turkey-gravy/
- ↑ https://www.thekitchn.com/how-to-make-quick-turkey-gravy-thanksgiving-cooking-lessons-from-the-kitchn-161016
- ↑ https://www.bowlofdelicious.com/turkey-gravy/
- ↑ https://www.stilltasty.com/fooditems/index/18567
- ↑ http://www.cookingmanager.com/leftover-meat-drippings/
- ↑ http://www.cookingmanager.com/leftover-meat-drippings/
- ↑ https://www.stilltasty.com/fooditems/index/18567
- ↑ https://www.stilltasty.com/fooditems/index/18567
- ↑ https://www.thekitchn.com/how-to-make-quick-turkey-gravy-thanksgiving-cooking-lessons-from-the-kitchn-161016
- ↑ https://www.thekitchn.com/how-to-make-quick-turkey-gravy-thanksgiving-cooking-lessons-from-the-kitchn-161016
- ↑ https://www.thekitchn.com/how-to-make-quick-turkey-gravy-thanksgiving-cooking-lessons-from-the-kitchn-161016
- ↑ https://www.thekitchn.com/how-to-make-quick-turkey-gravy-thanksgiving-cooking-lessons-from-the-kitchn-161016
- ↑ https://cooking.nytimes.com/guides/6-how-to-make-gravy
About This Article