X
This article was co-authored by Zac Churchill. Zac Churchill is from Davidson, North Carolina, and currently attends Tufts University. He has played Minecraft for over eight years and has extensive knowledge on how to play Minecraft and how the game has changed over the different versions. Specifically, Zac has expert experience in survival worlds, large builds on creative mode, and server design/upkeep.
This article has been viewed 238,018 times.
This is an essential guide to surviving in Minecraft Pocket Edition. By following these easy steps, you cannot only survive and thrive in Minecraft PE, but beat the game entirely.
Steps
Part 1
Part 1 of 8:
Starting Days
-
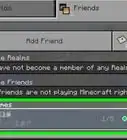
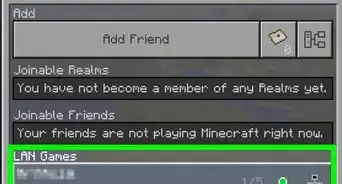
1Make a Minecraft survival world. Make sure to turn coordinates on, as these will help you during the game.
-
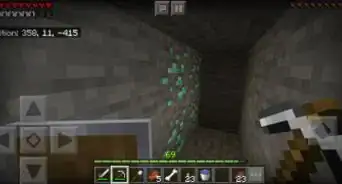
2Take a look at your surroundings. See what resources are around, and what you can take advantage of.
- If you spawned on an island with no resources or in the middle of the ocean, feel free to quit because early survival will be a pain to get through.
Advertisement -
3Punch down a single tree. Convert all the logs into planks.
-
4Make a crafting table. A crafting table will offer a bunch of different combinations to make more complex items. Once you do this, make 4 sticks and use them and 3 wooden planks to make a wooden pickaxe.
-
5Mine 3 blocks of stone. Use your remaining sticks to make a stone pickaxe, and discard the wooden one.
-
6Gather stone. You will need between 14-22 blocks of these to make a stone axe, shovel, sword, and 1 - 2 furnaces.
-
7Kill any animals nearby. You will later need them for food. You also want to gather one piece of leather from a cow.
-
8Mine some coal. The amount of coal you want to gather is between 2 - 16 pieces.
-
9Find a village. This step is optional. If you do find one, search all chests, and take any bookcases, blast furnaces, a bed, and smokers. Take hay bales, and use a crafting table to convert them into wheat, and then bread.
- If you find a village, feel free to skip step 11.
-
10Cut down 3 more trees. Use 8 of the logs to convert your furnaces into smokers. You may also want to gather 16 more cobblestone for 2 furnaces.
- This user didn't gather the 16 cobblestone, as he/she had obtained 2 blast furnaces from the village.
-
11Kill 3 sheep with the same color wool. This way, you will be able to make a bed, which you can use later.
-
12Locate a cave. You will need this to go mining and look for any valuable ores.
-
13Mine any iron you find in the cave. You should also make torches, and mine any coal you find. Save 6 planks for later, and convert the rest of the planks into sticks.
-
14Gather at least 13 pieces of iron. Smelt the iron in your furnace/blast furnace, and cook any food you gathered on the surface in your two smokers.
-
15Craft an iron sword, pickaxe, axe, and shovel. Also make a bucket and shield, and use any remaining pieces of iron to make armor. Feel free to remove any stone tools from your inventory.
-
16Get some water. With your newly made bucket, try to locate a water source in the cave, as you will need it later in the guide.
-
17Look out for any mobs in the caves. You should be fine as long as you block with your shield. Here is a quick guide on the hostile mobs of the overworld.
- Skeletons - Skeletons carry bows and have unlimited arrows. The easiest way to kill a skeleton is to sneak up with a sword or snipe them with your own bow and arrows. They can also spawn in the Nether
- Creepers - A creeper is green and pixelated. When a creeper comes close to you, it will blow up. To stop the ignition process, you must be at least 7 blocks away from them, and you have 2 seconds to do so once the ignition process has started. The easiest way to kill them is to shoot them with a bow. Also, creepers don't burn in direct sunlight so be careful!
- Zombies - Zombies are slow and can only kill by punching . The easiest way to kill them is to fight back with a sword. They can pick up any dropped blocks, tools or armour which makes them stronger. They can shoot with a bow but only if a player has dropped it and they have picked it up. Sometimes, zombies don't give back collected items after killed. A zombie can hold an iron sword, shovel or some armour naturally. They can turn villagers into zombie villagers.
- Spiders - A spider can jump to blocks and only attack at night. During the daytime, they will not burn; however they will ignore you and do no harm.
- Enderman- a neutral mob that does not attack unless looked at above its torso or are attacked first. They can teleport around, do massive damage, and take damage from water. They can also spawn in the Nether.
- Slimes- They're hostile and will follow you no matter in which direction you are in. You can lead these mobs into a pit of lava or a hole. They spawn underground in specific chunks or in swamp biomes.
- Cave Spiders- They can fit in a 0.5 x 1 block gap, are normally in mineshafts, are more aggressive than normal spiders, and have venom. It leaves you with half a heart of life left, unless you drink milk. If you are in Hardcore, this can be the end of your world.
-
18Head down a cave. When you reach y level 11 (the middle number in your coordinates, located in the upper left hand corner) where lava is located, use your water bucket to eliminate any lava.
-
19Mine other ores. Although your main goal is to find diamonds, feel free to mine other ores, such as gold, iron, lapis lazuli, redstone, and emeralds.
-
20Craft a full set of iron armor. If you haven't done so already, place down your furnace/blast furnace, and smelt between 4-24 (depending on how much armor you have already made) iron ore to craft a full set of iron armor.
-
21Mine. If you cannot find diamonds in a naturally generated cave, go ahead and strip mine (a 2x1 mine that you dig until you find enough of what you're looking for).
-
22Find diamonds. You will need at least 5 diamonds for this stage of the game. Before you mine them, feel free to clean out your inventory, and get rid of that pesky gravel or andesite that clutters your inventory.
-
23Craft a diamond pickaxe. Using this, place your water in a 1x1 hole next to the obsidian, to prevent any obsidian from burning. You'll need 14 pieces; 4 for an enchantment table, and 10 for a Nether portal.
-
24Find your back up to the surface. You should have now gathered all your materials.
- If you reach the surface and its night, use your bed to turn it into day.
-
25Locate any nearby sugar cane. You will need at least 3 pieces to make a book for your enchantment table.
-
26Congratulations on finishing the starting phase of the guide!


Advertisement
Part 2
Part 2 of 8:
Making Your Settlement
-
1Locate an area to build your permanent settlement. You generally want this to be around 200 blocks away from a village. This way, you can easily get farming essentials.
-
2Build a corner structure. This will mark the edges of your house, and what will be in between.
-
3Look for your materials. You may not have all the components to make your house, so go ahead and do whatever you need to in order to obtain all the necessary items.
-
4Make a stonecutter. A stonecutter is an efficient way to craft certain stone-based blocks, such as polished diorite, or chiseled stone bricks.
-
5Create the frame. The frame should be nothing more than your base block, indicating where the doors and windows will be located.
-
6Create a floor and roof. Using the block of your choosing, dig out your floor and replace it with you preferred block, along with the roof. Also add doors where needed.
-
7Add windows to your frame. If you want to, feel free to go get the some dye(s) to stain your glass. This user decided to stain their glass red.
-
8Create a second floor. This step is optional. If you do so, make sure to follow Part 2, steps 2 - 7.
-
9Add lighting. Now that you're finished with your house structure, go throughout your house and add lighting, to prevent any mobs from spawning.
-
10Decorate. Decorate the interior or your house. You will most likely need tons of chests/barrels, and it is suggested that you have 4 furnaces, 4 smokers, and 8 blast furnaces, to quickly smelt/cook you items. Don't forget to add your bed!
-
11Make an enchantment table. Now that you have completed your house, making an enchantment table will allow you to get stronger weapons, tools, and armor.
- If possible, surround the enchantment table with bookshelves, leaving 1 block of space between them, as shown in the image. This will increase the enchantment level(s) greatly.
-
12Mine. Yes, you heard right. You must go mine again, despite the fact that you already have. Get all the iron and coal you can, and head down to y layer 11 for diamonds and other materials. You will need iron to repair you other tools.
- Head back to steps 13, 18, 19, 21, and 22 for a refresher on mining.
-
13Craft an anvil. Once you finish your mining expedition, craft an anvil from 3 blocks of iron and 4 iron ingots. You will need it to combine enchantments later.
-
14Locate your nearest village. Although it may be rude, take all the crops from the village, as well as any other useful blocks. Don't cook the food yet, as you will need it in the agriculture part of this guide.
-
15Congrats on finishing you settlement!


Advertisement
Part 3
Part 3 of 8:
Agriculture
-
1Plant your sugar cane. Sugar cane must be planted directly next to a water source. You will need sugar cane to create books, as well as to make paper in order to trade for emeralds with villagers.
-
2Mark the grass. You will need to mark where you will be building your farm, and you can do this by crafting a hoe and tilling the grass where you are planning on planting your crops.
- Keep in mind that all crops can only be at most 4 blocks away from a water source to grow.
-
3Build a wall. You can use fences or walls to protect your farmland from being trampled by you or other mobs.
- You can add fence gates to enter your farm. Alternatively, you can add carpets on tops of the fences/walls, which will allow only you to get in, and not other mobs.
-
4Plant your crops. You generally want at least 32 of each type of crop growing. This means wheat seeds, beetroot seeds, potatoes, and carrots.
- If you were lucky enough to get any, make sure to plant any pumpkins and/or melons by turning the fruit into seeds.
-
5Remember to light up your perimeters. Not only should you light up the area around you crops, but also around your settlement. You never know if that surprise creeper is right around the corner.
-
6Plant berry bushes. Be careful, they sting you when they are fully grown so create some paths so that berries are accessible and you don't die in the process. They slow you (unlike other crops) and don't require replanting. If you found a spruce forest and took the berry bushes, go ahead and plant the bushes.
- You can also plant bamboo if you have any, but keep in mind that it has very little use.
-
7Build pens for animals. You want to typically have a bigger pen for both cows and pigs, as they give you the best possible food source. However, make sure you don't forget the chickens and sheep.
-
8Look out for any wandering traders. Wandering traders are NPCs that trade a variety of different items, some of which are hard to find. These can include certain saplings, cocoa beans, and pumpkin/melons seeds.
- If he has nothing worth trading, you can go ahead and kill the NPC and the llamas. In doing so, the llamas will attack, and deal half a heart of damage. When they die, each llama will also drop a lead, another hard to obtain item.
-
9Lead animals to your pens. You can do this by holding the animal's favorite food in your hand, and they will follow. Do not feed them until they are in their pens, or else they will lose attention.
-
10Close the pens. Make sure you have a double gate system if you chose to use fence gates. This way, if a mob escapes from its pen, there's another gate to stop it.
-
11Breed animals. Do this by giving them their favorite food. A list is located below, describing what each passive mobs eats and drops.
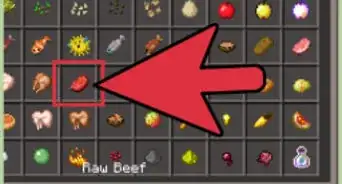
- Cows eat wheat, and can drop 2 - 3 raw beef, as well as 0 - 2 leather.
- Pigs eat wheat, potatoes, carrots, and beetroots, and can drop 1 - 3 raw pork chops.
- Chickens eat any type of seeds, and can drop 1 raw chicken, and 0 - 2 feathers.
- Sheep eat wheat, and can drop 1 piece of its color wool, and 1 - 2 raw mutton.
- Rabbits eat carrots, and can drop 1 raw rabbit, and 0 - 2 rabbit hide. They also have a 10% chance to drop a rabbit's foot.
- Horses eat golden apples or golden carrots, and llamas eat hay bales. Both mobs can drop 0 - 2 pieces of leather.
- Turtles have no purpose, and drop 1 turtle scute upon growing up. You can use 5 of these to make a Turtle Shell helmet.
- Dogs, cats, villagers, and bats drop no items. Dogs can be bred with any type of meat, and cats can be bred by fish.
- Foxes eat sweet berries, drop any item in their mouth, and have an 8.5% chance to drop a piece of rabbit hide.
- Squids spawn randomly, cannot be bred, and drop 0 - 2 ink sacs.
- Fishes can drop pufferfish, raw cod, or tropical fish, depending on the type of fish killed. They cannot be bred
- Pandas eat bamboo, and have a chance at dropping a slimeball when a baby panda sneezes. Upon growing up, baby pandas can drop 1 - 7 slimeballs.
- Polar Bears cannot be bred, and have a 75% chance to drop 0 - 2 raw cod, and a 25% chance to drop 0 - 2 raw salmon.
- Dolphins spawn randomly, cannot be bred, and have a chance at dropping 1 raw cod at death Dolphins (if swam near) give you the effect 'Dolphins Grace' which makes you swim faster. Speed potions, replacing the sea bottom with soul soil and wearing 'Soul Speed' or 'Aqua Affinity' boots speeds you with this effect. Dolphins are weak to the 'Impaling' enchantment. Dolphins are neutral. If attacked they surround you. Dolphins play with items dropped so dying near dolphins is bad because your stuff may be everywhere! Feeding dolphins cod makes them swim to nearby treasures and makes them more likely to play with you.
-
12Plant saplings. You will always need a sufficient supply of wood, so start placing saplings 5 blocks apart in every direction, and you will have a sufficient wood farm.
-
13Make more bookshelves. Keep making bookshelves by using your supply of leather, sugar cane, and wood. You want to reach a minimum level of 26 on your enchantment table before you start enchanting; however, you should always try and get to level 30.
-
14Congrats on finishing the agriculture part of this guide!


Advertisement
Part 4
Part 4 of 8:
The Nether
-
1Prepare. The Nether is fiery, hell-like dimension, filled with lava and tons of hostile mobs. Be prepared to die, so make sure to bring iron armor and tools. You can bring diamond, although it is rather risky and not preferred.
- Water buckets do not work in the Nether.
- Lava buckets can be used to smelt 100 items in a smoker, furnace, or blast furnace.
-
2Build you Nether portal. You will need 2 obsidian for the base and top, as well as 3 obsidian for the sides. You don't need to add obsidian in the corners, but if you do, you will need an extra 4 obsidian.
- Make sure to bring a flint and steel with you, to relight your portal if it's destroyed by a ghast.
-
3Take a look at your surroundings. When you step out of the portal, do it while shifting. You never know where you may have spawned. You should also gather lava buckets, so you can smelt high numbers of items and not use coal.
-
4Watch out for mobs. Almost all the mobs are hostile, with the exception of Zombie Piglins, who only attack you if you attack them. Here is a guide on the mobs of the Nether, all of which are immune to fire.
- Ghasts - Ghasts are flying mobs that hurl fireballs at you. These can deal between 1.5 - 5 hearts of damage, not including any fire damage. Kill them with a bow, or by smacking their fireballs right back at them. You can use any item, including you fists, to deflect a fireball.
- Wither Skeletons - Wither Skeletons are dangerous mobs that can inflict you with the Wither effect. This effect slowly causes damage over time, and cannot be prevented without milk. These mobs can deal between 2 - 4 hearts of damage. They cannot fit under 2 block high walls.
- Blazes - Blazes are mobs similar to Ghasts. They only spawn in or near a Nether Fortress, and consecutively shoot a trio of fireballs around every 10 seconds. These fireballs do not damage the terrain, but do light the terrain on fire. These mobs can fly, and have a similar shooting range as Ghasts.
- Magma Cubes- Magma Cubes are the Nether's variant to Slimes. All magma cubes do an extra heart of damage, and tiny magma cubes can deal half a heart of damage.
- Zombie Piglins- Zombie Piglins are the only neutral mobs. If you do attack one, all zombie piglins in a 50 block radius will go after you. Once all are defeated, they will become neutral again.
- Skeletons/Endermen - These are the only Overworld mobs that will spawn in the Nether. Skeletons are commonly found in Soul Sand Valleys sometimes in Nether fortresses, and endermen are found in Warped Forests.
- Piglins- Piglins are neutral/hostile mobs. They are neutral if you are wearing any piece of gold armor. They will become hostile toward you if attacked directly by a player, or if a chest is opened within their sight range. They can be used to barter via gold ingots, and can provide you with items such as ender pearls, fire resistance potions, and soul speed iron boots. They are aggresive to 'Zoglins and Hoglins' and do a kind of 'Victory dance' if killed on Java Edition (You won't see this on pocket edition).
- Hoglins - Hoglins are hostile mobs which have 20 hearts, and can deal around 9 damage. They are not fire resistant, and when killed, they can drop between 2 - 4 raw porkchops and 0 - 2 leather. They only spawn in Crimson Forests. If in overworld they become hostile to all (even zombies) and attack all undead mobs meaning creepers explode and cause damage.
- Striders - Striders can be considered as the "horse" of the nether. They can be used as a mode of transport across lava. They can be ridden the same way as a pig, except using a Fungus on a Stick to direct them. They are passive mobs, and move faster over lava than they do land.
-
5Search for a Nether fortress. These are fortresses, not strongholds that spawn in the Nether. They can be found along the east - west axis, and are commonly recognized by their long pillars that typically stretch up and out of a lava ocean.
- While searching for a fortress, you may also encounter a Bastion Remnant. This is a structure that is composed mainly out of blackstone bricks, and is inhabited by Piglins and Piglin Brutes. It is highly advised you do not adventure them until late-game, unless you know how the maneuver them and avoid Piglins.
-
6Loot any chests. Nether fortress chests contain a variety of gold-based items. These include gold ingots, horse armor, chestplates, and swords. However, these chests can also contain Nether wart, obsidian, diamonds, saddles, flint n steel, as well as all other types of horse armor.
-
7Locate staircases. Around 1/3 of all staircases will have Nether wart growing beside them. Pick up the Nether wart, as well as the soul sand, as you will need it for potions.
-
8Find a blaze spawner. Blaze spawners are relatively common. It is suggested you build a roof above them, so they do not escape. You generally want to gather around 20 blaze rods, for potions, ender chests, and eyes of ender.
- This is also a great way to gather levels!
-
9Head back to the Overworld. Once done so, make your own Nether Wart farm. You can do this in the Nether to allow for quicker growth. However, you will not be using the Nether Wart excessively, so growing it slower is fine.
-
10Create a brewing stand. Make a brewing stand from a blaze rod and 3 cobblestone. You will also need a blaze powder for the brewing stand to work. You typically want between 2 - 3 brewing stands.
- If needed, you typically want to go on a big mining expedition after this. You want to gather around 8 stacks of iron, 4 stacks of redstone, 6 stacks of coal, 2 stack of gold, and around 32 diamonds. This is to prevent mining later on. You will need at least a stack of food, and around 32 - 48 oak logs before you go mining. Remember to bring tools and weapons too!
-
11Congrats of finishing The Nether part of this guide!


Advertisement
Part 5
Part 5 of 8:
Adventuring
-
1Head out in one direction. Before you leave, remember to only bring the bare essentials. This would be a full set or iron tools and armor, a water bucket, bed, boat, and half a stack of food. A fishing rod comes in handy because you can generate your own food.
- You could also bring a saddle if you have or think you will find a horse.
-
2Fish. Fishing can't provide you with diamonds and golden apples, but can provide you with enchanted but damaged bows and fishing rods, as well as enchanted books, saddles, and name tags.
-
3Locate a mineshaft. A mineshaft can best be seen through a large hole, or a ravine. It is easily noticed through its wooden structures. Mineshafts give plenty of space for mining, and contain chests in minecarts that can contain various types of loot.
- Mineshafts also spawn above ground in the mesa biome, and the oak wood is replace with dark oak wood.
-
4Locate a dungeon. Dungeons are fairly hard to find. They are typically found in large walls or caves, and can be noticed through their use of cobblestone. Located in the center of a dungeon is a random spawner.
- This spawner will spawn between 1 - 3 spiders, zombies, or skeletons.
- In strongholds, the spawner will spawn between 1 - 2 silverfish.
- In Nether Fortresses, the spawner will spawn 1 -3 blazes, and in Bastion Remnants, it will spawn 1 - 3 magma cubes.
-
5Locate a village. You probably have already found one, but there are many variations in these. Villages can contain helpful loot chests, as well as hay bales, blast furnaces, or smokers. Villages spawn in desert, plains, savanna, or ice plain biomes.
- Villagers have a different appearance for each of these biomes, and also have a different appearance if they are in a jungle or swamp biome.
-
6Locate a desert temple. This is probably the most valuable structure that you can find in the Overworld. They may be hidden by sand, and can be recognized through their twin-tower shape.
- Disarm a desert temple. When you enter a desert temple, you should first kill any mobs. You will find a pattern of wool in the center, in a 3 x 3 shape. Dig one block outside this 3 x 3, and you will locate a hidden chamber with a pressure plate. When you dig down, remove the pressure plate, and under it you will find 9 blocks of TNT. Feel free to then take the 4 chests, as they are not trapped.
- You can always leave the pressure plate there, just make sure you don't step on it!
-
7Find a horse. You can do this at any time, but a horse will help you cross terrain at a much faster speed. Make sure you find a horse that is faster than you sprinting, or else you're just wasting your time.
-
8Locate a desert well. These are essentially useless, and only provide you with sand-related blocks and an infinite water source.
-
9Locate a shipwreck. Shipwrecks can spawn in the ocean or on beaches. They contain 3 different types of chests; map chests, treasure chests, and supply chests.
- Supply chests contain a variety of random foodstuffs and enchanted leather armor. Map chests contain books and paper, as well as a treasure map. Treasure chests are located in the captain's quarters, and can contain iron, gold, lapis, XP bottles, emeralds and a diamond.
-
10Locate underwater ruins. Underwater ruins are small structures typically guarded by drowned. They can spawn in groups of 1 - 5, and contain treasure maps, as well as random loot, such as enchanted fishing rods, wheat, coal, rotten flesh, golden helmets, stone axes, and enchanted books.
-
11Locate buried treasure. Follow your treasure map to the relevant area in which the X marks. The best way to find buried treasure is to blast mine, or using TNT to blow up the sand.
-
12Loot your buried treasure. Buried treasures always contain a heart of the sea. They also contain iron, gold, chain armor, TNT, leads, random tier 1 potions, cooked fish, emeralds, and sometimes diamonds.
-
13Locate a pillager outpost. Pillager outposts are tall, rustic-themed structures that hold hostile pillagers. Pillagers spawn in random parties across the world, or in these structures. The top of the tower holds a chest with random goods.
- Killing the leader of the pillagers (the one with the banner on his head) will cause you to get to Bad Omen effect. This can be removed with milk. When entering a village with this effect, you will initiate a raid. Raids consist of 5 or more waves of pillagers, and can be very rewarding.
-
14Locate a witch hut. Witch huts are small wooden structures that spawn in swamps, and contain a cauldron, crafting table, along with a witch and her cat.
-
15Locate an ocean monument. Ocean monuments are giant underwater structures that contain wet sponges and 8 blocks of gold. They also contain a variety of prismarine blocks and sea lanterns, as well as Guardians.
- After the deletion of the crafting recipe for enchanted golden apples, these structures have become relatively useless, unless you need sponges.
-
16Locate an igloo. Igloos are small snow huts that spawn randomly in snowy biomes. They contain a furnace, crafting table, bed, redstone torch, and some carpets.
- Locate the hidden igloo room. Under around half of all igloos, in the upper center carpet, you will find a trapdoor that leads down to a hidden room. There will be a brewing stand with a potion of weakness, as well as a chest that contains a golden apple and other random loot. You can use these two items to cure the zombie villager.
-
17Congratulations on finishing the adventuring phase of the guide!


Advertisement
Part 6
Part 6 of 8:
Beating Minecraft: Part 1
-
1Locate your stronghold. This can be done by throwing an eye of ender into the sky, and following it. While doing this, there is a 20% chance it will break. You will know where the stronghold is when the eye of ender goes down into the ground.
-
2Explore the stronghold. While exploring, make sure you block off all passageways you already explored, as you can get lost.
-
3Search for the library. The library is a room filled with books and 1 - 2 chests. These chests can contain enchanted books, and can be used for enchanting items.
-
4Search for the storage room. The storage room is a simple hallway with a chest that contain iron goods, as well as iron, diamonds, or ender pearls.
-
5Search for the intersection room. The intersection room has a wooden ceiling and ladder that leads to an upper level. The upper level contains a chest that contains similar loot to those of the storage room chest.
-
6Locate the portal room. This is the most obvious of goals, as you will need it to get to the End. This room contains a silverfish spawner, and can be noticed through it's use of portal blocks.
-
7Check how many eyes of ender are present. Depending on how lucky you are, you may get a already-filled portal. But once you destroy the silverfish spawner, you should always check to see how many remaining eyes of ender you need.


Advertisement
Part 7
Part 7 of 8:
Beating Minecraft: Part 2
-
1Prepare to battle the Ender Dragon. You will want at least Protection III diamond armor, as well as a Sharpness IV on your sword. You will also need at least a Power III bow with either lots of arrows or Infinity.
- Also consider bringing lots of blocks, a stack of wood, food, enchanted golden apples, fireworks, torches, a water bucket, and potions of both strength and slow falling.
-
2Place a bed in the stronghold. This will help you to quickly get back into battle if you die, and will prevent your items from despawning.
-
3Drink your potions. Drink your potions of strength and slow falling. Remember to periodically check while in the End if your potion effects are still active.
-
4Attack the end crystals. Once you jump into the portal, your main goal is to eliminate these crystals to prevent the dragon from healing. Do this by using your bow and shooting at them.
-
5Destroy the protected end crystals. Two of the end crystals will be encased in iron bars, meaning you will have to build up to destroy them. Break a hole in the bars, and build a bridge around 8 blocks away before shooting it.
-
6Beware of dragon's breath. Especially in Minecraft PE, dragon's breath is a harmful toxin that will deplete your health the longer you are in it. This can kill a full diamond in a matter of seconds.
- If you have quick reflexes, build up or eat an enchanted golden apple if you are surrounded by this toxin to survive.
-
7Attack the dragon. Once all end crystals are destroyed, attack the Ender Dragon with a bow while it's flying, and when it comes down to the podium, attack it with a sword.
-
8Defeat the Ender Dragon. You will know when the dragon is defeated when it permanently turns red, starts to disintegrate, and gives off a sorrowful wail. You also can get 78 levels of XP if you start at zero.
-
9Obtain the Dragon Egg. The Dragon Egg is a rare Minecraft item, and cannot be mined. You can obtain this exclusive item by punching it once and letting it teleport away. Then dig 2 blocks under it's location and place a torch. This should leave 1 block between the Dragon Egg and torch. Break the block, and the Dragon Egg should become an item.
-
10Congratulations on beating Minecraft!


Advertisement
Part 8
Part 8 of 8:
Explore The End
-
1Explore the Outer End Islands. To get to these islands, locate your exit portal. This should be a 1 x 1 portal, encased in bedrock. You can get through it by tossing an Ender Pearl. Once done so, you will be teleported to a random island.
-
2Locate an End City. End Cities are considered the most valuable structures in the game. This is because of their extremely good loot, the majority of which is equal to a level 30 enchantment. You can recognize these cities through their use of purple blocks.
-
3Locate the chest rooms. Chest rooms contain valuable, typically rare items. There are 3 areas where chests can be located: the loot room, treasure room, and ship.
- The treasure room will contain an ender chest as well as a normal loot chest.
- The ship will contain a brewing stand with 2 Instant Health II Potions.
-
4Loot the chests. Take the valuables within. If they are enchanted with enchantments such as Fire or Blast Protection, you should take them, as you can always use a grindstone to remove the enchantments if you need so.
-
5Craft a shulker box. A shulker box is a storage item, and is essentially a portable chest. They can be carried in your inventory, do not stack unless empty, and do not lose their items when broken.
-
6Locate the End City ship. Around 20% of End Cities contain a ship. You will want to either build up or ender pearl to this ship. Head to the underbelly of the ship to find the elytra, as well as two chests.
- Feel free to take the Dragon's Head located at the front of the ship, and the potions in the brewing stand.
-
7Take the elytra. Once you kill the shulker, loot the chests and take the elytra. You can equip the elytra on your chest plate armor slot, and double jump to activate it.
-
8Use your elytra. Once you double jump, click the screen to activate your fireworks. This will power your elytra.
- Unless you want to find more end cities after this, feel free to leave The End by traveling through your Outer Island portal, and then through the main portal.
-
9Explore. You've beaten the game, now what's next? You can build amazing mob farms, travel to new structures, or even make a redstone cannon. What you do next is up to you!
-
10Congratulations on making it through this 100 step guide!


Advertisement
Community Q&A
-
QuestionHow do I make the monsters come out?
 Community AnswerGo to Settings, and find the bar that says: "Difficulty". If the difficulty is set to "Peaceful," you won't see any monsters. Try setting it to something higher, such as: Easy, Normal, or Hard.
 -
QuestionWhat happens if sand falls on me in the game?
 Community AnswerSand or gravel that falls onto you will make you suffocate. If that happens, break the block quickly, or you actually spawn on your intial spawn point. Otherwise, move.
 -
QuestionIs there an Ender Dragon in pocket edition?
 Community AnswerThe End does not exist in Minecraff PE in version 0.14.2. It is supposed to be added in 0.15.0.
Advertisement
Warnings
- You may die in-game, but don't worry- you can always get your items back.⧼thumbs_response⧽
Advertisement


About This Article

Zac Churchill
Minecraft Specialist
This article was co-authored by Zac Churchill. Zac Churchill is from Davidson, North Carolina, and currently attends Tufts University. He has played Minecraft for over eight years and has extensive knowledge on how to play Minecraft and how the game has changed over the different versions. Specifically, Zac has expert experience in survival worlds, large builds on creative mode, and server design/upkeep. This article has been viewed 238,018 times.
How helpful is this?
Co-authors: 54
Updated: March 13, 2023
Views: 238,018
Categories: Minecraft Pocket Edition
Advertisement