This article was co-authored by Chelsea Hunersen. Chelsea Hunersen is a Social Media Expert and leads the Social Media team at Qualtrics in the Greater Salt Lake City Area. With over 10 years of experience, she specializes in social media and content development. She has been published in TheMuse, The HubSpot Blog, and HuffPost. She earned her MS in Integrated Marketing Communications from Northwestern University and her BA from the University of Michigan. She also holds a HubSpot Inbound Marketing Certification.
There are 15 references cited in this article, which can be found at the bottom of the page.
This article has been viewed 121,542 times.
When meeting new people, we all make an effort to look our best. We work out, wear nice clothes, and practice cleanliness to make a good first impression. And whether we like it or not, first impressions are greatly affected by our appearance. [1] Having a great Facebook Profile picture will best reflect the way you wish to be perceived online and in the real world.
Steps
Looking Your Best
-
1Freshen up. A healthy appearance is very attractive,[2] so by looking fresh, you’ll look your best. Do your normal hygienic routine like brushing your teeth or taking a shower before taking your photo.
-
2Enhance your features. Style your hair in a way that best frames your face or use quality make up to highlight your features. Think about what you do to look great on a first date or to an important interview and do exactly that. If you love your look, you’ll be more comfortable in front of the camera.
- If you have the money and time, go to a stylist and have them give you a make over before you take your picture. Ask them to teach you how to do it home, so if you want to take more pictures you can do it yourself.
Advertisement -
3Choose the right clothes. Wear something that flatters your figure and makes you stand out in a crowd. Bold colors will put the focus on you, whether your background be a clear sky or a busy street. Use an accessory to make you dazzle, but does not draw attention away from your face.
- Make sure there are no unsightly stains or tears in inappropriate places.


Composing the Photo
-
1Good lighting is key. No matter what is in the background, your actual image will look great with soft lighting. Soft lighting is where shadow transitions are soft, where there aren’t strong shadows on your face or objects around you.
- Think about a candlelit room or mood lighting for a romantic dinner, where warm soft light is found all around you.
- The best places to find soft light are in open shade, where the light isn’t shining directly on you. This could be on the side of a building or house.
- Up lighting, or hard light, can be harsh and highlight undesirable features like wrinkles and baggy eyes. [5]
- Avoid placing the light directly in front of or behind you to prevent harsh shadows and squinting.
-
2Have a clear background. If possible, try not to have anything directly behind you so you remain the focus of the photo. Solid colors or simple wall patterns are ideal, but make sure you stand out against them.
- If you are at a party, step away from the crowd and snap your photo. Go it alone because it is your profile picture so it should be all about you.
- If you are in a group photo, try to place yourself in the center.
- If you are at a party, step away from the crowd and snap your photo. Go it alone because it is your profile picture so it should be all about you.
-
3Find a good frame. The world is filled with natural frames such as alleyways, mountain ranges, trees, doorways, even people! Put these objects around the edge of the photo so you become the main subject. This will make you the main point of interest.
-
4Use the Rule of Thirds. Divide your image into 9 equal sections by 2 vertical and 2 horizontal lines. Position yourself and or other important images in your scene along these lines or the intersections. This will add balance and interest to your photo. [6]
- If you are taking a picture with an object or monument, this is an aesthetically pleasing rule to use. Symmetry is very eye catching. [7]


Discovering your Perfect Pose
-
1Use a nice mirror. While you are experimenting with which pose, angle, and facial expression to use in your photo, practice in a clean mirror. Make sure your mirror is not distorted, marked up or blurry. This will ensure the most accurate results in your findings.
-
2Angle your body. To thin yourself out, angle your body about 45 degrees away from the camera, but keep your head looking at the camera. Position your body with one foot slightly forward, or shoulder if you are sitting. [8]
-
3Use your “good side”. Our bodies and faces are generally not mirrored images. [9] Find which side of your face and body you prefer and make that side more visible in the photo.
- Look through photos you have posed in and you may find you have a tendency to turn your face to the right or left. This is probably the side you prefer, and feel most comfortable posing with. [10]
-
4Elongate your neck. This simulates height and poise. It may feel unnatural, but when roll your shoulders back and look in the mirror, you’ll find it is instantly slimming. [11]
-
5
-
6Analyze celebrities similar to you. Find someone in similar age, height and body shape and look at photos they have modeled in. Try out their poses and see if their stances suit you.
-
7Avoid clichéd poses. Most of the time people use clichéd poses because they are uncomfortable. [14] These are poses like the “duck face”, “tongue-in-cheek”, or flashing a gang sign. If you are nervous step away for a minute and when you come back into frame take the photo immediately. You will have less time to be self-conscious.


Taking the Photo
-
1Find a camera. In this modern age cameras are accessible almost everywhere. Choose which camera you would like to use be it your computer webcam, cell phone, film/digital camera, or disposable camera.
- If you do not have any of these, go to your nearest electronics store and ask an employee which camera would work best for you.
- If you are low on cash, buy a disposable camera from places like grocery stores or gas stations. Otherwise, ask a friend if you can use their camera.
-
2Sizing. Decide whether you want a “mug shot” or full-length photo. Facebook profile pictures are small sized, so having either a head shot would be best. If you love your shape, try a pose to the waist.
-
3Take a selfie. Selfies are self-portraits generally taken by a digital camera or camera phone supported by your hand or “selfie stick”. Taking selfies enable you to have more control over how others see you. [15] For most people, the best angle for a selfie is one that's slightly higher than their line of vision. And you probably shouldn't stare directly into the camera, either. Most people don’t look their best straight on, so angle your face using your “good side”. [16]
- Selfie sticks are monopods that help you take selfies beyond the range of your hand. Otherwise, elongate your arm and snap a photo of yourself.
- If you are using a smart phone, flip your phone so you can see your image in the screen. You can position the image exactly as you please and snap a photo
- Try to keep your arm out of the frame.
- most phone cameras are higher quality on the back of the phone (not in forward facing mode), so it may be better to have someone take you picture for you, even if it's selfie-style.
- If you don’t have a smart phone or you are using a camera, find a mirror so you can still see your image. If there is no mirror accessible, angle it toward you as best you can.
- Most selfie sticks come with mirrors. [17]
-
4Get a photographer. Find a friend or someone nearby to take a photo of you. Make sure your photographer knows how to focus the camera to avoid blurriness and pixelation. Generally cameras have a little box that pops up when looking through/at the screen. Have them center you in this box and snap the photo. This is the easiest way to center and focus the photo.
- If the box does not show up automatically, there should be an option in the settings or directions of the camera to show you how to make it appear.
- To spice up the image, have your photographer zoom in all the way, step back until your image clearly fills the frame (with space around all sides), and snap the photo.
- Make sure the flash is off to avoid harsh light.
-
5Time the photo. Having a timer will enable you to position yourself in the ideal way. Ask your photographer to give you a countdown, or give yourself a countdown. If you are taking a selfie, rest the camera on a stable surface, set the timer, and get into position.
- Read the directions that come with your camera on how to set a timer. If you lost the hard copy of the directions, a google search should prove fruitful.
-
6Take a lot of photos. By taking a lot of photos you have a larger selection to choose from. The first couple snapshots may not turn out the way you envisioned, so take a lot and pick the one you like the best.
- Throughout the photo-shoot, periodically look at the photos you have taken. This way you can judge what you need to change in order to take an amazing picture. For example, you may need to change locations, switch up your posture, or fix your hair.


Editing the Photo
-
1Brighten and enhance. Picture editing may not always be necessary, but sometimes it can make your photo extra spectacular. Use a photo editor to brighten aspects of your picture that deserve more focus. This will give the photo depth and make it more exciting.
- There are a number of photo editors available to the average person. Browse the web and you can find a few like these:
-
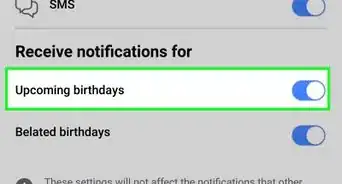
2Use a filter. Using a filter can add a little interest to your photo yet provide the same image. You might find you look better in certain filters than if you used the original photo. Many smartphones and computers come with software that enables you to use a filter, so try playing with them and see what you like.
- Don’t use a filter that will distract from your image. Effects like “negative” or “sketch” might be confusing and unattractive depending on what kind of picture you choose.
-
3Crop. Use a photo editor to crop the picture and make it look balanced. You can also cut out undesirable objects or people that happen to be in your photo. When posting your Facebook photo, Facebook provides a cropping tool.
-
4Touch up. If your portrait needs a little touching up, use an online airbrushing tool. You can remove and mend spots you find unattractive and get your desired look. From whitening your teeth to enhancing a tan, people will see you the way you wish to be seen on your best day.
- You can find lots of airbrushing tools online that are easy to use and effective.
- facebrush.com
- fotor.com
- makeup.pho.to/
- You can find lots of airbrushing tools online that are easy to use and effective.


Expert Q&A
-
QuestionHow do you take a professional profile picture on Facebook?
 Chelsea HunersenChelsea Hunersen is a Social Media Expert and leads the Social Media team at Qualtrics in the Greater Salt Lake City Area. With over 10 years of experience, she specializes in social media and content development. She has been published in TheMuse, The HubSpot Blog, and HuffPost. She earned her MS in Integrated Marketing Communications from Northwestern University and her BA from the University of Michigan. She also holds a HubSpot Inbound Marketing Certification.
Social Media ExpertTake your profile picture so it's from the shoulders up—it should be straight on your face (or mostly straight on your face, if you'd like to angle yourself slightly). You want your face to be the clear focus!
Warnings
- Make sure your photo is high quality. This may seem obvious, but a blurry/pixelated/distorted photo can be very off putting.⧼thumbs_response⧽


Expert Interview
Thanks for reading our article! If you'd like to learn more about profile pictures, check out our in-depth interview with Chelsea Hunersen.
References
- ↑ http://www.npr.org/sections/health-shots/2014/05/05/308349318/you-had-me-at-hello-the-science-behind-first-impressions
- ↑ http://www.dailymail.co.uk/news/article-2182380/Smile-Why-white-teeth-sign-good-health-make-attractive.html
- ↑ http://www.health.harvard.edu/family_health_guide/moisturizers-do-they-work
- ↑ http://www.mouthhealthy.org/en/az-topics/f/flossing
- ↑ http://www.silverlight.co.uk/tutorials/darkroom/dark_room.html
- ↑ http://www.silverlight.co.uk/tutorials/toc.html
- ↑ http://www.philamuseum.org/doc_downloads/education/lessonPlans/Symmetry%20and%20Balance%20in%20Art%20and%20Math.pdf
- ↑ http://www.modelmanagement.com/modeling-advice/modeling-tips/
- ↑ http://www.psychologicalscience.org/index.php/publications/observer/2011/april-11/beauty-is-in-the-mind-of-the-beholder.html
- ↑ http://www.dailymail.co.uk/sciencetech/article-2556689/Is-left-best-People-pose-photo-position-brain-makes-half-expressive.html
- ↑ http://www.modelmanagement.com/modeling-advice/modeling-tips/
- ↑ http://petapixel.com/2013/05/24/dear-model-posing-tips-for-how-to-look-your-best-in-photographs/
- ↑ http://petapixel.com/2013/05/24/dear-model-posing-tips-for-how-to-look-your-best-in-photographs/
- ↑ http://time.com/3104938/depression-comedy-connection/
- ↑ http://www.npr.org/sections/alltechconsidered/2015/07/31/427845743/what-selfies-tell-us-about-ourselves-and-how-others-see-us
- ↑ http://petapixel.com/2013/05/24/dear-model-posing-tips-for-how-to-look-your-best-in-photographs/
- ↑ https://www.amazon.com/s?k=selfie+stick&i=mobile&ref=nb_sb_noss_1
About This Article