This article was medically reviewed by Troy A. Miles, MD. Dr. Miles is an Orthopedic Surgeon specializing in Adult Joint Reconstruction in California. He received his MD from the Albert Einstein College of Medicine in 2010, followed by a residency at the Oregon Health & Science University and fellowship at the University of California, Davis. He is a Diplomat of the American Board of Orthopaedic Surgery and is a member of the American Association of Hip and Knee Surgeons, American Orthopaedic Association, American Association of Orthopaedic Surgery, and the North Pacific Orthopaedic Society.
This article has been viewed 319,238 times.
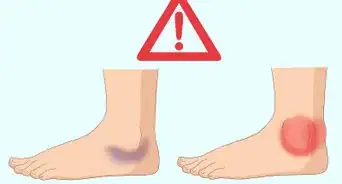
Ankle injuries can take a while to heal, especially when they don’t receive the proper treatment. Anyone is capable of sustaining such an injury, but athletes are more prone to experience one. To help an athlete recover from a minor ankle injury it is always a good idea to tape the ankle. Taping the ankle allows for extra support while still providing mobility.
Steps
Preparing to Tape the Ankle
-
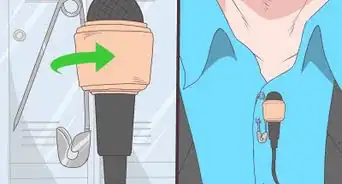
1Seek medical professionals. If you are not trained to wrap ankles, you should seek a medical professional. In the case of an emergency, you may need to attempt to wrap the ankle yourself. Only attempt to take over where a medical professional is needed if you are in a serious situation, as you may cause further harm.
-
2Gather materials. Make sure you have everything you need in order to properly tape the ankle. Without all the proper equipment, you may cause further injury to the person whose ankle you wish to wrap. Plan to have these four things ahead of time.[1] You will need:
- Tape adherent. Tape adherent helps to prevent slippage and eases the wrapping process.
- Heel and lace pads. Heel and lace pads protect against blisters caused by friction and chafing.
- Pre-wrap. Pre-wrap acts a barrier between the skin and the tape. Pre-wrap is a foam- or gauze-type cloth pad. It is made with different things depending on the manufacturer. It can be made of cotton, latex, other synthetic materials, as well as blends of these materials.
- Athletic tape. Athletic tape is the main structural component used when wrapping ankles.
Advertisement -
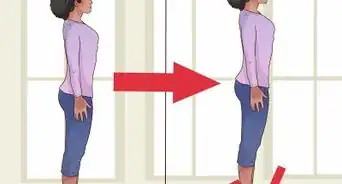
3Position the injured patient. Ask the patient to sit someplace sturdy where his or her foot can be elevated and extended such that it can be easily accessed. The foot should be pointed upright at a 90 degree angle and should remain in that position throughout the duration of the tape job.[2]
-
4Apply adhesive. This comes most commonly in spray form, as QDA (Quick Drying Adhesive). The adhesive is lightly sprayed evenly over the area you will wrap. By applying this adhesive, you will ensure the wrapping remains in place.[3]


Taping the Ankle
-
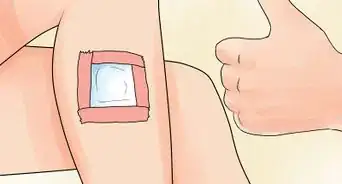
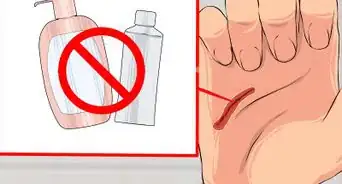
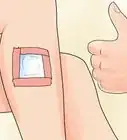
1Position the heel and lace pads. Place the heel and lace pads on the top and backside of the ankle. The pads prevent blister-causing friction under ankle tape. When positioning, think about the points where your shoe meets your foot. These are the most likely place to experience blistering due to wrapping.[4]
- For added protection, skin lube can be applied underneath the pads themselves, although this is not strictly necessary.
- In emergency situations, heel and lace pads may not be necessary.
-
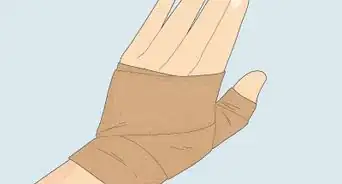
2Wrap the ankle fully with a pre-wrap. Apply pre-wrap from the mid-foot to the bottom end of the calf muscle. Cover the foot entirely in order to prevent the tape from sticking to the skin. The heel may remain uncovered. This will provide a barrier between the tape and the skin, as well as an additional layer of support. [5]
-
3Apply anchors. Put one to three anchor strips at the top of the pre-wrap. Each consecutive strip should overlap at about its midpoint. Place one around the arch of the foot, where the lower portion of the pre-wrap ends.
- Make sure that each anchor strip is applied with even tension. Too light and the tape won't anchor the the pre-wrap strongly enough; too tight and the circulation to the foot could be pinched or cut off.
- Check with the athlete after application to find out if the tape is comfortable.
-
4Attach stirrups. Apply three semi-overlapping stirrups, beginning on the medial side (inside of the ankle) and working to the lateral side (outside of the ankle). These stirrups will be U-shaped strips. The tape starts at the top anchor, goes over the bottom of the heel, under the foot, and back up the other side. It ends at the starting anchor on the opposite side of the foot.
- Make sure you're using even tension as you put the stirrup on the inside anchor, under the foot, and on the outside anchor.[6]
-
5Place three horseshoes. These go from either side of the foot, back around the achilles tendon, to the opposite side of the foot. Horseshoe tape wrappings stabilize the stirrups. They also add support to the ankle.
-
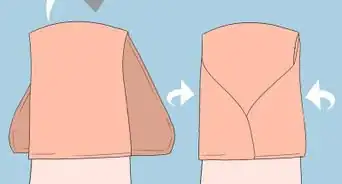
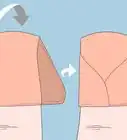
6Make two figure eights. Apply the tape in two figure eight patterns, with one going in each direction. Start at the top of the foot where the foot connects with the ankle, take the tape under the foot, back up, and around the back of the ankle. The tape should end up where you started it.
-
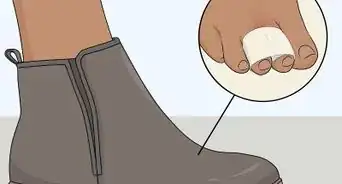
7Use heel locks. Heel locks start on one side of the foot, wrap about the heel, and then are taped back on the side you began from. Four are applied in alternation, two on each side of the foot. This helps to stabilize the ankle.
-
8Tape up with horizontal strips. These are meant to fully cover the pre-wrap. This helps to hold all the different pieces of tape together. It also helps to add additional stability and closes up the wrap.[7]


References
- ↑ https://www.footcaremd.org/resources/how-to-help/how-to-tape-an-ankle
- ↑ https://www.footcaremd.org/resources/how-to-help/how-to-tape-an-ankle
- ↑ http://www.podiatrytoday.com/article/5378
- ↑ https://www.aofas.org/footcaremd/how-to/foot-injury/Pages/How-to-Tape-an-Ankle.aspx
- ↑ https://www.chicagotribune.com/lifestyles/sc-fam-0108-lifeskill-wrap-ankle-20130108-story.html
- ↑ http://www.nismat.org/clinicians/athletic-training/taping-for-the-sprained-ankle
- ↑ http://www.aofas.org/footcaremd/how-to/foot-injury/Pages/How-to-Tape-an-Ankle.aspx
About This Article
To tape an ankle like an athletic trainer, start by placing sterile pads on the top and bottom of the ankle to stabilize it. You’ll also want to pre-wrap the ankle and apply strips of tape to the mid-foot, sides of the ankle, and back of the ankle for additional support and stability. When you’re ready to tape, apply two layers of figure-eights around the foot and ankle for full support. To provide maximum stability, apply each layer of tape with even tension, but don’t make the wrap so tight it cuts off the circulation. For more tips, such as when to visit a professional, read on!


Medical Disclaimer
The content of this article is not intended to be a substitute for professional medical advice, examination, diagnosis, or treatment. You should always contact your doctor or other qualified healthcare professional before starting, changing, or stopping any kind of health treatment.
Read More...