This article was co-authored by wikiHow Staff. Our trained team of editors and researchers validate articles for accuracy and comprehensiveness. wikiHow's Content Management Team carefully monitors the work from our editorial staff to ensure that each article is backed by trusted research and meets our high quality standards.
This article has been viewed 64,486 times.
Learn more...
Soft on one side and adhesive on the other, Moleskin is a universally appraised product most often used for preventing and protecting blisters, rashes and chafing but also for basic repairs and sound reduction. Many hikers, runners and walkers use it to protect blisters from infection and to provide comfort during their exercises. You can also apply moleskin directly to the inside of your shoes, particularly dress shoes, to make them more comfortable to wear. Moleskin also provides a quick fix for sound interference when recording with lavalier microphones by reducing the sound of shirt and body friction. It also makes for a quick and easy fixes for bra underwires.
Steps
Applying Moleskin to a Blister
-
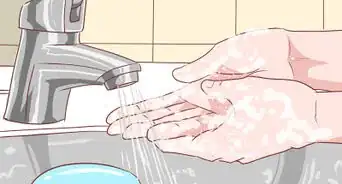
1Treat the blister. Pierce the blister with a sterile needle and gently push out all the liquid, keeping the roof of the blister intact to protect the raw skin beneath. You will then want to apply antiseptic ointment to the blister and surrounding area and let it dry for fifteen seconds. This will act as a glue for the moleskin.[1]
-
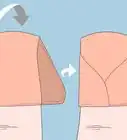
2Cut a hole slightly bigger than the blister in a piece of moleskin. It is easiest to fold the moleskin in half and cut out a semicircle or oval slightly larger than half the size of your blister along the folded edge.[2] When you unfold it you should have a symmetrical shape that fits around the blister.
- By making the hole bigger than the blister, you are creating a protective well that stops anything from rubbing against it and making it worse.[3]
Advertisement -
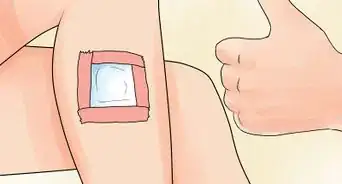
3Place the moleskin around your blister. Peel off the backing and place the moleskin sticky side down against your skin so the blister is directly in the centre of the hole.
- The piece of moleskin should fit comfortably around your blister with about ½ an inch (or 1 cm) of material left between the hole and the edge of the moleskin.
- Apply a second identical layer on top of this if your blister is flush with the surface of the first layer, or if it rises above it.
-
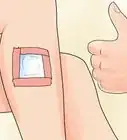
4Place another piece of moleskin on top to cover the hole and blister. This piece should be exactly the same size as the pieces beneath it, but without the hole in the centre. It will act as a lid, protecting the blister from friction and contamination.[4]
-
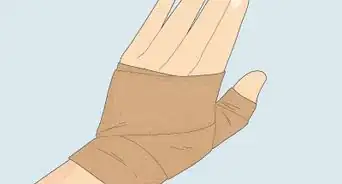
5Tape the moleskin to your skin. Spread the tape across the whole patch of moleskin with athletic or duct tape to secure it in place. If possible, try wrapping it entirely around your foot, ankle, or toe respectively if the blister is on any of these areas to make sure the tape doesn’t peel off when rubbing against your shoes.[5] You should now be able to carry on with your activities pain free.
- While moleskin is adhesive, it is not very strong and you risk it peeling off without tape.


Applying Moleskin to Your Shoes
-
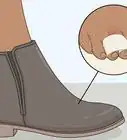
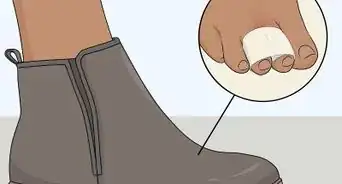
1Locate all the areas on your shoes causing pain or friction. Common places are around the toes in covered shoes, straps, and the back of the shoe by the heel. Moleskin will be able to prevent chafing in these areas and relieve pressure for spots where the shoe digs into your skin, such as with thin straps.
- You should be able to feel very quickly while wearing them where these uncomfortable spots in your shoes are. If there is a gap between the back of the shoe and your heel, it is likely that chafing and blistering will occur after long or repetitive periods of use.
-
2Measure the size of moleskin you will need. Hold a piece of moleskin beside the area to get an estimate of the size you’ll need. Then with pen or pencil trace onto the moleskin the part of the shoe you will be covering in moleskin.[6]
- You want to cover the entire area that is causing pain or discomfort. If it is a strap, measure the moleskin along the entire length of the inside of it. If it’s the heel, the moleskin should reach from the very bottom to the very top of the heel, and span wide enough to cover all chafing areas. The width of this varies person by person and is different for each shoe.
-
3Cut the piece of moleskin along the lines you drew. When you realign this shape with the part of the shoe you’re covering, it should not be visible from the outside. Place it inside the shoe without taking the paper backing off to check it is a perfect fit. Trim anywhere it will be visible.
-
4Unpeel part of the backing tape to reveal a small section of adhesive. Don’t peel the backing off the moleskin entirely or it will be too hard to stick on perfectly. Unpeel the part that will be in the most hard to reach spot, such as the front of the toes or where the sides or straps meet with the inner sole.[7]
-
5Line up your moleskin as perfectly as possible with the shape of the shoe. Press the sticky part firmly against the inside of the shoe and make sure it stays. Slowly unpeel the rest of the backing with one hand as you press the moleskin against the shoe with the other, making sure it stays perfectly aligned with the shoe.[8] Your shoes are now ready to be worn.
- If you are working with a covered toe, stick your index finger over the sticky portion of the moleskin and slide the moleskin forward into the tip of the toe area along the sole of the shoe.[9] When you push the moleskin in as far as possible, remove your finger and press the tip of the shoe down onto the sticky part of the moleskin to bind them together. Slip your hand beneath the moleskin and with the other hand pull off the rest of the backing, pressing the moleskin up against your shoe as you go.


Using Moleskin for Bra Repair
-
1Work the underwire back into your bra. Pinch the underwire with two fingers and scrunch as much of the underwire’s fabric sleeve up to your fingers as possible. Then, pinching both the tip of the wire and the hole where underwire first emerges from the sleeve, pull back on the scrunched fabric until it is straightened out. The underwire should now be completely back in the sleeve. You may need to repeat this process a few times.
- If the tip of your underwire is bent out of shape, pinch at the base of the bend with one hand and use your other to pry it backwards to unbend it. This may require bending it in various ways until it is roughly the shape it should be.
-
2Cut a small strip of moleskin to cover the area. This should be about 1 inch (2.5 cm) long and just wide enough to cover the underwire tubing.[10] This is to prevent the underwire from poking out again, and needs to be longer than the hole itself so that the moleskin has enough surface area to stick to and stay put.
-
3Stick the moleskin over the hole along the underwire. None of the moleskin should be sticking to the cup of the bra or it won’t stay as sticky. It should only be on the underwire casing and cover the hole entirely.[11] Press it down firmly so that the underwire doesn’t push the moleskin off and emerge again.
- By massaging the moleskin in your hands before unpeeling the backing you will warm the glue and help it stick to the fabric easier.


Applying Moleskin to Lavalier Microphones
-
1Cut a long thin strip the width of your microphone. You want to cover the entire base body of the microphone without covering the part that receives sound.[12] You will be wrapping this around the microphone multiple times, so the length should be long enough to go around the microphone 4 times.
-
2Wrap the moleskin around the microphone. Being careful not to cover the top of the microphone, wrap the moleskin around the microphone 2-3 times with the sticky side facing outwards.[13]
-
3Stick a safety pin against the microphone. With the safety pin open, stick the long, complete end of the safety pin to the moleskin.[14] The pointed metal end of the pin should be free and pointing outwards, away from the tape. This is so you can attach the microphone to the inside of clothes for use later.
-
4Wrap the moleskin around the microphone once more. This will hold the safety pin to the microphone. Cut off any excess moleskin from the strip. You may now easily attach the microphone to clothes using the safety pin and have less sound interference than before.
- To stop the outside of the tape from being sticky, you may wish to apply a layer of moleskin sticky side down to the outside of the microphone and tape. You could do this at the end or before wrapping the pin to the microphone for the final layer.


Warnings
- The moleskin will likely come off your bra after a few washes so you will need to replace them periodically.[18]⧼thumbs_response⧽


References
- ↑ https://www.backpacker.com/gear/the-cure-beating-blisters
- ↑ https://healthfully.com/use-moleskin-blisters-6745832.html
- ↑ https://www.backpacker.com/gear/the-cure-beating-blisters
- ↑ https://www.backpacker.com/gear/the-cure-beating-blisters
- ↑ https://healthfully.com/use-moleskin-blisters-6745832.html
- ↑ https://www.glamour.com/story/the-5-minute-5-trick-to-making
- ↑ https://www.vivaveltoro.com/moleskin-tieks-flats/
- ↑ https://www.vivaveltoro.com/moleskin-tieks-flats/
- ↑ https://www.vivaveltoro.com/moleskin-tieks-flats/
- ↑ https://chaoticallycreative.com/how-to-repair-an-underwire-bra/
- ↑ https://chaoticallycreative.com/how-to-repair-an-underwire-bra/
- ↑ https://blog.audio-technica.com/fred-ginsburgs-tips-rigging-lavalier-microphones/
- ↑ https://blog.audio-technica.com/fred-ginsburgs-tips-rigging-lavalier-microphones/
- ↑ https://blog.audio-technica.com/fred-ginsburgs-tips-rigging-lavalier-microphones/
- ↑ https://healthfully.com/use-moleskin-blisters-6745832.html
- ↑ https://www.backpacker.com/gear/the-cure-beating-blisters
- ↑ https://www.vivaveltoro.com/moleskin-tieks-flats/
- ↑ https://chaoticallycreative.com/how-to-repair-an-underwire-bra/
About This Article

Moleskin is a soft, adhesive material that’s great for protecting blisters and other sensitive areas on your skin. To apply moleskin to a popped blister, first, clean the area around the blister with soap and water and apply an antibiotic ointment. Wait for your skin to dry before applying the moleskin. Take a piece of moleskin and cut a circle in it that’s a little bit bigger than the blister. Peel off the backing and apply the adhesive side of the moleskin to your skin so that the blister sits inside the hole you cut out. Layer an identical piece of moleskin, also with a hole cut out of it, on top of the first to create a raised cushion around the blister. Finally, add a third layer of moleskin on top of the first two, but this time don’t cut out a hole. This final layer will cover the blister and protect it from irritation and contaminants that could cause an infection. You can also apply moleskin to the insides of your shoes to create some extra cushioning in areas where the shoes tend to rub and irritate your feet. Measure and cut some pieces of moleskin so they match up with the areas on your feet that tend to get irritated, then line them up with the problem spots in your shoes. Carefully peel off the adhesive backing and stick the moleskin pieces in place inside the shoe.