This article was co-authored by Dave Jones. Dave Jones is a Professional Plumber and the Midwest Regional Vice President at Roto-Rooter Plumbing & Water Cleanup. In 1992, Jones joined Roto-Rooter as a drain service technician at the age of 18. Since then, he has risen through the ranks into positions of increasing authority. Dave served as general manager of Roto-Rooter’s Charlotte, North Carolina, and Atlanta, Georgia branches before being promoted to Contractor Area Manager and later to Regional Vice President. Dave holds Master Plumber Licenses in Pennsylvania, North Carolina, and Georgia.
There are 7 references cited in this article, which can be found at the bottom of the page.
This article has been viewed 51,027 times.
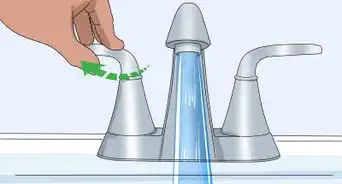
Water heaters are an important home appliance that heat water for use in your sinks, dishwasher, washing machine, and shower. If the water in your home doesn’t get any hotter than a lukewarm temperature, try turning up the heat. If that doesn’t solve the problem, it’s possible that 1 of the heating elements in the water heater is malfunctioning or broken. To test the heater elements before replacing them, use a multimeter: a small tool which tests the electrical current running through metal.
Steps
Accessing the Elements
-
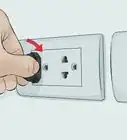
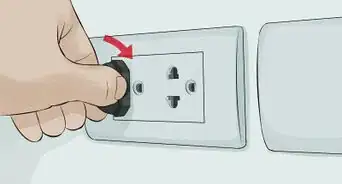
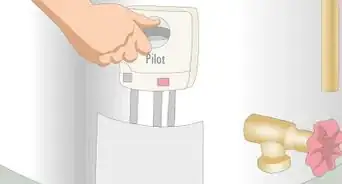
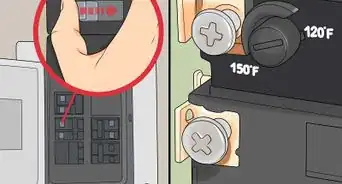
1Turn off the breaker that powers the water heater. The water heater must not be active (have electrical power) while you’re testing the element. The electric breaker is a roughly 1 ft × 2 ft (30 cm × 61 cm) metal box that’s attached to a wall. Look for it in your home’s basement, laundry room, or large storage closet. Find the breaker that’s marked “hot water heater” or that controls power to the room the heater is in, and flip it “off.”[1]
- If you’re not sure which breaker controls power to the water heater, just turn off all of the double breakers (sets of 2 breakers linked together).
-
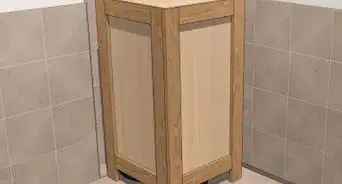
2Remove the metal cover so you can see the water heater’s thermostat. You’ll see a metal plate near the base of the water heater. Use a Philips head screwdriver to take out the screws holding the metal plate in place. Under the plate, you’ll see the water heater’s thermostat and heating elements.[2]
- Set the metal cover and screws nearby. If you’re concerned that the screws may roll under an appliance, place them in a small bowl.
Advertisement -
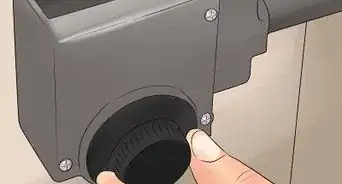
3Pull out the insulation and plastic cover if your heater has them. Many water heaters have a layer of fiberglass or cellulose insulation just beneath the metal cover. Pull that out and set it aside. Many heaters also have a plastic cover over the thermostat. These plastic covers fit in place by friction and typically have a tab on the top that you can pull to release them. Pull up on the tab to loosen the plastic cover and remove it from the thermostat.[3]
- Not all water heaters have a plastic safety cover and insulation. If yours does not, skip this step.
-
4Test the power with a non-contact voltage detector to make sure it’s off. Before you start working on the water heater, confirm that the electric power in the room the heater is in is off. See if electrical current is going to the water heater by touching the tip of the voltage detector to the wires leading into the thermostat. If the detector lights up or beeps, the outlet is active. If the detector doesn’t light up, you have successfully turned off the power.[4]
- If you don’t have a non-contact voltage detector, you can purchase one at any hardware store or home-improvement store.
- The tool is about 5 inches (13 cm) long and looks like a large plastic pen. It comes to a point with a metal prong.
-
5Identify the ends of the 2 metal elements inside of the open panel. You can’t see the elements themselves since they extend several inches inside of the water heater. If you look inside the open panel, though, you’ll see the base ends of the 2 metal elements. Each metal base is about 1 inch (2.5 cm) across and has a small plastic plate screwed into it.[5]
- The majority of water heaters for homes have 2 heater elements. If you live in an apartment or a small home and have a small water heater, it may only have 1 element.


Using the Multimeter
-
1Set your multimeter to the lowest setting for ohms of resistance. A multimeter is a tool used to measure electrical current and voltage that will indicate if current can run through your water heater’s elements. Multimeters have a 2 in × 4 in (5.1 cm × 10.2 cm) plastic body and 2 metal prongs that are attached to the body of the multimeter via wires. On the body of the multimeter, you should see a dial that controls how many volts the tool is operating at. Turn the dial to the lowest ohms setting. Different models may have different lowest settings.[6]
- Tap the 2 metal prongs to make sure the tool is working. To calibrate the tool, hold the prongs together and move the needle until it points to “0.”
- Purchase a multimeter at a local hardware store or home-improvement store if you don’t already have the tool.
-
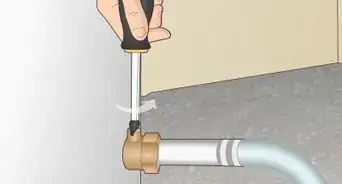
2Take 1 of the wires off of a water heater element. Each of a water heater’s elements has 2 electrical wires running to screws that hold the element in place. Choose which heater element you’d like to test first. Remove 1 wire (it doesn’t matter which one) by finding its loose end and unraveling it from around the metal element.[7]
- It’s necessary to do this so that you’re testing the conductivity of only the element itself and not any other connected parts of the water heater element.
- If the wire is tightly wrapped around the water-heater element, you may need to use a pair of needle-nose pliers to remove it.
-
3Hold the multimeter prongs to the element screws to test for flow. Set the body of the multimeter on the ground at the base of the water heater. Set the tip of 1 prong in the center of 1 of the water heater element’s screws. Likewise, take the second prong and hold it to the center of the water heater element's second screw.[8]
- Since you’ve turned off power to the water heater, there’s no risk of electrocution.
-
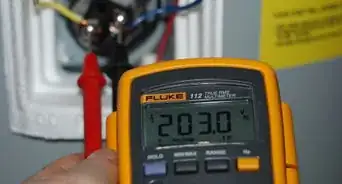
4Look to see how many ohms of resistance the multimeter reads. Whether you’re working with a digital or an analog multimeter, there should be a dial or a digital panel that indicates the resistance. If the element is working properly, the micrometer will indicate that it senses between 10–30 ohms of resistance. If the needle does not move (or the digital display displays “0”), the water heater element is not working and needs to be replaced.[9]
- If the digital multimeter shows a very low number (e.g., “1”), it still indicates that the element isn’t working.
-
5Test the second water heater element if the first is working properly. If you test the first element and it is working fine, try testing the second one with the multimeter. It may be the malfunctioning element. Once you’ve determined which of the elements is broken, you can replace it.[10]
- Or, contact the water heater’s manufacturer and ask if they can send a repair service to fix it for you.
-
6Reattach the wire and cover the water heater's exposed panel. When you're done testing or replacing the elements, use your needle-nose pliers to tighten the wire that you removed back around its respective screw. Snap the plastic cover back in place over the thermostat, and gently press the insulation into place around it. Set the metal panel back in its position and reinsert the screws you removed earlier. Tighten the screws in their holes until they’re holding the metal panel firmly in place.[11]
- Finally, turn the power breaker back on to restore the flow of electricity to whatever room your water heater is located in.


Things You’ll Need
- Philips head screwdriver
- Non-contact voltage detector
- Multimeter
- Small bowl (optional)
- Needle-nose pliers (optional)


References
- ↑ https://www.water-heater-repair-guide.com/waterheaterelementtesting.html
- ↑ https://www.familyhandyman.com/plumbing/water-heater/diy-hot-water-heater-repair/
- ↑ https://www.familyhandyman.com/plumbing/water-heater/diy-hot-water-heater-repair/
- ↑ https://www.familyhandyman.com/plumbing/water-heater/diy-hot-water-heater-repair/
- ↑ https://youtu.be/LxnZQZm9YcI?t=87
- ↑ https://youtu.be/LxnZQZm9YcI?t=45
- ↑ https://www.water-heater-repair-guide.com/waterheaterelementtesting.html
- ↑ https://youtu.be/LxnZQZm9YcI?t=96
- ↑ https://youtu.be/LxnZQZm9YcI?t=103
About This Article