This article was co-authored by Adrian Tandez and by wikiHow staff writer, Eric McClure. Adrian Tandez is the founder and head instructor of the Tandez Academy, a world-renowned self-defense training center in Mountain View, California. Trained under the renowned martial artist Dan Inosanto, Adrian is a certified instructor in Bruce Lee's Jeet Kune Do, Filipino Martial Arts, and Silat, among other things. Adrian has over 27 years of self defense training experience.
There are 16 references cited in this article, which can be found at the bottom of the page.
wikiHow marks an article as reader-approved once it receives enough positive feedback. This article has 13 testimonials from our readers, earning it our reader-approved status.
This article has been viewed 1,131,456 times.
Whether you want to be able to defend yourself or you’re interested in a combat sport like boxing or MMA, knowing how to throw a proper punch is an essential step. Being able to throw a controlled, accurate, and efficient punch is also important from a safety perspective, since throwing wild and unsteady punches is more likely to hurt you than your opponent. If you’re training with a heavy bag, hand pads, or boxing gloves, always wear hand wraps to ensure that you don’t break a bone or injure your wrist.
Steps
Getting in a Fighting Stance
-
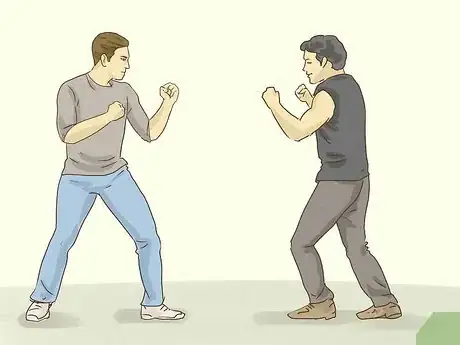
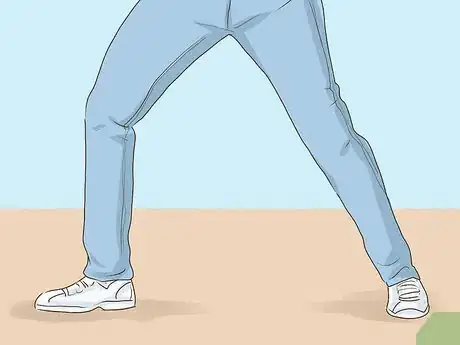
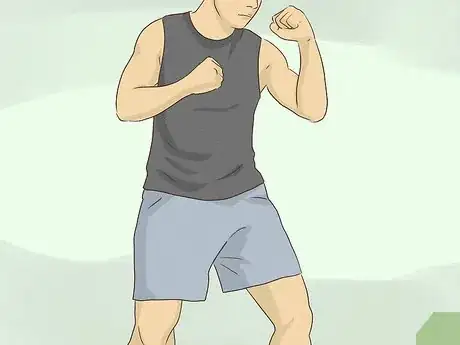
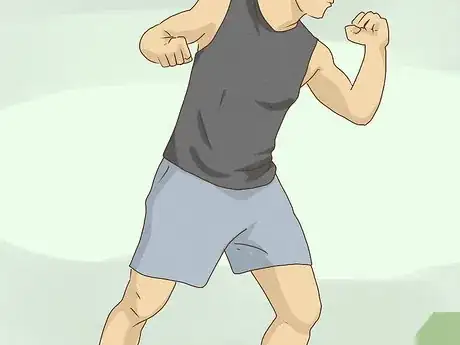
1Keep your feet under your shoulders and turn towards your target. Put your nondominant foot in front of you and point it at a 35- to 45-degree angle towards your target. Plant your dominant foot behind you and point it away from the target at a 45- to 60-degree angle. Line yourself up with your target so that you’re comfortable, but keep your back foot a little open—it shouldn’t look like you’re about to swing a baseball bat.[1]
- Throwing power comes from the lower body, not the upper body, so you need to get into a strong stance before throwing any kind of punch.
- If your feet line up on the same line with your target, you won’t have a strong base and it will be extremely hard to rotate or pivot. Keep your chest slightly open to the target.
- In most combat sports, this is called the A-stance. It is the main stance for offense and defense.
-
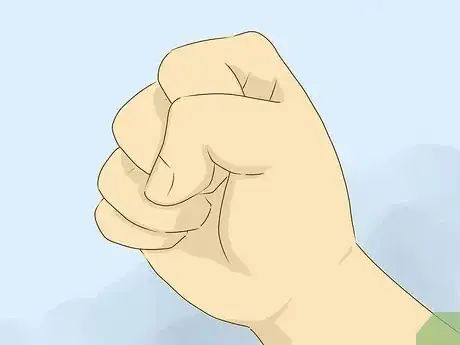
2Tuck your thumb over your middle finger to make a proper fist and avoid injuries. To make a perfect fist, close your hand tightly with your thumb on top of your other 4 fingers. Rest your thumb on top of your middle knuckle. Squeeze firmly to maintain a strong grip and avoid damaging your hand with your punch. Keep your wrist as straight as possible and never bend it while striking a target.[2]
- If you punch with your 4 fingers wrapped over your thumb, you’re extremely likely to break a bone in your hand.
- Line your wrist up to keep it straight with your forearm. If your wrist is really flimsy, you may sprain your wrist with a punch.
- Ideally, you will hit your target with the knuckle on your middle finger while your fingers are flush. Keep your thumb over the middle finger to brace it.
Warning: If you’re practicing a combat sport, like boxing or MMA, use hand wraps to brace your wrist and fingers. Tightly-wrapped hand wraps will dramatically reduce the odds of an injury from a punch.
Advertisement -
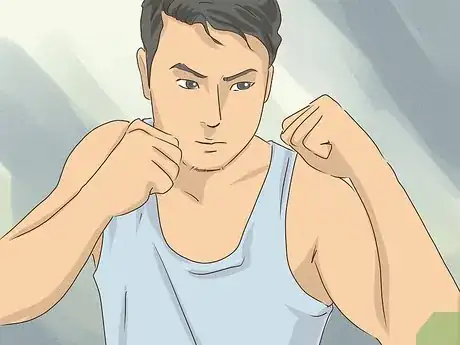
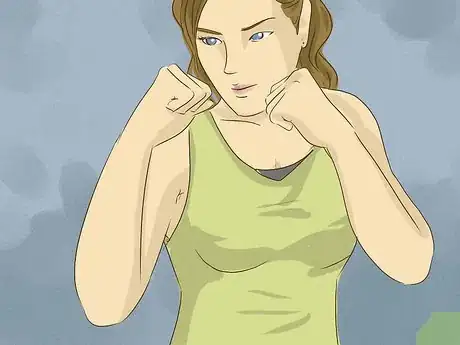
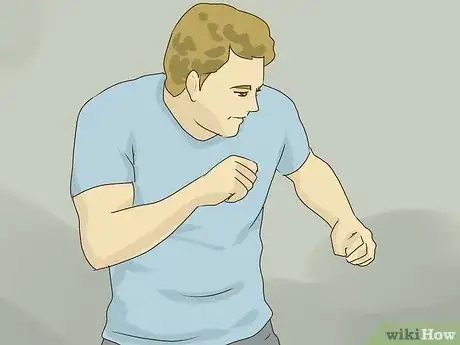
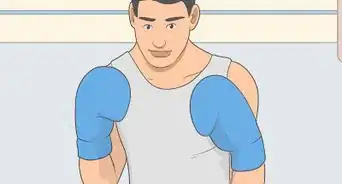
3Tuck your dominant hand against your chin and raise your free hand. Bend your elbows and lift your dominant hand up to your cheek. Hold it 1–3 inches (2.5–7.6 cm) from the surface of your skin with your knuckles pointing up and your elbow against your ribs. Lift your nondominant hand in front of you so that it’s on the same level as your dominant fist, at least 4–10 inches (10–25 cm) in front of your face.[3]
- Keep your nondominant hand up if you aren’t throwing a punch. In a fight, it is your first line of defense when it comes to blocking an incoming punch.
- Some professional fighters will literally press their dominant hand against their cheek. They do this to make sure they keep it close over the course of a fight. Keeping your dominant fist against your cheek makes it easy to raise it up while tucking your head down to protect yourself.
-
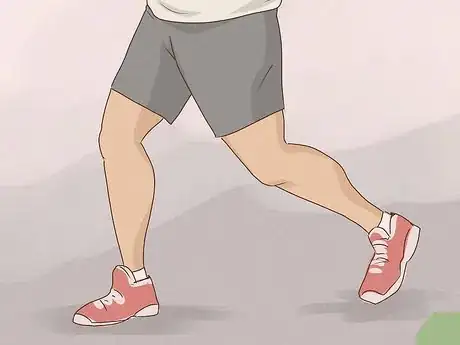
4Bend your knees slightly to stabilize yourself and generate power. Every punch you throw will start with a lower body movement. If your legs and hips aren’t stable, you won’t be punching with much power. Bend your knees slightly so that they’re comfortable and flexible. This way, it will be easier generate power and transfer it quickly from your legs to your upper body.[4]
- Bent knees also make it harder to get knocked over if someone is punching back. If you stand straight up, it’s hard to balance yourself if you get hit. However, bending your knees a little keeps you from falling over if you take a punch from your opponent.
- One of the reasons that boxers and MMA fighters bounce around when they’re in an A-stance is that it helps keep their knees bent.
Throwing a Straight Punch
-
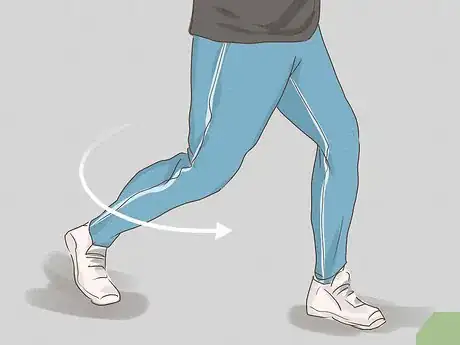
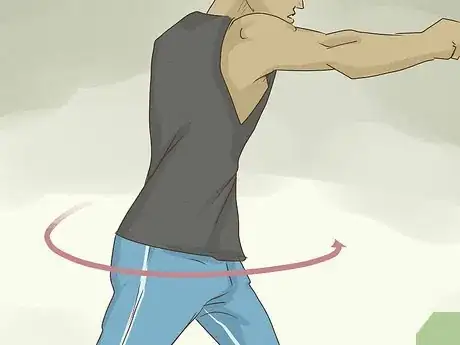
1Pivot your back foot and turn your knee inward to initiate the punch. Raise your back heel without lifting the ball of your foot. In one motion, turn your foot and back knee towards your target. It’s okay if your leg dips down a little as you do this. The power of a straight punch starts with the legs, and pivoting inwards helps generate torque for your upper body.[5]
- In combat sports, a straight punch refers to a compact, direct strike that is thrown with the dominant hand. It is more powerful than a jab, but faster than a hook. It’s what most people think of when they picture a regular punch.
- Take a 6–12 in (15–30 cm) step forward if you need to before doing this. To do this, shuffle your front foot forward before sliding your back foot back under your shoulder. Only do this if you think you’ll struggle to strike your target.[6]
- Strategically, a straight punch is the best tool in your arsenal. It’s easier to land than a flashy, over-the-top haymaker, but it’s more powerful than a quick jab.
-
2Twist your hips and chest towards your target. As your back foot and knee finish twisting, begin rotating your hips and chest towards your target. At this point, your hands and arms should still be roughly where they were in the original fighting position.[7]
Tip: It’s okay if you lean forward a little to reach a target that’s backing away from you. Avoid leaning more than 12 inches (30 cm) though, since you’ll throw yourself off balance if you lean too far.
-
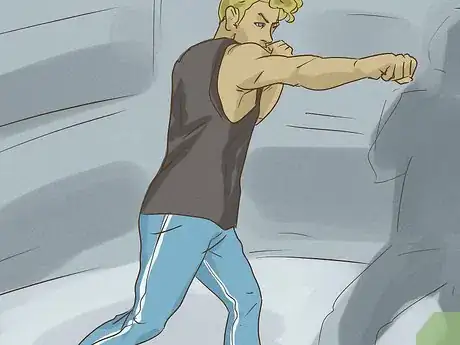
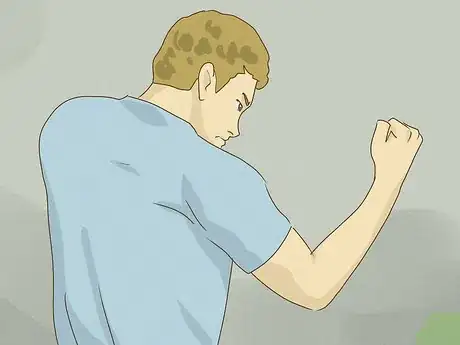
3Extend your fist and allow your arm to turn inwards as you strike. Keep your forearm pointing up towards the sky as your hips and chest rotate forward. Once you turn 10-20 degrees towards the target, let your dominant arm follow your chest. Extend it straight towards your target, allowing your wrist to naturally turn inward.[8]
- Avoid looping your arm out away from you and towards your target. It may feel more comfortable if you aren’t a trained fighter, but you actually lose a lot of power when you do that. It’s also more dangerous, since your hand is more likely to hit the target at an angle.
- Let your nondominant hand float 6–12 inches (15–30 cm) to the side as you do this, but keep it raised. Don’t lower your nondominant hand in the event that you need to protect yourself after the punch lands.
-
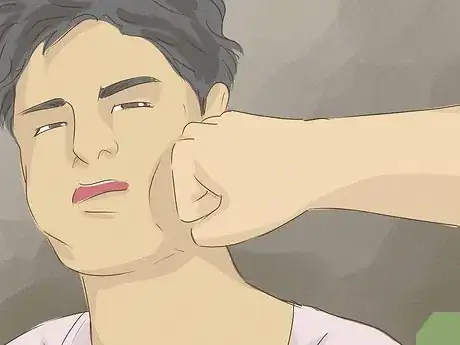
4Strike the target with your middle knuckle and follow through. Continue extending your arm straight towards your target while turning your wrist inwards. To the best of your ability, hit the target with your middle knuckle. Once you make contact, continue extending your arm forward until it’s completely stretched out. As soon as it reaches its totally extended, snap it back to you and put it back against your chin or proceed with another punch depending on whether your opponent is vulnerable or not.[9]
- Hit the target with the palm-side of your hand facing down.
- A good straight punch lands with your arm extended 90-95% of the way.
- If it looks like you won’t connect with your target, let the punch extend naturally into the air and accept that you missed. Do not launch yourself forward to connect the punch. If you do, you’re extremely likely to get hit with a counterpunch in a fight.
EXPERT TIPAlign your elbow with your wrist and with your shoulders so that you have the right structure to withstand the pressure of the blow.
Adrian Tandez is the founder and head instructor of the Tandez Academy, a world-renowned self-defense training center in Mountain View, California. Trained under the renowned martial artist Dan Inosanto, Adrian is a certified instructor in Bruce Lee's Jeet Kune Do, Filipino Martial Arts, and Silat, among other things. Adrian has over 27 years of self defense training experience.
Adrian Tandez
Self Defense Trainer Adrian Tandez
Self Defense Trainer
Jabbing
-
1Keep your elbows against your ribs with your hands raised in front of you. Adjust your stance slightly for a jab by tucking your elbows tight against your sides. Keep your upper body as compact as possible for a jab, since the maneuver is meant to be as fast as possible.[10]
- In combat sports, a jab refers to any straight punch thrown with your nondominant hand where you don’t rotate your hips. It is used to test an opponent’s defenses, throw them off balance for a stronger punch, or get a free punch in when they’re focused on your dominant hand.
- Most of the time, in a professional fight, more jabs are thrown than any other punch. This is because a jab is the safest punch to throw from a defensive perspective since you don’t open yourself up to high-impact counter punches.
-
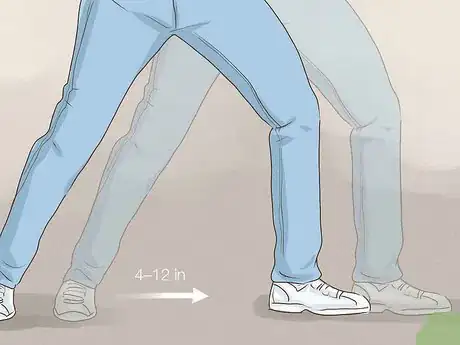
2Take a 4–12 in (10–30 cm) step forward with your nondominant foot. A jab always starts with a small step. Lift your nondominant heel up and slide your foot forward towards your target. If the opponent is close enough to hit right now, take a 4 in (10 cm) step. If you need to get closer, step 8–12 inches (20–30 cm). Keep your foot planted at the same angle that it was resting at in your A-stance.[11]
Variation: Some fighters like to slide their foot, while others lift it 1–2 inches (2.5–5.1 cm) off of the ground and take an actual step. Do whatever feels comfortable to you.
-
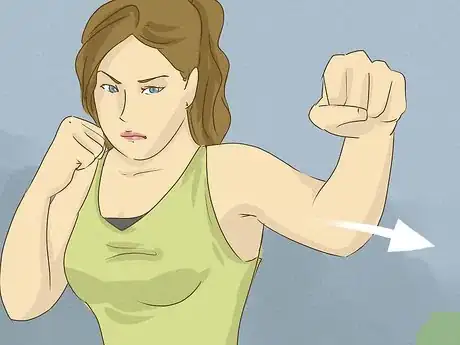
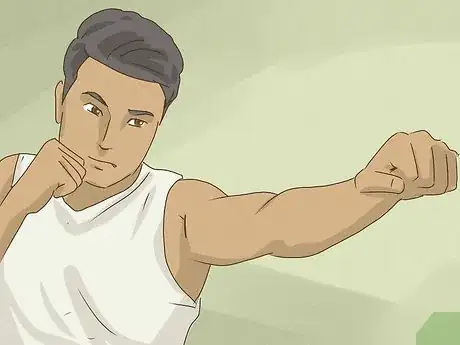
3Extend your nondominant hand 3/4 of the way towards your target. Without turning, rotating, or pivoting, extend your nondominant hand toward the target. You can lean forward a little if you want to add a little more power to your punch, but it’s not mandatory. Keep your head still and do not lower your dominant hand from your cheek while you do this.[12]
- The most common counter to a jab is a hook. Keeping your dominant hand against your cheek will keep you from taking a big counter-punch from your opponent.
- A jab is not intended to be a knockout punch. It’s okay if it doesn’t feel like there’s a lot of power behind your punch.
- Do your best to not bend your elbow away from you as you extend your arm. A wide elbow is a signal to your opponent that you’re punching, while a straight extension is much harder to track visually.
-
4Flip your wrist over while landing your punch. During the last 1/4 of your arm’s extension, flip your wrist downward so that your palm is facing the floor. Hit the target with your middle knuckle as best as you can to strike cleanly.[13]
- When you do this quickly, this will feel kind of like a whipping motion.
- If you don’t turn your wrist over as you land your punch, you are leaving your body open to a counter punch. You’re also losing out on a lot of the jab’s power, which comes from this flicking motion.
-
5Pull your arm back almost immediately after hitting the target. Don’t follow through hard with your jab. After you make contact, snap your nondominant hand back to its original position. Either throw another punch immediately, or take a step back and prepare for the next punch.[14]
- In boxing, MMA, or martial arts, the goal of a jab is to either land a free punch or set yourself up for a better punch with your dominant hand. If you follow through and leave your nondominant arm extended, it will be hard to take advantage of your opponent’s defensive maneuver in time to land a punch.
Landing a Hook
-
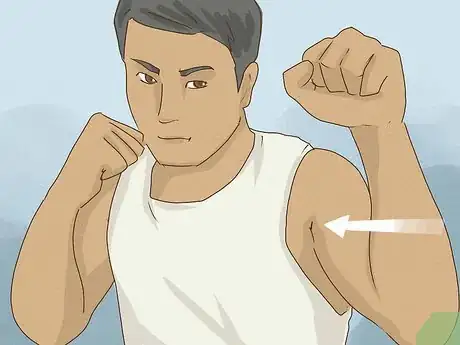
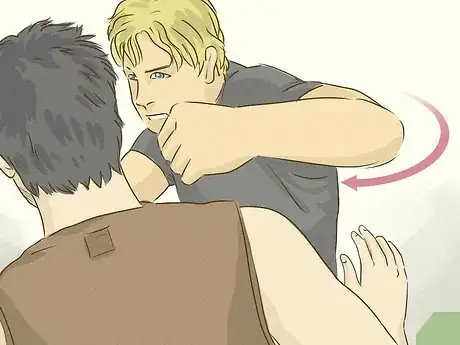
1Turn your dominant hand down while raising your elbow. From the A-stance, lift your dominant elbow up until your forearm is parallel to the floor. Let your wrist turn naturally downwards so that your knuckles are facing the ground. Do this as quickly as possible without moving your entire chest to avoid signaling your punch to your opponent.[15]
- You can throw a hook with your dominant or nondominant hand. If you’re throwing this punch with your other hand, turn your nondominant wrist down while raising the elbow.
- The hook takes longer to throw than a straight punch, but it’s quite powerful when used correctly. Throw hooks when your opponent is really close to you to knock them off balance. A good hook also has a higher chance of knocking your opponent down, since you’re striking your opponent at an angle they aren’t expecting.
-
2Bend your front knee inward while pivoting your entire body. The hook requires a small windup for maximum power. To put some weight behind your punch, bend your front leg down and in towards your body like you’re curling yourself up. Let your hip follow your knee like you’re twisting away from your opponent. Do not move your arms while doing this.[16]
- Your dominant hand should be directly behind your head at the end of this motion.
- Reverse the instruction to throw a hook with your nondominant hand; bend your back leg inwards while turning your torso slightly away from you.
-
3Keep your elbow bent at a 90-degree angle while rotating into the target. Maintain a bent elbow as you rotate your entire body towards your target. Pivot your back leg inwards while opening your front leg up to the target. Allow your punching arm to follow your hip and strike your opponent with your middle knuckle. When done correctly, this looks like your entire body is twisting forward like a hinge.[17]
- For a hook with your nondominant hand the instruction is basically the same except you’re twisting from the other direction and using your nondominant leg to pivot your body.
Tip: Follow through and return to the A-stance or throw another punch. If you connect a good hook, the odds are extremely high that you should continue punching, though. A strong hook will throw your opponent off balance.
Connecting an Uppercut
-
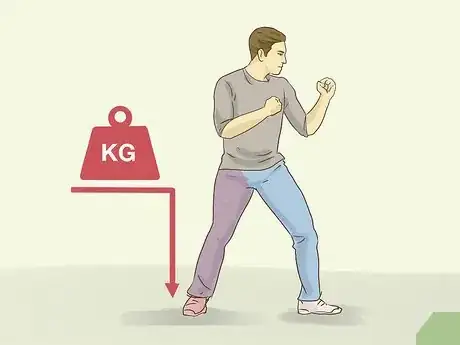
1Shift your weight to your dominant leg to generate power. Normally, your weight is evenly distributed between both feet when you’re in the A-stance. Since an uppercut requires you to throw a punch at an odd angle, you need to shift your weight to generate power. Keep your weight on your back foot to generate enough natural momentum to throw a strong uppercut.[18]
- You can throw an uppercut with your nondominant hand. To do this, shift your weight to your nondominant leg instead.
- An uppercut is the most difficult type of punch to pull off effectively. Due to the fact that you’re striking from an odd angle, it’s harder to land your punch with power. The goal of an uppercut is to cut through your opponent’s defenses by striking from a unique angle.
-
2Lower your dominant arm and shoulder 10-20 degrees. Lean back 2–3 inches (5.1–7.6 cm) and lower your dominant shoulder. Slide your dominant elbow against your ribs with your forearm aimed at your target. Keep your nondominant hand raised in front of you to block counterpunches and hide your attack angle.[19]
- These instructions are reversed for an uppercut with your nondominant hand. Importantly, you should not tuck the elbow if you’re throwing an uppercut with your nondominant hand, though. Instead, let it freely hang under your shoulder.
-
3Pivot with your dominant leg to initiate the punch. Raise your dominant heel off of the ground and bend your knee inwards. At the same time, lean forward toward your target. While leaning forward, lower your dominant leg another 2–3 inches (5.1–7.6 cm). This will give you more power and create a better angle of attack.[20]
- When done correctly, your body will look like it’s doing a kind of scooping motion as you’re dipping down and extending your punch out.
Tip: Keep your nondominant arm raised in front of you while doing this. Keep both elbows pointing towards the floor at this point.
-
4Drive your fist upwards to strike your target at an angle. Despite the way it may look in a professional fight, you don’t actually throw your arm in a circular motion, it’s basically a straight punch upwards at an angle. Throw your fist up towards your target. Hit with your middle knuckle and drive through the punch. After you extend through the target, pull your arm back and prepare for another punch or block.[21]
Expert Q&A
-
QuestionHow do you withstand a punch?
 Adrian TandezAdrian Tandez is the founder and head instructor of the Tandez Academy, a world-renowned self-defense training center in Mountain View, California. Trained under the renowned martial artist Dan Inosanto, Adrian is a certified instructor in Bruce Lee's Jeet Kune Do, Filipino Martial Arts, and Silat, among other things. Adrian has over 27 years of self defense training experience.
Self Defense Trainer Number one, try to control distance. Footwork, move, angle, don't allow yourself to be a target by just standing there. Don't allow that person to get too close to you if you can. Number two, if they do get too close to you, you have to be aggressive. You have to intercept them by striking first before they get too close to hurt you. I don't believe in the idea of blocking. Blocking is a passive movement that requires too much to make it work. If the person's bigger and stronger than you, they're just going to crash your your block or just break your arms. If somebody threw 10 punches at you, I bet you wouldn't block all 10 punches perfectly, because you wouldn't know where they're coming from and where they're going. So it's better to advocate more for mobility, controlling distance and striking.
Warnings
- If you aren’t engaging in a combat sport, never punch someone unless you’re being attacked and can’t get away. The goal of learning self-defense is to protect yourself, not start an unnecessary fight.⧼thumbs_response⧽
- If you’re practicing your punching with a heavy bag, speed bag, hand pads, or sparring match, always wear hand wraps. If you don’t, you’re more likely to break your wrist or injure your hand.[22]⧼thumbs_response⧽
References
- ↑ https://youtu.be/VyjsF8s6xnY?t=35
- ↑ https://www.asgmag.com/survival-skills/knuckle-sandwich-how-to-throw-a-proper-punch/
- ↑ https://youtu.be/DmXyuo6fhGw?t=39
- ↑ https://youtu.be/VyjsF8s6xnY?t=85
- ↑ https://youtu.be/DmXyuo6fhGw?t=22
- ↑ https://www.asgmag.com/survival-skills/knuckle-sandwich-how-to-throw-a-proper-punch/
- ↑ https://youtu.be/LViFS7EMdi4?t=20
- ↑ https://youtu.be/o3k9NNAUwIE?t=41
- ↑ https://youtu.be/CCIekf4lkc0?t=17
- ↑ https://youtu.be/fWeo0Od8xxM?t=51
- ↑ https://fightrr.com/muay-thai/technique/the-jab
- ↑ https://fightrr.com/muay-thai/technique/the-jab
- ↑ https://fightrr.com/muay-thai/technique/the-jab
- ↑ https://www.asgmag.com/survival-skills/knuckle-sandwich-how-to-throw-a-proper-punch/
- ↑ https://www.youtube.com/watch?v=NxIWai9sDR8
- ↑ https://www.youtube.com/watch?v=NxIWai9sDR8
- ↑ https://www.youtube.com/watch?v=NxIWai9sDR8
- ↑ https://youtu.be/ZmxyguvPwlo?t=55
- ↑ https://youtu.be/ZmxyguvPwlo?t=125
- ↑ https://www.youtube.com/watch?v=Vb5eXfEz0x0
- ↑ https://youtu.be/ZmxyguvPwlo?t=202
- ↑ https://youtu.be/-kgVnNAHLLM?t=146
About This Article
To get into the position to throw a basic jabbing punch, stand with your knees slightly bent, your chin down, and your fists held in front of your face like a boxer. When you’re ready to throw the punch, push off slightly with your back foot, and rotate your shoulder as you push your arm forward so that your fist rotates 180 degrees. Keep your free hand up so that it protects your face, then bring your jabbing arm back to the starting position. To learn how to land other types of punches, such as uppercuts or hooks, keep reading the article!


-Step-15-Version-2.webp)


