wikiHow is a “wiki,” similar to Wikipedia, which means that many of our articles are co-written by multiple authors. To create this article, volunteer authors worked to edit and improve it over time.
This article has been viewed 120,894 times.
Learn more...
Toasted walnuts have a richer, deeper taste than raw walnuts. While toasting shelled walnuts is generally preferred over toasting in-shell walnuts due to the manner in which the shells must be removed, walnuts toasted in-shell often retain more of the nuts’ natural flavor.
Steps
Oven Toasting (Shelled)
-
1Preheat the oven to 375 degrees Fahrenheit (191 degrees Celsius). Prepare a baking sheet by lining it with aluminum foil or parchment paper. Non-stick cooking spray will also work.
-
2Spread the walnuts out flat. Ideally, the shelled walnuts will be divided into halves or quarters. Whole walnuts may not toast evenly, while pieces smaller than quarters may toast too quickly and burn as a result. The walnuts should be in a single layer to ensure even cooking.Advertisement
-
3Toast the walnuts until browned. At this temperature, the walnuts should only need to bake for 5 to 10 minutes, especially if they are in smaller pieces. Check the walnuts after the first 5 minutes to make sure that they have not started to burn. You can even stir them with a heat-resistant spatula to improve even browning.
-
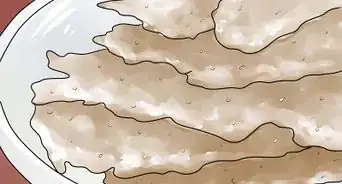
4Remove the walnuts and allow them to cool. Once the walnuts smell toasted, they are done. Remove them from the oven and transfer them to a heat-resistant bowl until they cool. Enjoy them warm or at room temperature, but you should at least wait until they are no longer burning hot to the touch.


Stove-Top Toasting (Shelled)
-
1Heat a large skillet. Place the skillet on the stove burner and heat it over medium-high heat. You need to use a dry heat, since the fat and oils in the walnuts will be enough to toast them. As such, you should not use non-stick cooking spray, oil, or butter in the pan.
-
2Pour the walnuts into the pan. The shelled walnuts will toast best if divided into halves or quarters, but since it is easier to monitor the toasting process on the stovetop, you can also use smaller pieces if desired. Try to keep the walnuts on a single layer to promote even toasting.
-
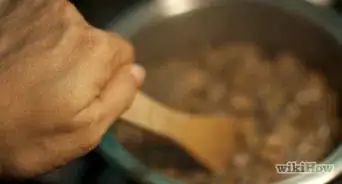
3Stir frequently. Stirring the walnuts allows each one to be exposed to the heat for an equal amount of time and, as a result, you will get more evenly toasted walnuts and find fewer burnt nuts. Stirring constantly is best, but you can allow the nuts to rest for brief periods as long as you still have an eye on them.
-
4Cook until browned. The process should only take about 5 minutes, but may go even faster if you have small pieces. Once done, the walnuts will be a deeper shade of brown and will smell toasted.
-
5Remove from heat. Immediately transfer the nuts out of the pan once done. Otherwise, they will continue to cook on the hot metal. Transfer them to a heat-resistant bowl or dish and let them cool until they reach your desired serving temperature.


Microwave Toasting (Shelled)
-
1Place the walnuts into a microwavable glass bowl. A microwave-safe pie dish works well, but any dish marked safe for microwave use will be adequate. Only add enough walnuts to cover the bottom of the dish in a single layer. Keep the walnuts in halves or quarters to ensure the best possible toast.
-
2Microwave on high for 1 minute. Check the walnuts to make sure that none have burned. Stir them using a heat-resistant spatula to make sure that each nut is getting cooked evenly. If your microwave does not have a rotating tray, turn the dish 180 degrees before continuing.
-
3Cook the walnuts for another minute on high. Smell them to see if they have finished cooking. If done in the microwave, walnuts will not brown, but the toasted smell should still come through.
-
4Microwave in 20 second intervals as needed. This will not usually be necessary after the first 2 minutes of cooking, but it might prove useful if the halves are especially large.
-
5Let the walnuts cool slightly before serving. Eating them directly out of the microwave could cause you to burn your mouth.


Preparing the Nuts (in Shell)
-
1Inspect the shell for cracks and holes. While it might be tempting to select walnuts with cracks in the shell to make it easier to peel the shell away after cooking, shells with cracks or holes in them do not offer much protection for the kernel inside, and as a result, there is a higher chance that the walnuts will have gone rancid or will have lost some of their original flavor.
-
2Rinse the walnuts. Even though the heat will likely kill off most of the contaminants on the walnut shell, starting off with clean walnuts is always more sanitary. Clean the walnuts by rinsing them under warm running water. If you notice any stuck-on dirt, gently scrub the walnut shell with a vegetable brush. Allow the nuts to air dry before toasting.
-
3Cut a small "x" into the shell. Using a sharp, serrated knife, cut a small "x" onto one side of the walnut. One of the main reasons that people typically remove the shell before toasting the walnut is because the shell is a little harder to remove after it is heated. To make it easier to peel the shell, cut an "x" into it before you begin toasting.


Oven Toasting (in Shell)
-
1Preheat the oven to 350 degrees Fahrenheit (177 degrees Celsius). Prepare a baking sheet by covering it with a sheet of nonstick aluminum foil or parchment paper.
-
2Spread the walnuts out in a single layer on the baking sheet. In order to make sure that the walnuts toast evenly, you should keep them all in a single layer rather than allowing them to pile up. The nuts will also benefit from being spaced slightly apart, but they will still toast even if they are touching. For best results, position the nuts so that the "x" marked on the shell faces up. The mark does not need to be completely upright, but it should not be covered by the baking sheet or by other nuts.
-
3Bake the walnuts for 10 minutes. The nuts should continue toasting until they become fragrant and take on a slightly darker hue. The shell should also begin to turn up slightly where the "x" is at. You might need to cook the walnuts for as long as 15 minutes, but they generally toast a little faster in-shell, so 10 minutes is often enough.
-
4Stir the nuts at the halfway point. It is not necessary, but stirring the nuts will help ensure even and thorough cooking. Use a spatula, as the nuts and baking sheet will be too hot to touch by hand. Make sure that the "x" on each shell can still be seen and is not covered.


Stove-Top Toasting (in Shell)
-
1Heat a large, dry frying pan.[1] The skillet should be heated over medium-high heat. Allow it to warm up for five minutes or so to ensure that it is appropriately hot. Do not use oil or cooking spray, since the nuts themselves contain enough oil to cook. It would be beneficial to use a non-stick skillet, however.
-
2Add the walnuts to the pan. The nuts should only be cooked on a single layer, and it is not recommended to toast a large batch that forms a multi-layer pile. It is generally a good idea to start with the "x" facing upward on as many of the nuts as possible, but it is not essential, since the walnuts will not stay in the same position for long.
-
3Stir the nuts frequently. After the first minute or two, begin stirring the nuts. They can rest for 30 second intervals or so, but for the most part, the nuts should be stirred continuously to ensure even and thorough toasting. Use a heat-resistant spatula.
-
4Remove the nuts from the heat after 10 minutes. The process may take a little longer or a little shorter depending on how hot the heating elements in your stovetop make the pan. Once the nuts begin browning and become very fragrant, they are ready to be pulled off. You should also dump them out of the pan since they will continue cooking there even after it has been removed from the heat.


Microwave Toasting (in Shell)
-
1Fill a microwave-safe pie plate with a single layer of walnuts. Any microwave-safe plate will work, but a pie plate is especially useful since it has raised sides. Keep the nuts to a single layer for even toasting and make sure that the "x" marking made in the shell is not covered by other nuts or facing the bottom of the dish.
-
2Cook the nuts in 1 minute intervals until done. The walnuts should be cooked on full power, and it will usually take several intervals before they finish toasting. The shells will not deepen in color like they do when toasted in the oven or on the stove, but they will become fragrant and the shell should begin to peel slightly at the cut part of the "x."
-
3Stir the walnuts in between intervals. Stirring the nuts allows them to toast evenly. Keep as many “x” marks showing even after you stir the nuts, but if the marks become covered, the nuts should still toast without much problem.


Removing the Shell (in Shell)
-
1Allow the nuts to cool slightly. Toasted walnuts taste best when served warm, so you should not let them cool to room temperature. They will be hot after you finish toasting them, though, and handling them immediately can lead to burns. Wait until the nuts have cooled just enough to comfortably hold in your hand.
-
2Peel back the corners of the "x." The shell should have begun peeling up slightly at the "x" mark as the walnuts toasted. Use your fingers to grip the corners and forcefully peel the softened shell off. The shell may still pose some problem, but it can usually be worked off with only your fingers.
-
3Use a nutcracker only if necessary. If the shell is still too hard to peel away, gently crack it using a nutcracker as though the nut were still raw. Apply pressure carefully, though, since toasted walnuts tend to be a little softer than raw walnuts and will break apart more easily.
-
4Rub the walnuts with a towel.[2] You can either use a clean dish towel or paper towel. Rub the towel over the nuts using small yet rapid strokes to remove the bitter skins.
-
5Serve warm. You can also store the toasted nuts in the refrigerator or freezer if necessary, but most people prefer the taste of warm toasted walnuts over cold walnuts.


Things You’ll Need
- Baking sheet
- Aluminum foil or parchment paper
- Spatula
- Frying pan
- Pie plate or other microwave-safe dish


References
About This Article
To toast walnuts, start by spreading out your halved or quartered walnuts on a baking tray lined with parchment paper. Then, cook them in the oven at 375 degrees Fahrenheit until they’re golden brown, which usually takes 5 to 10 minutes. Alternatively, place the walnuts in a microwavable glass bowl and cook them on the high setting for 1 minute. Next, stir the nuts to ensure they cook evenly, and cook them for 1 more minute. For tips on how to toast walnuts on the stovetop, read on!