This article was co-authored by Veronica Winters. Veronica Winters is a Figurative Artist who owns an online art gallery and studio in Naples, Florida. With over 20 years of experience, Veronica specializes in surreal figurative oil paintings and colored pencil drawings. In 2022, she won the Award for Distinction at the 30th Annual Colored Pencil Society of America International Exhibition. Veronica is also a published author of two art books: How to Color Like an Artist and The Colored Pencil Manual. She received her BFA in Studio Art at Oklahoma State University and her MFA in Painting at Pennsylvania State University. Veronica also studied classical drawing at the Grand Central Academy of Art and the Art Students League of New York.
There are 8 references cited in this article, which can be found at the bottom of the page.
This article has been viewed 63,650 times.
Artists of all ages and skill levels can reproduce photographs by tracing them. Artists trace for a variety of reasons: to practice drawing techniques, save time, or to create a work of art out of a photograph that inspires them. There are a couple of simple methods for tracing pictures. You can easily trace a photograph using cheap tracing paper found at any art supply store. Or, use a projector to project the image onto paper and trace the image from there. Once you’ve traced your image, you can use your artistic skills to enhance and embellish the image further.
Steps
Using Tracing Paper
-
1Choose a photograph to trace that has vivid colors and lines. Since you’re using tracing paper to trace your photograph, it is important that you can see the lines and colors of the image through the paper. An image that has distinct lines will show through the thin paper and allow you to trace it more easily. Avoid images that have small or blurry details that might not show through the paper.
- Remember that because you are tracing the image, your final product will be a replica of the photograph; if you want your final product to be a certain size, make sure you size the photograph appropriately (you can size it on a computer and reprint it) before tracing.[1]
-
2Tape each corner of the photograph to your drawing surface using artist tape. Choose the location you want to draw on, and use artist tape to secure your image. Artist tape will hold the photograph still while you trace and will easily peel away without tearing the photo or leaving any residue.[2]
- You can use an ordinary table as a surface to trace a photograph, but you might be more comfortable if you tape the photograph to a drawing board and adjust the drawing angle to your liking.
- Consider buying a small tracing lightbox and taping your photograph to the glass. The lightbox will shine a light against the back of the photograph, making the image easier to trace. You could also try taping the photograph to a sunny window, allowing more light to shine through the image.
Advertisement -
3Tape a sheet of tracing paper over the photograph. Tracing paper often comes in rolls, so cut the correct size of paper based on the size of your photograph. You want to make sure it is at least the same size, if not larger. Hold the paper over the photo with one hand and smooth it with the other, so that it is taut as you tape the edges. Use artist tape to tape each corner of the tracing paper over the photograph.[3]
- Tracing paper is a really thin type of paper that is easy to see through. Generic tracing paper from your local art supply store will work perfectly.
-
4Use a hard artist's pencil to trace the lines of the photograph. An H or 2H pencil is best as B and softer pencils tend to smear.[4] You can also use colored pencils. Take your time and press lightly so that you can erase mistakes. Use your plastic eraser as needed.
-
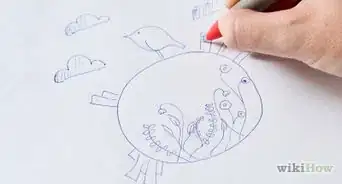
5Add detail to the traced image or leave it stark with simple lines. Once you have traced the most important lines of the photograph, decide how many extra details you want to add.
- Fewer details will give the tracing a cartoon-like, or abstract, appearance while copying all the details of the photograph will result in a realistic copy. Once you have traced the photograph, you can get creative and add any colors or additions that you want.
-
6Remove the artist tape from the tracing paper and the photograph. Once you are happy with your image and no longer need to trace the photograph, it is time to remove the tape. Move slowly and gently as you remove the tape so you don’t damage the delicate tracing paper. Remove the tape from the photograph as well.
- Try pulling off the tape slowly at a 90-degree angle to avoid tearing the paper.[5]


Using a Projector
-
1Choose a tracing or artist projector and set it up in your workspace. There are many different types of projectors, and while they can all be used to trace photographs, some will work better than others.[6] Use whatever projector you have available, or buy one that fits your needs. Place it in your workspace, and power it on.
- Art projectors are built specifically for artists and are your best bet when choosing a projector to trace photographs. Art projectors can project HD images, include a range of options for adjusting colors and image size, and can feature grids to help create layouts. Some art projectors can also project 3D images.[7]
- There is a range in price and quality when it comes to art projectors, so pick the one that fits best in your budget.
-
2Place your chosen photograph onto your projector. The way you set up your photograph on the projector will vary depending on which projector you use. Some projectors hook up to a computer and can project digital photographs, while others will require a hard copy of the photograph. Follow the instructions for the projector you are using.
- Choose a photograph that has a fair amount of contrast so that you can easily see the lines when you begin tracing.
-
3Adjust the size of the image until it is the size you want to trace. The traced image will be the exact size of the image you are projecting, so think about what you want the final product to look like when you consider what size image to project.
- Once you’ve set the size, adjust the projector image so that it is in focus.
-
4Tape a sheet of paper onto the projected image using artist tape. Depending on the type of projector you're using, you will be able to project the photograph onto either a horizontal or vertical surface. Choose whichever is easiest for you to draw on.[8] Use artist tape to tape each corner of your fresh piece of paper onto the projected image.
- Since the image will project directly onto the paper, you can use any size or type of paper. Plain paper, poster board or art paper all work well. The final product will be on this paper, so consider what each type of paper would look like with your image traced onto it.
-
5Trace the photograph onto the paper using whichever medium you like. Once you’ve set up the projector and paper, you are ready to trace the image. You can use a simple artist pencil here to get a quick and precise outline, or you could take more of a risk by using paints or watercolors.[9]
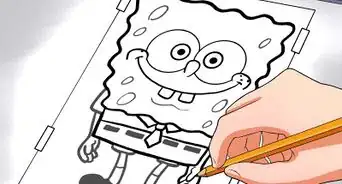
- Trace the main structural lines first, and then continue tracing until the traced image has the amount of detail you want.
-
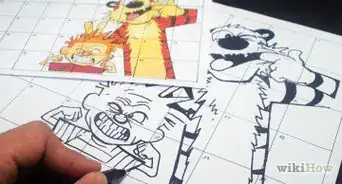
6Embellish the image until you are satisfied with the result. Once you’ve traced the image, have fun and use your artistic freedom to complete the image. Try combining photographs to create a single, unique work of art. You can also trace some aspects from one photograph, then replace it with a new photograph and continue tracing to create an image that is more abstract.[10]
- Once you have traced the outline, you may want to turn off the projector and continue drawing on your own. It can be fun to trace the basic structure of the image and then use your creativity to make it your own.


Expert Q&A
-
QuestionHow can I trace a picture without tracing paper?
 Veronica WintersVeronica Winters is a Figurative Artist who owns an online art gallery and studio in Naples, Florida. With over 20 years of experience, Veronica specializes in surreal figurative oil paintings and colored pencil drawings. In 2022, she won the Award for Distinction at the 30th Annual Colored Pencil Society of America International Exhibition. Veronica is also a published author of two art books: How to Color Like an Artist and The Colored Pencil Manual. She received her BFA in Studio Art at Oklahoma State University and her MFA in Painting at Pennsylvania State University. Veronica also studied classical drawing at the Grand Central Academy of Art and the Art Students League of New York.
Figurative ArtistUse the method of squares! Divide your reference image and your paper (or canvas) into equal squares both horizontally and vertically, and transfer the image by focusing your attention on the information you see in each square. Copy the exact position of lines in every square going from left to right. -
QuestionWhat if I don't want it on tracing paper, how would I get it from tracing paper to regular (by which I mean printer or drawing) paper easily?
 Ellie HomewoodCommunity AnswerTry investing in a lightbox, you can use normal paper and it works brilliantly. They can range from $15-$35.
 -
QuestionWhat can I do if I don't have tracing paper?
 Community AnswerYou can really use any kind of thin paper. Wax paper from the kitchen works, for example.
Things You'll Need
Using Tracing Paper
- Photographs
- A flat surface, drawing board or lightbox
- Masking or artist tape
- Tracing paper or plain white paper
- H or 2H artist's pencil
- Plastic eraser
Using a Projector
- Photographs
- Tracing projector
- Drawing, pastel or watercolor paper
- Pastel chalks, watercolor paints or pencils

References
- ↑ https://www.art-is-fun.com/transfer-paper
- ↑ https://www.art-is-fun.com/transfer-paper
- ↑ https://www.youtube.com/watch?v=YqRcJ4NH_vs
- ↑ https://alvalyn.com/how-to-use-graphite-paper-to-transfer-drawings/
- ↑ https://thevirtualinstructor.com/blog/how-to-prevent-artists-tape-from-damaging-your-paper
- ↑ https://www.art-is-fun.com/art-projector
- ↑ https://projectortop.com/best-projector-for-tracing-images/
- ↑ https://www.youtube.com/watch?v=-ZBNFit7rAo
- ↑ https://www.youtube.com/watch?v=-ZBNFit7rAo
About This Article