This article was co-authored by Matt Khoury, a trusted member of wikiHow's volunteer community. Matt Khoury is a seasoned drummer with over 25 years of experience. He started playing in high-school band and at church, which expanded into opportunities to play with bands in front of thousands of people across the United States.
There are 9 references cited in this article, which can be found at the bottom of the page.
This article has been viewed 43,146 times.
Learn more...
Tuning a bass drum doesn't mean quite the same thing as tuning other instruments. The size of the drum and the type of heads you place on it determine the pitch, and tuning begins by properly seating the heads on the drum. After the basic tuning, you'll get to use your instincts to adjust the pitch just so, perfecting your personal kick drum sound.
Steps
Tuning the Resonant (Front) Head
-
1Turn your bass when it no longer sounds crisp and clean. You need to tune your drum regularly to keep their sound sharp and clean, as opposed to uncontrollable or muddy resonance. Resonance is when the linger effects of the sound, such as how quickly the sound dies out.
- You must tune your bass drum if you've replaced either head.
- If you're having trouble with the sound, particularly with "decay" (kick drums generally want very little sustain),[1] , you have issues with your front head. Check it first before you get to the batter head -- both sides are important for sound.[2]
-
2Test the head for tightness by pressing in with your thumb. It should feel tight to the touch, but still have some give. It shouldn't feel hard, but it shouldn't have a ton of give, either -- 1/2" at most.
- The front, or resonant, head is the one that faces the audience while you play.[3]
Advertisement -
3Using your fingers, tighten all of the bolts around the face of the drum. You're not tuning just yet, simply getting the process started. You don't even want to get the bolts as tight as possible, just to the point of light resistance.
- For a way-out-of-tune drum, it can help to first loosen everything and then start from scratch.
-
4Tighten the topmost bolt one-half turn with a drum key. Turn your key clockwise 180-degrees to tighten the bolt. But topmost bolt, the the bolt at 12:00, or nearest that, if the drum was a clock. Press your thumb into the head right next to this bolt when you're done -- it should be tight, but still have some give.
- If you've gone too tight, loosen it a quarter turn. Don't worry if it isn't tight enough yet.
-
5Tighten the bolt directly opposite your first bolt, turning the same amount.To keep even tension on the drum you need to tighten bolts in opposing pairs. After you finish the 12:00 bolt, you need to tighten the 6:00 bolt, or the bolt in a straight line across from the one you just finished.
- Think of the head as a perfectly even tug-of-war match. Each bolt pulls evenly against the ones across from it, keeping everything from sliding or stretching unevenly.[4]
-
6Continue tightening around the drum, always working in opposing pairs. Keep working in pairs -- a half turn at the 3:00 bolt followed by a half turn of the
-
7Press your thumb into the drum about 1" inward from each bolt, testing for even tightness. After each spot, lightly tighten or loosen the bolt to ensure that the drum feels the same the entire way around. You want the exact same tightness across the drum. Remember, as always, to test and tighten in opposing pairs.
- Visually, the front head should only have a few (if any) wrinkles on it.
- Remember, you need some give. Kick drums, in particular, can be left a little looser to get a deeper, lower-frequency tone.[5]


Tuning the Batter (Striking) Head
-
1Loosen each rod on the top head until they almost come off. This isn't necessary for a quick tuning, but for the best results you should always start from scratch. Loosen all of the tension rods so that they are still installed but are placing no pressure on the drum head.[6]
-
2Stretch the new head, if installing one. If this is a replacement job, and not a simple tuning, place the new head on and tighten the bolts a quarter turn each. Using your palm, press deeply into the new head to stretch it out. A head stretches once it's tightened in place, meaning it will go slack (and need more re-tuning) if not pre-stretched.[7]
-
3Tighten each bolt as much as you can by hand. Tighten the batter head with the same system of opposing pairs used on the front head. Remember that if you tune the 12:00 first, you've got to jump to the 6:00 right after. You can then move to the 3:00 and the 9:00, and so on.
-
4Tighten each bolt a half turn with the drum key, working in opposing pairs. You're still working in opposing pairs of tension rods. Remember, it is just a 180 turn on each rod to start -- you'll adjust later. If you had a string connecting each tension rod to the rod straight across from it, they would be pulling on each other with even strength.
-
5Test the head 1" from each bolt using a drumstick, adjusting as necessary. Hit the head with a stick at the same point in front of each tension rod. Unless you lucked out on a perfect tuning, each rod will likely sound a little bit different. Use your drum key to get them perfectly aligned.
- Test all the rods first and see what sound you like best, or which sound is most common. Tune the rest to this.
- Tightening the rod makes it higher pitched while loosening it will make it sound deeper.


Adjusting For Your Preferred Sound
-
1Cut porthole to help record the kick drum and get a punchier sound. If you cut a hole in the resonant (front) head, this can help you make your bass drum sound a bit little less warm and resonant. Most importantly, it helps place microphones nice and close to the kick drum fir recording. Some considerations with a porthole include:
- Keep the hole between 3"-5" in diameter.
- Place the hole near the edge of the drum -- 3:00 or 5:00 position is best.
- Consider testing drums with and without holes before you start cutting.[8]
-
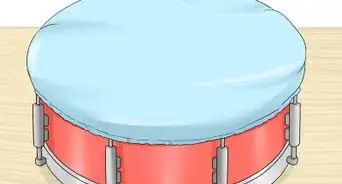
2Think about damping your kick drum during quieter gigs and spaces. Damping is placing a towel or pillow in the kick drum to absorb some of the vibrations. You can also buy dedicated products for damping, or tape a towel to the rim of the front head for a smaller effect. Damping has several benefits, but you should always test the sound out before committing to a damping strategy. Some effects of damping include:
- Slightly quieter head and sound
- Less resonance, leading to a punchier strike
- More tone control -- move the damper to different parts of the kick drum for different sounds.[9]
-
3Leave the drum heads tuned a little looser than normal for an even deeper sound. Loosen up the bolts on the batter head if you want an even deeper, lower frequency sound. The looser the head, the deeper the sound. Loosening the resonant head can help as well, but it can also muddy up your sound if loosened too much.
- Note, however, that looser heads create more resonance. Many drummers use some damping to control these effects.
-
4Keep playing and experimenting to find your perfect tone. Drum tuning doesn't have a melodic key you need to hit. It is more about your personal sound than any "right" amount of tuning. Keep mixing and matching tightness, damping, portholes, and even the type of beaters you use to hit the drum to find your personal bass drum tone.
- Sometimes the right tuning depends on the style of music. Pop and rock tends to like sharp but deep kick drums, whereas jazz drummers may be a bit more "splashy."


Expert Q&A
-
QuestionHow do you change the sound of a drum?
 Matt KhouryMatt Khoury is a seasoned drummer with over 25 years of experience. He started playing in high-school band and at church, which expanded into opportunities to play with bands in front of thousands of people across the United States.
Veteran DrummerPlay around with tightening and loosening the drum heads until you like the sound. Many drum models have a musical note printed in the drum's shell so you can tune it to a precise note. It's also totally fine to tune it on your own by playing around with how tight you make the heads!
Warnings
- You can't be sure what your drum sounds like if you never get out from behind it to see what how it sounds to the audience. You will have to retune your drums for different environments, add or remove damping and muffling devices or make other adjustments when a microphone is attached to the drum.⧼thumbs_response⧽
Things You'll Need
- Drumheads
- Drum key
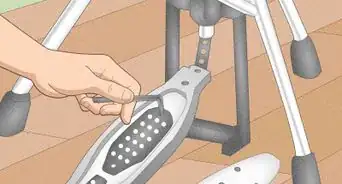
- Pedal and/or drumstick
- Damping and muffling devices


References
- ↑ http://www.chrisbrushdrums.com/bass-drum-tuning/
- ↑ http://www.chrisbrushdrums.com/drum-tuning/
- ↑ http://www.musicradar.com/tuition/drums/7-simple-steps-to-tuning-your-bass-drum-199692
- ↑ http://drumsticksensei.com/16/how-to-tune-a-snare-drum-the-right-way/
- ↑ http://www.chrisbrushdrums.com/bass-drum-tuning/
- ↑ http://www.drumlessons.com/drum-lessons/general-drum-lessons/how-to-tune-your-snare-drum/
- ↑ http://www.musicradar.com/tuition/drums/7-simple-steps-to-tuning-your-bass-drum-199692
- ↑ http://www.bassdrumsecrets.com/articles/get-the-best-sounding-bass-drum.php
- ↑ http://www.chrisbrushdrums.com/bass-drum-tuning/
About This Article