X
wikiHow is a “wiki,” similar to Wikipedia, which means that many of our articles are co-written by multiple authors. To create this article, 61 people, some anonymous, worked to edit and improve it over time.
This article has been viewed 932,319 times.
Learn more...
Your PSP firmware controls your system settings, and new versions get released to add features and fix errors and security problems. There are several ways that you can update the firmware on your PSP. If you have a network connection, you can update directly from the PSP itself. Otherwise, you can use a computer or a game disc that comes with update software. If you want to use homebrew software on your PSP, you can install custom firmware.
Steps
Method 1
Method 1 of 4:
Using the PSP
-
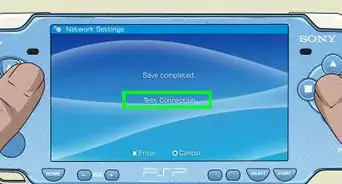
1Connect your PSP to a wireless network. Your PSP will need to be connected to the network in order to download the update files.
- If you don't have a wireless internet connection, you can update your PSP using your computer.
-
2Open the Settings menu. This is located on the far-left end of the XMB.Advertisement
-
3Select "System Update". This can be found at the top of the Settings menu.
-
4Select "Update via Internet".
-
5Select your network connection. If you don't have any networks to select, you will need to setup a connection first.
-
6Download any available updates. The PSP will search for updates. If one is found, you can press "X" to start downloading it.
-
7Start the update. After the update has been downloaded, you will be prompted to start installing it. Press "X" to start the update process.
- If you need to go back and install the update later, navigate to Settings, select "System Update", and then select "Update via Storage Media".


Advertisement
Method 2
Method 2 of 4:
Using Your Computer
-
1Create a new folder on your desktop. Name it PSP. It must be all upper-case.
-
2Open the PSP folder and create a GAME folder. Again, it must be all upper-case.
-
3Open the GAME folder and create an UPDATE folder. This one must be upper-case as well.
-
4Download the latest firmware from the PlayStation website. You can download the PSP firmware from the system updates page.
- The file you download should be called EBOOT.PBP.
- The latest and final firmware version is 6.61
-
5Move the downloaded file into the UPDATE folder.
-
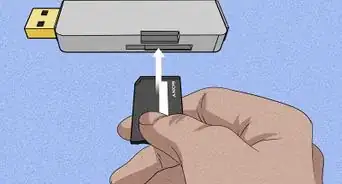
6Connect your PSP to your computer via USB, or insert your Memory Stick Duo card into your computer's card reader.
- If you connect your PSP to your computer, navigate to the Settings menu and select "USB Connection".
-
7Open the Memory Stick Duo folder. When you connect your PSP or insert your memory card, you should be asked if you want to open the folder. If not, open your Computer window and select the "Ms Duo" option.
-
8Copy the PSP folder you created onto the memory card. You may already have a PSP folder, which you can overwrite. This will add the update data to your PSP.
-
9Disconnect your PSP or memory card from your computer.
-
10Navigate to the Game menu on the XMB.
-
11Select the "Memory Stick" option.
-
12Select your update file. The PSP will begin the installation process.


Advertisement
Method 3
Method 3 of 4:
Using a UMD
-
1Insert a UMD containing the update. Some games contain firmware updates on the disc. The last firmware included on a UMD was 6.37.
-
2Navigate to the Game menu.
-
3Select "PSP Update ver.X.XX". The Xs will be replaced by the version number of the update. The update will have a UMD icon, and is typically below the actual game in the Game menu.
-
4Follow the prompts to install the update.


Advertisement
Method 4
Method 4 of 4:
Installing Custom Firmware
-
1Ensure your system is updated to version 6.60. Follow one of the methods above to do so. This is required to install the custom firmware.
-
2Download the "Pro CFW" files. These are the custom firmware files that allow you to use homebrew programs on your PSP. They can be found at a variety of places online.
- Make sure to download the latest version that is compatible with 6.60.
-
3Extract the "Pro CFW" archive. This will extract into the familiar PSP/GAME folder structure. The GAME folder will contain the custom firmware files.
-
4Connect your PSP to your computer via USB, or insert your Memory Stick Duo card into your computer's card reader.
- If you connect your PSP to your computer, navigate to the Settings menu and select "USB Connection".
-
5Open the Memory Stick Duo folder. When you connect your PSP or insert your memory card, you should be asked if you want to open the folder. If not, open your Computer window and select the "Ms Duo" option.
-
6Copy the extracted PSP/GAME folder onto the memory card.
-
7Disconnect your PSP or memory card. Insert the memory card back in the PSP if necessary.
-
8Navigate to the Game menu and run the "Pro Update" application. Follow the prompts to install the custom firmware.
-
9Run "Fast Recovery" whenever you reboot your system. This can be found in the Game menu, and is required to reactive the custom firmware when the PSP restarts.[1]


Advertisement
Community Q&A
-
QuestionIs there a limit to how many times you can update?
 Community AnswerNo, but it may lag a bit if you install a lot of updates.
 -
QuestionDoes anything happen to memory stick games while updating?Community AnswerNothing is going to happen to anything on the memory stick while the system is updating.
-
QuestionWill PSP custom firmware revert to original if I do a factory reset?
 Community AnswerYes, it will revert back to the original firmware when factory reset. You will have to reinstall CFW.
Advertisement
Warnings
- Don't turn off your PSP while it's updating or it will likely not work again.⧼thumbs_response⧽
Advertisement


About This Article
Advertisement