Explore this Article
Co-authored by
wikiHow Staff
X
This article was co-authored by wikiHow Staff. Our trained team of editors and researchers validate articles for accuracy and comprehensiveness. wikiHow's Content Management Team carefully monitors the work from our editorial staff to ensure that each article is backed by trusted research and meets our high quality standards.
This article has been viewed 16,813 times.
Learn more...
This wikiHow will teach you how to automatically upload new photos taken on your iPhone to your iCloud account, either by enabling the iCloud Photo Library or the Photo Stream.
Steps
1
Open the iPhone's Settings.
2
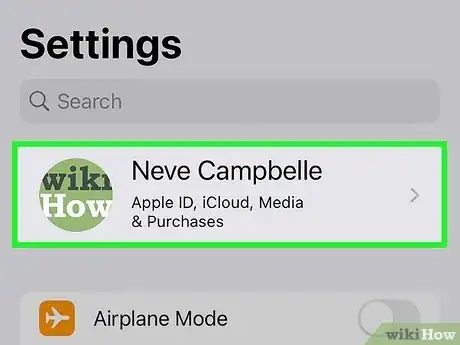
Tap your name.
-
Your name is at the top of the Settings screen. This displays information about your Apple ID account.[1] X Research source
3
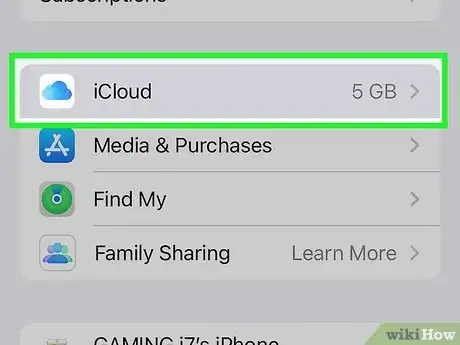
Tap "iCloud."
4
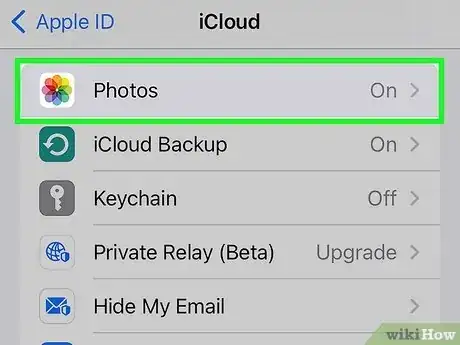
Tap "Photos."
5
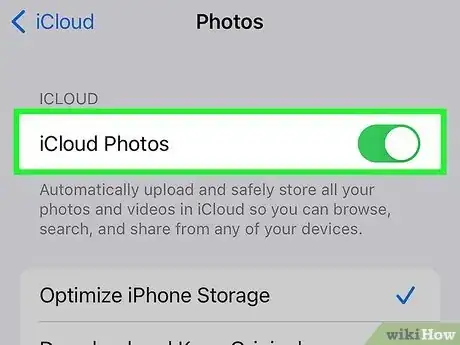
Tap the switch to turn on iCloud Photos.
-
Toggle the switch next to "iCloud Photos" to On . This will automatically upload your entire Photos library (including video) when your device syncs to iCloud.
- You can choose between Optimize Storage or Download and Keep Originals. The former will prioritize iCloud over local storage to save space, the latter will keep the original copy on the phone.
- iCloud Photo Library uses iCloud storage space. You can store any number of photos as long as you have the available space.
- Your photo library can now be accessed from the Photos app on your iPhone, iPad, or Mac. You can also access your photo library from a web browser by going to the Photos section of www.icloud.com.
Advertisement
You Might Also Like

How to
Hard Reset an iPhone
 How to Fix "Notifications Silenced" on iPhone Messages
 3 Easy Ways to Check Your WiFi GHz on an iPhone
 4 Easy Steps to Delete Lock Screen Wallpapers on iOS 16
 Turn Off Location Sharing on an iPhone Without Anyone Knowing
 6 Easy Steps to Reload Your Cash App Card at the Store
 2 Ways to Get a Still Image from Video on iPhone or iPad
 How to Unforget a Forgotten Bluetooth Device to an iPhone
 13 Easy Ways to Speed Up Your iPhone Personal Hotspot

How to
View Downloads on an iPhone
 Your iPhone Ghost Touch Problems Solved: 11 Easy Fixes
How to
Find a Lost iPhone

How to
Take a Screenshot With an iPhone
 2 Easy Ways to Add Membership Cards to Apple Wallet
Advertisement
References
About This Article

Co-authored by:
wikiHow Staff
wikiHow Staff Writer
This article was co-authored by wikiHow Staff. Our trained team of editors and researchers validate articles for accuracy and comprehensiveness. wikiHow's Content Management Team carefully monitors the work from our editorial staff to ensure that each article is backed by trusted research and meets our high quality standards. This article has been viewed 16,813 times.
How helpful is this?
Co-authors: 5
Updated: July 23, 2022
Views: 16,813
Categories: IPhone
Article SummaryX
1. Open the Settings.
2. Tap iCloud and sign in (if necessary).
3. Tap Photos.
4. Enable iCloud Photo Library.
Did this summary help you?
Advertisement
