wikiHow is a “wiki,” similar to Wikipedia, which means that many of our articles are co-written by multiple authors. To create this article, 36 people, some anonymous, worked to edit and improve it over time.
The wikiHow Tech Team also followed the article's instructions and verified that they work.
This article has been viewed 536,095 times.
Learn more...
Audacity is a robust, powerful open-source audio recorder and editor that can do much more than you would imagine from a free application. Its interface is a little cryptic in places, so you may find yourself a little overwhelmed when you first use it.
Steps
Recording
-
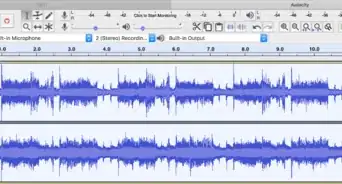
1Connect your gear. In your instrument preferences, set the output destination of your instrument. Set the input of Audacity to match the output from your instrument. In this example, the signal is routed through the Soundflower interface from a software synth’s output to Audacity’s audio input.
- While sound cards and interfaces vary, it’s a good practice to monitor your actual instrument to prevent latency issues. Because latency is always a factor when monitoring the recorded signal, it’s very difficult to find your groove when playing. In Audacity, set your preferences as shown:
-
2Confirm connection. Check to make sure your outputs and inputs are properly routed by first selecting Start Monitoring from the popup menu below the input meters (by the microphone icon), then playing your instrument.
- The LR input meters should respond.
- If the meters are hitting 0dB, use the Input Volume Slider to lower the input level so that the meters only approach 0 during the loudest sections.
Advertisement -
3Choose how to activate recording. When everything is connected properly, and your levels are set, you’re ready to record. You have two options:
- Press Record and start playing. There will generally be some silence at the beginning of your track. This can be trimmed away when you’re done recording.
- Alternately, you can enable Sound Activated Recording in your Recording preferences. Check the Sound Activated Recording checkbox, then set the Sound Activation Level (DB)—the lower the number, the quieter the sound that will trigger recording. This is useful if, for example, you are recording in another room and don’t want to have a long silence at the beginning of your track as you walk back and prepare to play.
-
4Record your track. Whichever method you choose, it’s now the moment of truth! Press the red Record button (or press “R”, and when you’re ready, start playing. You’ll see the waveforms written to your track as you play.
- Note: While this should not generally be the case, if everything is set as described above, if you are flat lining (i.e., the waveform displays as a straight line) when you record, that means that signal is not getting from your instrument to your track. Confirm your connections and try again.
-
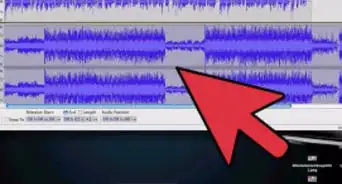
5Stop recording. When you are finished, press the square yellow Stop button. You should see something similar to the image above.
- If you chose Sound Activated recording, Audacity will automatically stop recording when the sound drops below the threshold level.
- To add additional tracks while listening to previously recorded tracks, make sure “Overdub: Play other tracks while recording new one” is checked in Preferences: Recording.
-
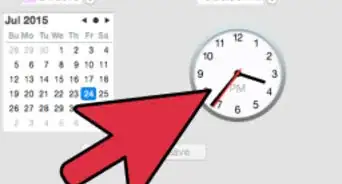
6Set a date and time to record. There’s an alternate recording option that most software sound recorders do not have, and that is Timer Record.
- From the Transport menu, select Timer Record..., or press Shift-T. In the resulting window, you can set the Start Date and Time, and either the End Date and Time, or the Duration. This lets you set your recorder to turn on when you are not around. Why would you do this? Because you can!
-
7Extend your recording. If you want to add additional material to your existing recording, press Shift-Record, or type Shift-R, and new material will be appended at the end of the existing recording on the current track.


Playback
-
1Review your recording. When you have finished your tracking, give it a listen. Click on the triangular green Play button (or press the Space bar). Your track should play from the beginning and will automatically stop at the end of your track.
- Pressing Shift while you press Play or the Space bar will loop your track until you click the Stop button or press the Space bar again.
- To loop a specific section, make sure the Selection Tool is enabled, then click and drag over the section you want to loop. Note: after you make your selection, press “Z” for the software to automatically find the zero-crossing point: the point where the start and end waveforms are at 0 amplitude (start and end at the same sound level). Depending on the nature of the loop and the source material, this will often give you a very clean loop without clicks or pops.
-
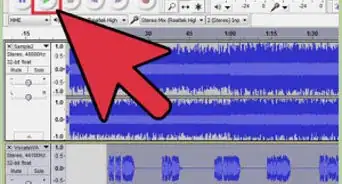
2Change the playback speed. You can alter the playback speed easily, which can come in handy if you are working out a solo or trying to learn a difficult piece of music.
- Drag the Playback Speed slider to the left to slow the track down, or to the right to speed the track up, then press the green “Playback at Speed” arrow to play your track back at the new speed. To make changes, adjust the speed and click the arrow again.
-
3Choose your view of the track. The default view is the waveform viewed in linear form. Without going into detail, the linear scale is viewed as a percentage of level between 0—or silence; and 1, or maximum level. You can also view the track in other formats:
- Waveform (dB) which shows the waveform in decibel levels. It will generally appear “larger” than the linear view.
- Spectrogram, which is a colorful FFT (Fast Fourier Transform) view of the audio.
- Pitch, which shows pitches from high at the top of the track, to low pitches at the bottom. It’s very interesting with rich textures, and chords.
-
4Solo tracks. If you have multiple tracks playing, and only want to hear one of them, click on the Solo button in the Track control area to the left of the waveform.
- All other tracks except those that are soloed will be silenced. This is very useful if you want to, for example, get a good level between the bass and the drums.
-
5Mute tracks. If you have multiple tracks playing, and want to silence one or more of them, click on the Mute button in the Track control area to the left of the waveform.
- All other tracks but the muted track or tracks will still sound. This is very useful if you want to, for example, compare 2 takes, or thin down the mix temporarily.
-
6Set your pan and level. The Pan control will place your sound in the stereo field, from left to right, to any point in between. The level control sets the volume for that track.


Editing
-
1Trim your track. If you’ve recorded more than you need, to save editing time, trim your track to only what you intend to keep. Start by making a safety backup in case things go awry, and then proceed as follows:
- Choose the Selection Tool from the toolbar. Select the audio you want to keep. Choose Loop Playback (Shift-Space) and listen to your edit a few times to make sure it’s good. Adjust as necessary until it sounds right, then from the Edit menu, select Remove Audio, then select Trim, or simply press Command-T (Control-T on a PC). The audio on either side of the selection is removed from the track.
- After trimming, move your audio, if necessary, to the correct location by selecting the Time Shift tool, and dragging the sound to the proper location.
-
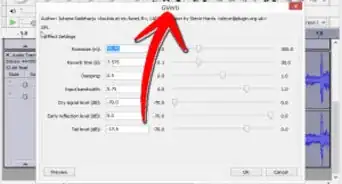
2Apply effects. You can apply a variety of effects, from those built into Audacity, to VST effects, and effects native to your OS.
- With the selection tool, select all or part of your track.
- From the Effect menu, choose your desired effect. For this example, we’ll use Echo, as applied to a simple click track.
- Set any parameters called for by the effect, listen to the preview, and when it’s how you like, press OK. The effect will process and display the result. The example below is the raw click track on top, and the echoed click track on the bottom.
- You can process the same track with many effects, though it’s possible to amplify the waveform too much, resulting in ugly digital distortion. If that happens, undo to the last step before distortion kicked in, and instead of applying your next filter, apply an Amplifier effect, set to -3dB. If your next process still results in distortion, undo the distorting effect and the Amplify effect, then redo the Amplify effect at a stronger level. -6dB would be good.
- Note: It’s always a good idea to duplicate a track (Command or Control-D) before doing any editing that changes the waveform.
-
3Experiment freely. Try all the filters, and see what they do and how the sound with your source material.
-
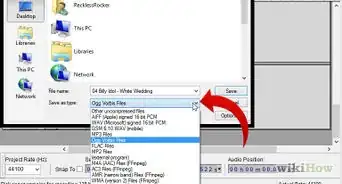
4Save your finished sound file. When you’re done editing, mixing, trimming, and polishing your sound file into a rare gem of musical beauty, you will want to save it for posterity and possible fame and fortune. From the File menu, select Export..., then choose the desired format—from AIFF to WMA and many others in between.


Community Q&A
-
QuestionAfter recording sequential tracks (vinyl records), can I play back only selected tracks?
 Community AnswerYou need to make each track into its own file when importing them through Audacity. You can record the whole album into one file to start with. Then, you'll take the .WAV file for the entire album, which you just created, and make a copy of it under a different name. Then, edit this file down to one track - hit "save as" or export under the name of that track.
 -
QuestionI would like to use Audacity to record myself playing multiple instruments on one track. How do I accomplish this?
 Community AnswerYou can record each instrument on its own track, then merge them all down to one after all the trimming and editing and all that jazz.
 -
QuestionWhen recording a new voice section or word correction and inserting it into an existing solo voice track, what is the best method of matching the volume of the inserted piece to the rest of the track?
 Community AnswerUse the Gain tools on the left side of the track, and drag it up or down, like a volume switch, until it matches your liking.
Things You'll Need
- Audacity
- Microphone or sound generator (synth, for example)
- Speakers or headphones
- Computer


.webp)

About This Article
1. Connect your gear to your sound card to use Audacity for recording.
2. Open audio files for editing.
3. Use the editing tools in Effects to edit the track.
4. Import multiple tracks to play at once.
5. Export files in high-quality formats.